Integrating Axinom DRM Key Service with AWS MediaLive/MediaPackage
It is possible to integrate Axinom Key Service Secure Packager and Encoder Key Exchange (SPEKE) with Amazon Web Services MediaLive and MediaPackage. The following article provides you step-by-step guidelines for doing so.
This guide outlines the main integration points with Axinom DRM and is intended to support your implementation efforts. For production use, we strongly recommend consulting the official AWS documentation to ensure best practices and a secure, scalable setup are followed.
Start
Log in to the AWS Management Console at: https://console.aws.amazon.com
API Gateway Setup
This is the main point of integration with Axinom Key Service. The API Gateway is configured to provide an endpoint that proxies key requests between various AWS media services (such as MediaPackage and MediaConvert) and Axinom Key Service. Information is exchanged according to the SPEKE specification.
For information on SPEKE, see the AWS documentation: https://docs.aws.amazon.com/speke/latest/documentation/what-is-speke.html
-
Open the AWS API Gateway console: https://console.aws.amazon.com/apigateway
-
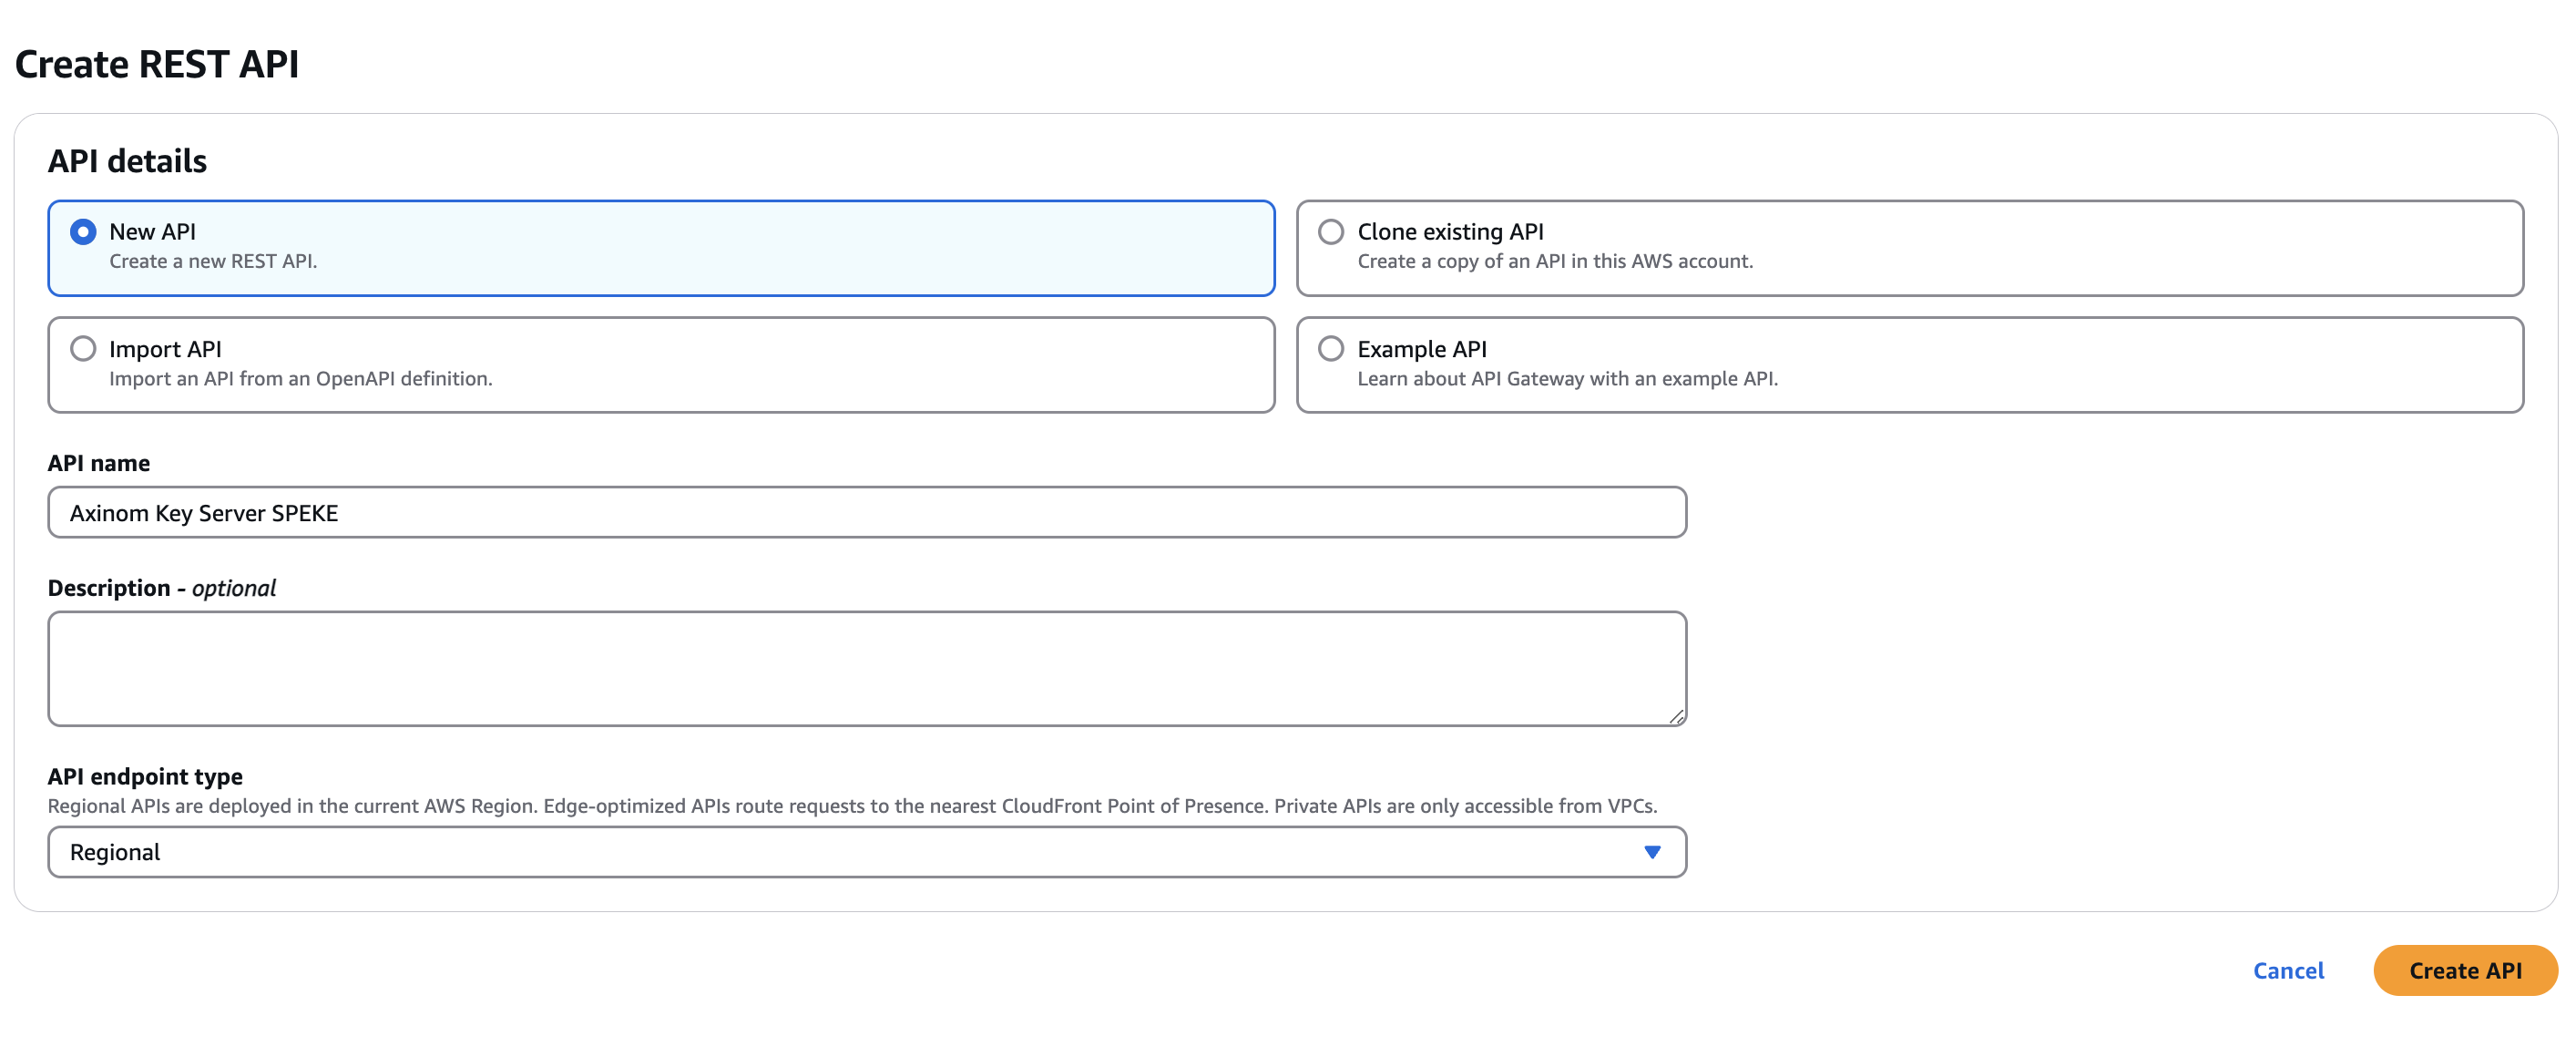
Create a new API:
-
Choose the API type, select the Rest API
-
Set general API settings:
-
API creation method: New API.
-
API name: "Axinom Key Server SPEKE".
-
Endpoint type: Regional.
-
-
Choose Create API.
-
-
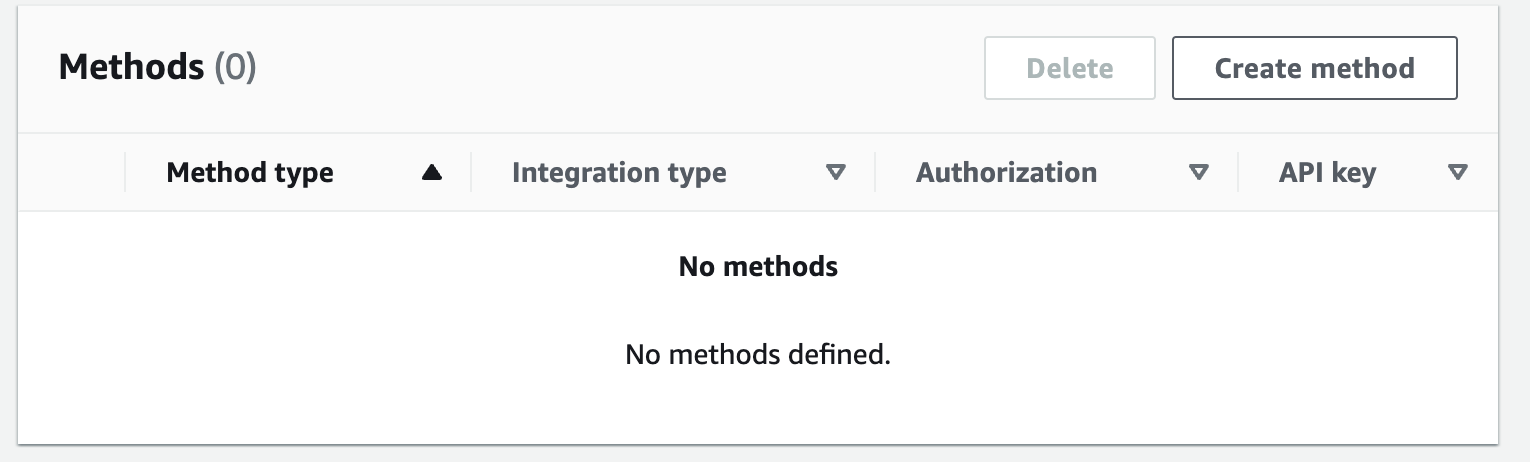
Add a POST method to the API:
-
Select Resources -> Methods -> Create Method.
-
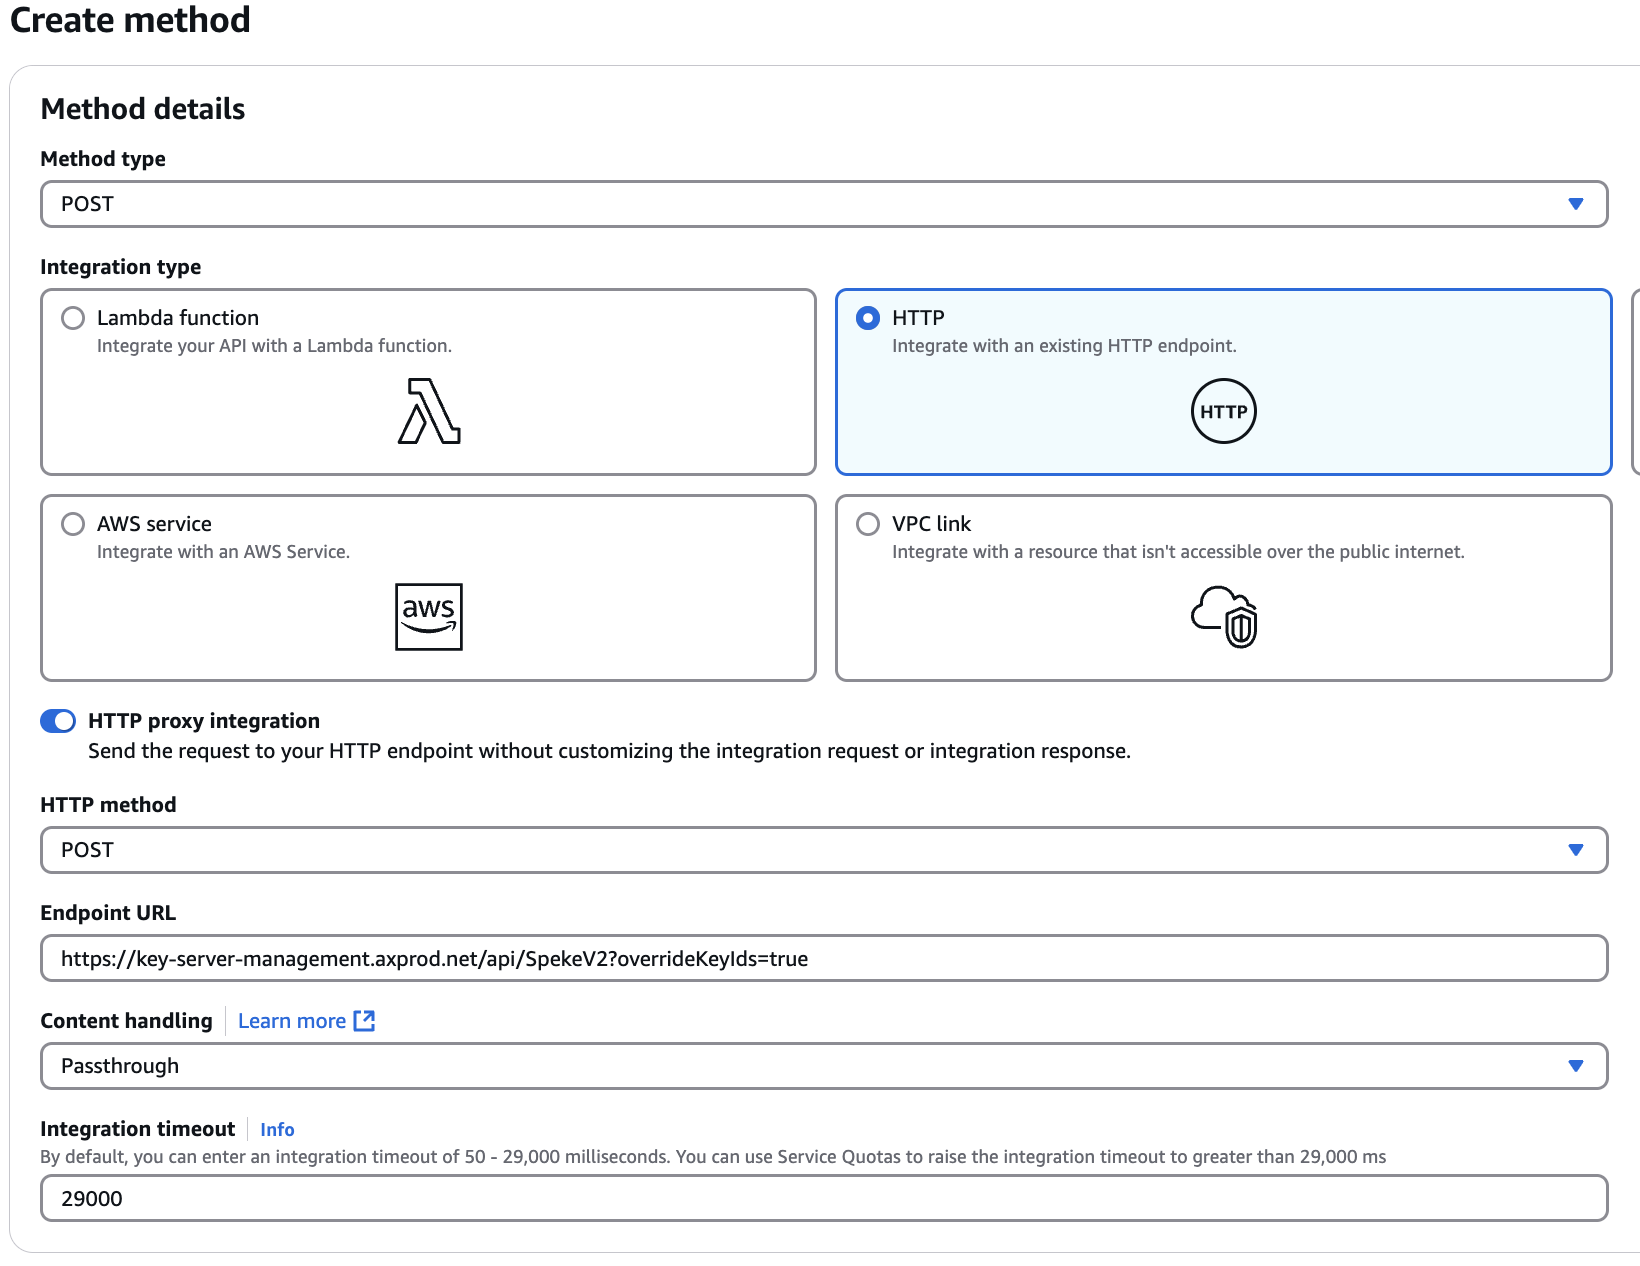
Configure the POST method:
-
Method type : POST
-
Integration type: HTTP.
-
Use HTTP Proxy integration: yes.
- If you you planning to use Media Package V2, you have to set HTTP Proxy integration: No.
-
HTTP method: POST.
-
Endpoint URL: https://key-server-management.axprod.net/api/SpekeV2?overrideKeyIds=true (this is the Axinom Key Service SPEKE V2 endpoint, with "key override" enabled). Should there be a need to use the older SPEKEv1 protocol, make sure the set the SPEKEv1 URL here. Refer to SPEKE V1 for further details.
-
Content Handling: Passthrough.
-
Keep Integration timeout to 29000.
-
Choose Create Method.
-
-
-
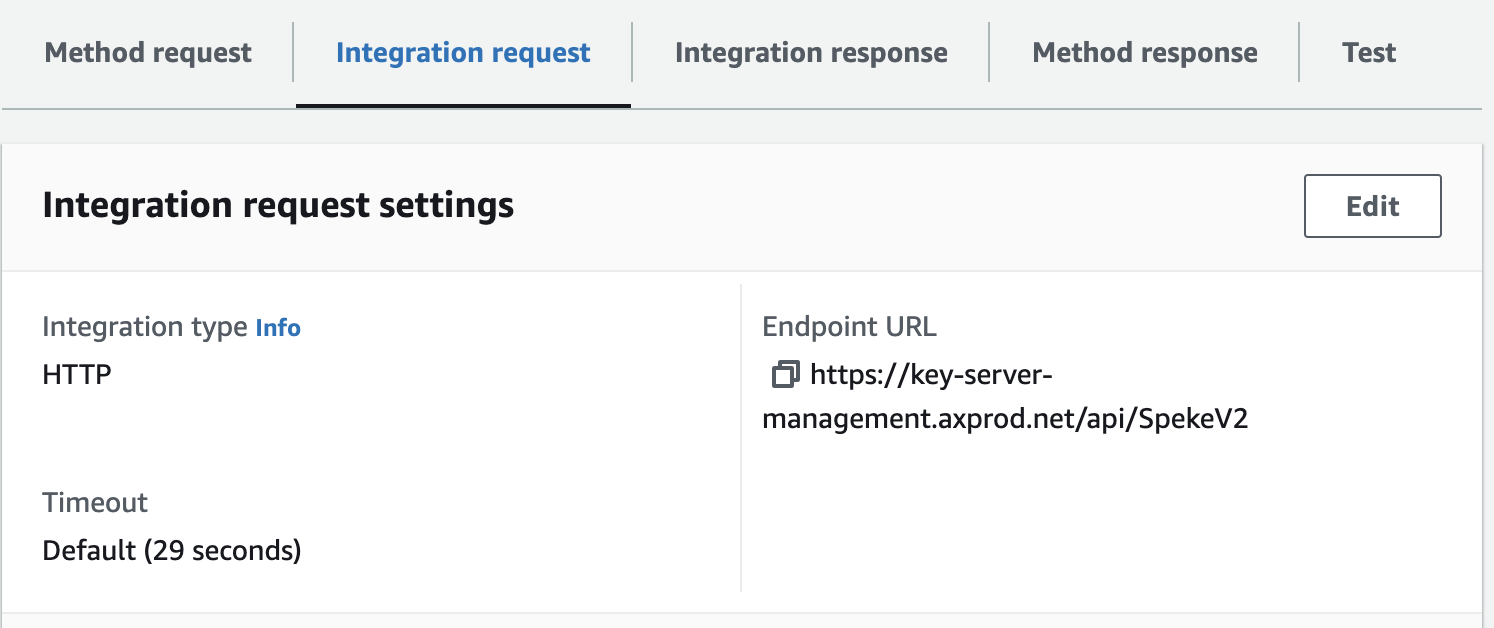
Add an authorization header to the POST method:
-
Choose Integration Request under the POST - Method Execution pane.
-
Click Edit
-
Expand URL request headers parameters and choose Add request header parameters.
-
Specify the Basic HTTP authentication header using your Axinom Key Service Management API credentials:
-
Name: "Authorization".
-
Mapped from: 'Basic <credentials>', where <credentials> is the base64 encoding of your Tenant ID and key service Management Key value as GUID strings joined by a colon( :). The single quotes must be included in the header.
If the Tenant ID is
2028718f-1edd-482a-b6b5-8067e93cfbfaand the Management Key ise0b81b34-dd82-4897-89f2-bdf32d7023f7then the resulting "Mapped from" value should be ’Basic MjAyODcxOGYtMWVkZC00ODJhLWI2YjUtODA2N2U5M2NmYmZhOmUwYjgxYjM0LWRkODItNDg5Ny04OWYyLWJkZjMyZDcwMjNmNw=='`.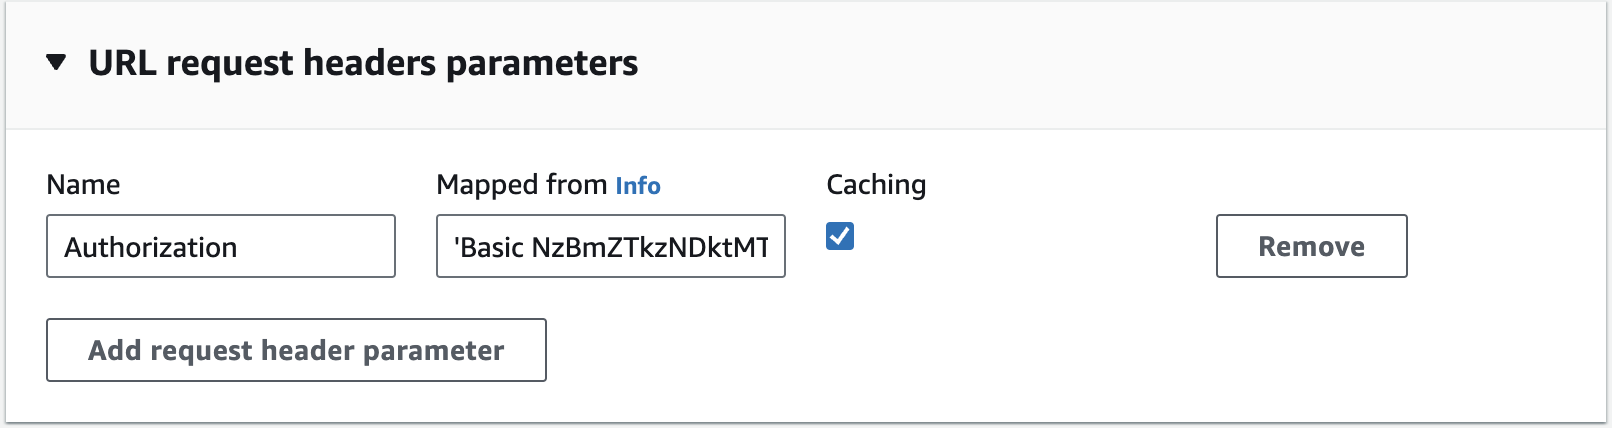
-
-
Add
X-Speke-Version: 2.0header if you are using Media Package V2. -
Save the changes.
-
-
Test the API configuration:
-
When using Media Package V1, you have to add
X-Speke-Version: 2.0header, only for the testing purposes. Remember to remove it after this test. -
Choose TEST in the pane.

-
Paste a valid SPEKE request inside the Request Body box. You can find a valid SPEKE V2 request from here
-
Choose Test.
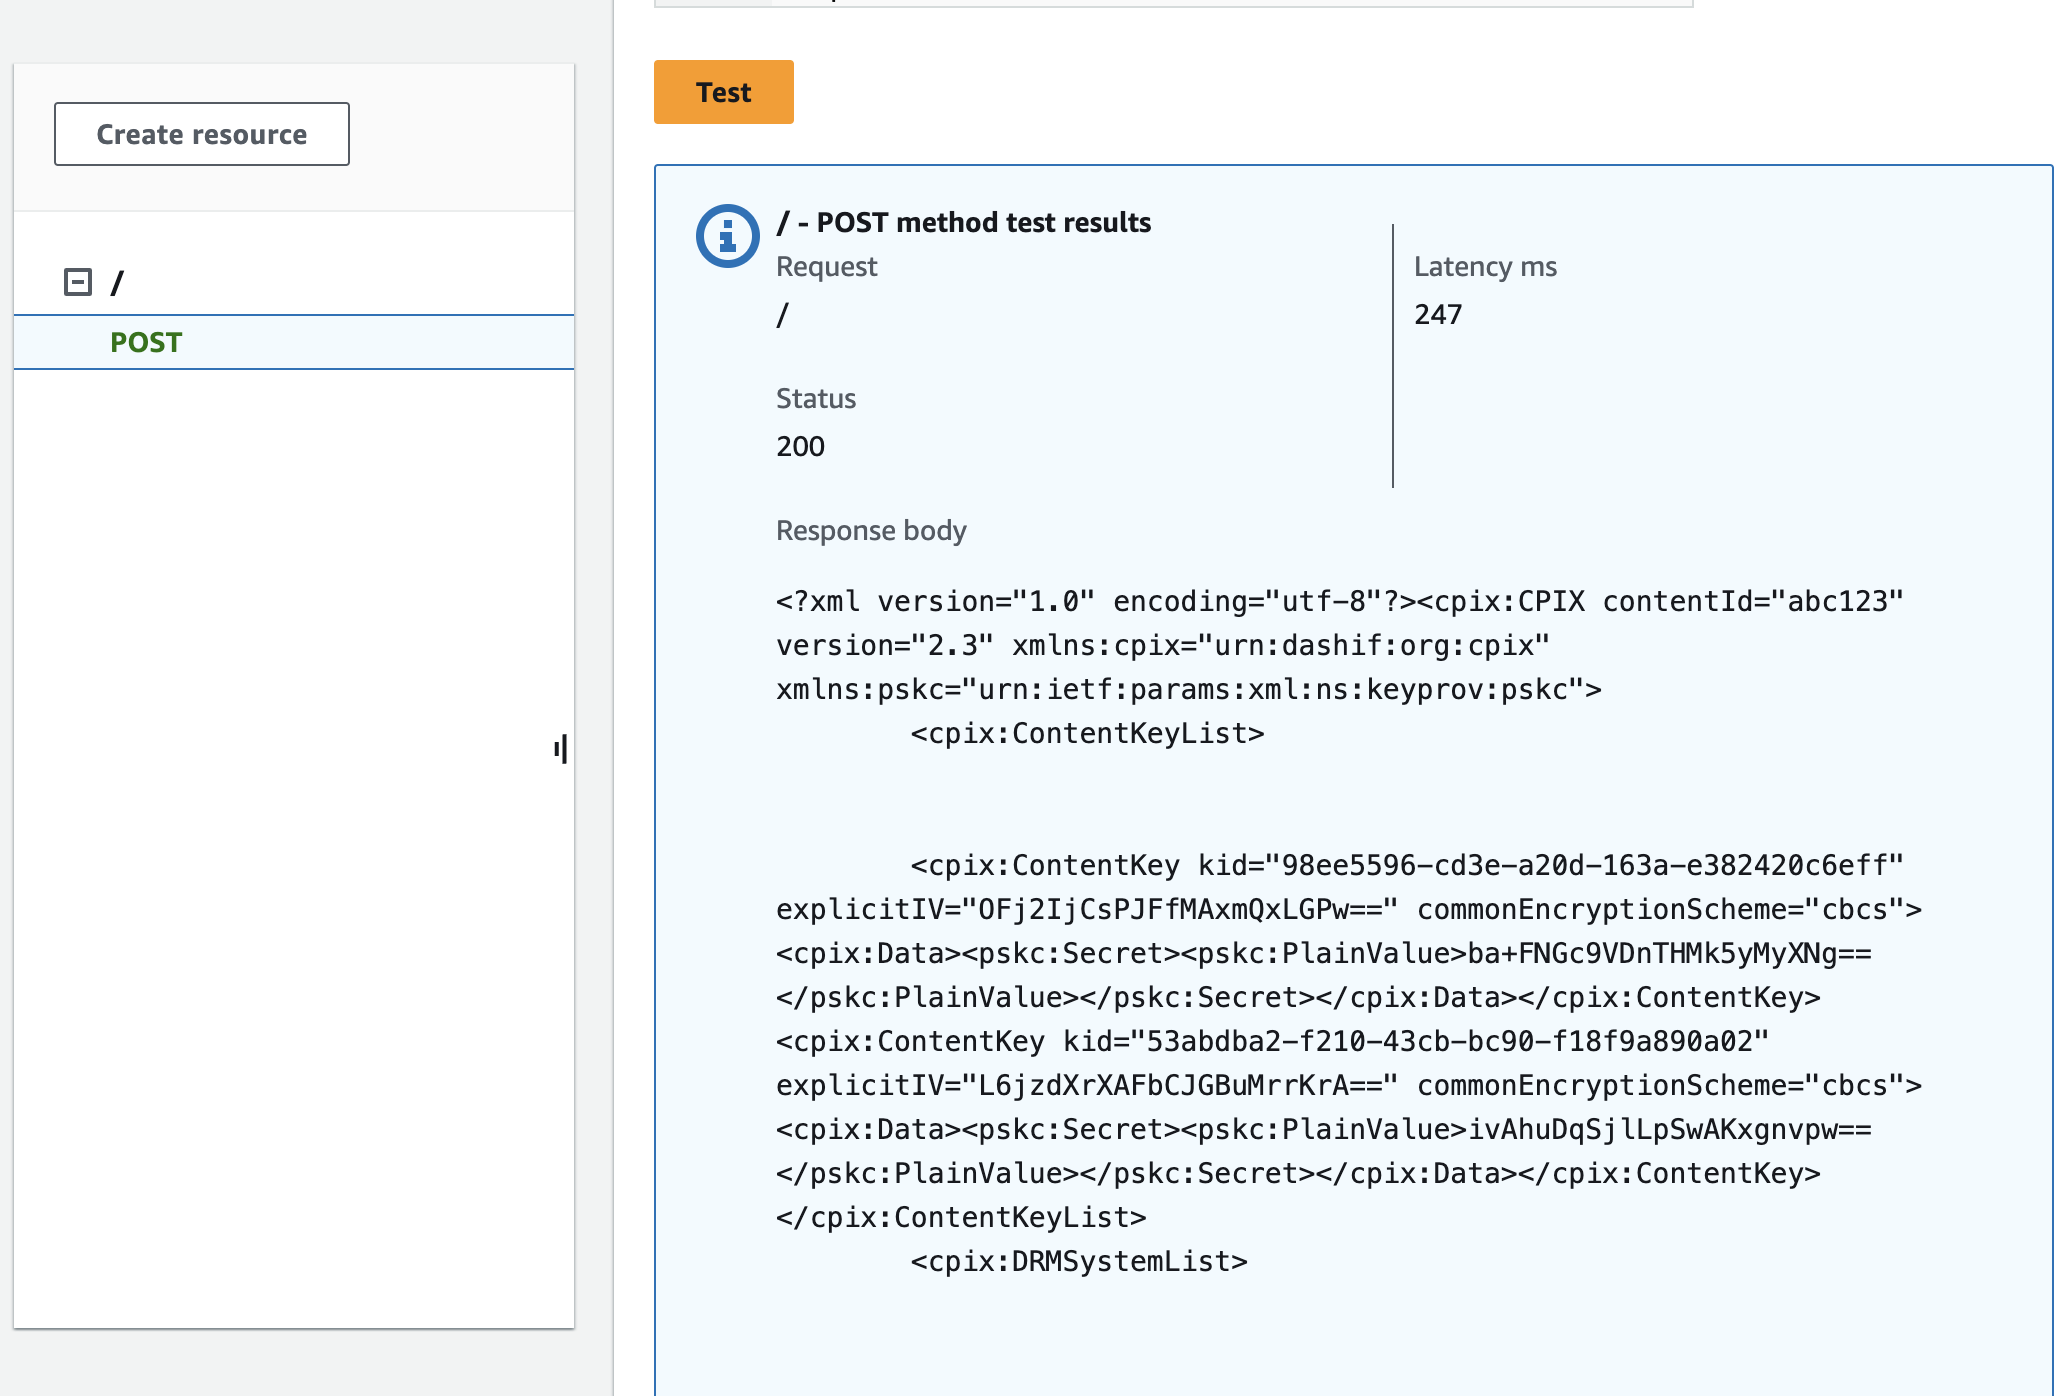
- If the configuration is correct and a valid SPEKE request was provided, Axinom Key Service returns 200 OK with the SPEKE response in the response body.
- If there’s an issue with authentication then Axinom Key Service returns 401 Unauthorized. In that case, re-check the authorization header.
-
-
Deploy the API:
-
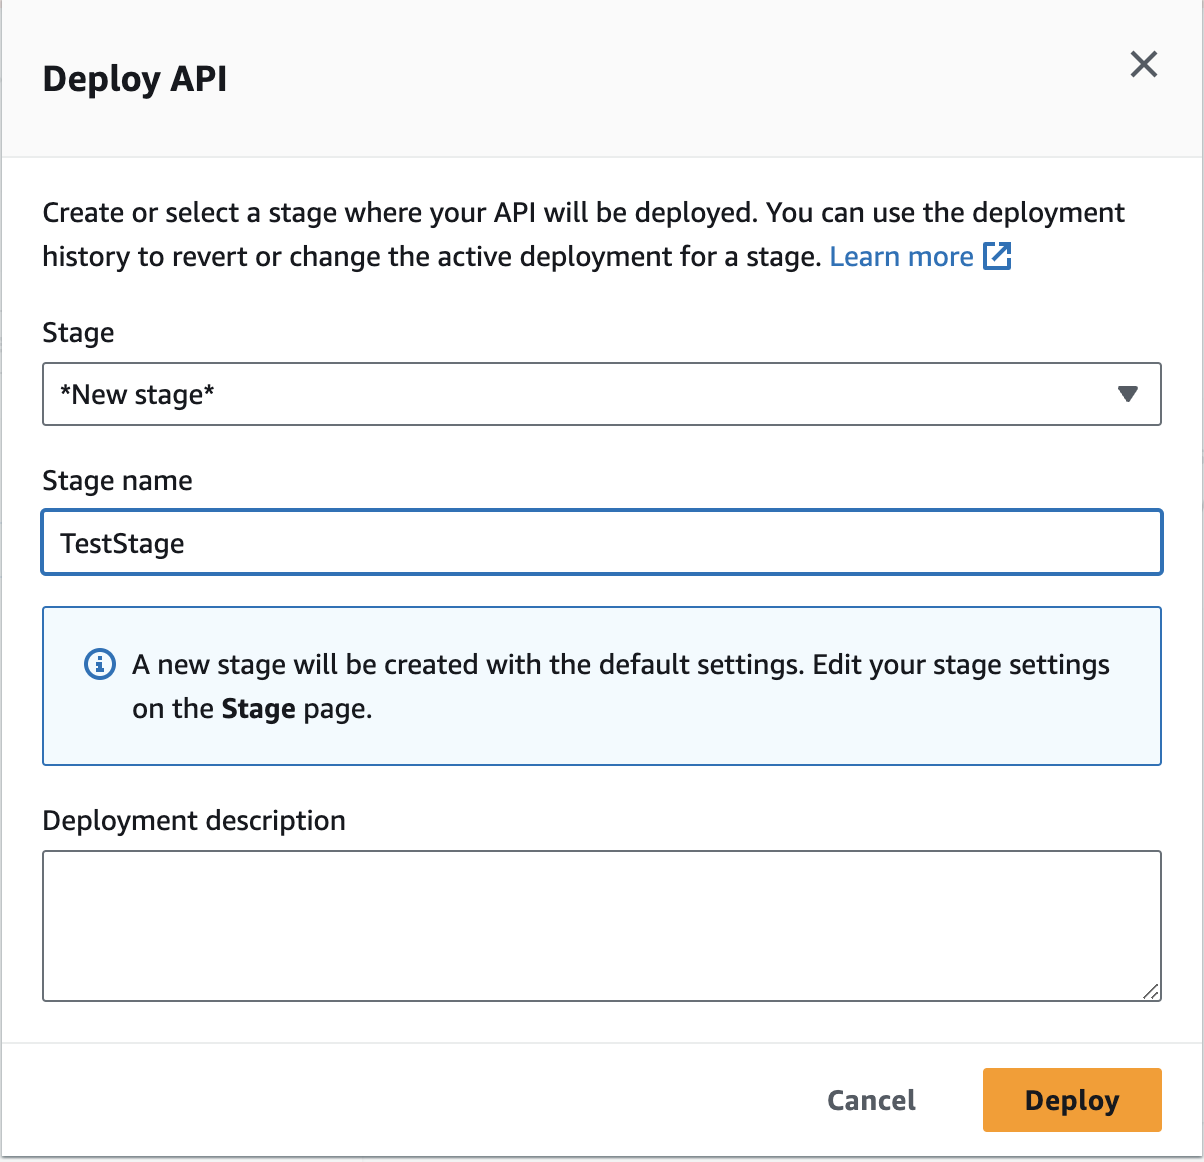
Select Resources -> Actions -> Deploy API.

-
Deployment stage: [New Stage].
-
Stage name: "TestStage".
-
Choose Deploy.
- If the configuration is later changed, the API should be redeployed for the update to be visible to other services.
-
Note down the API Invoke URL. This is provided to AWS media services as the key service URL.

-
IAM (Identity and Access Management) Setup
Before configuring MediaPackage, it is necessary to create an IAM role that allows MediaPackage to call the API Gateway.
-
Open the AWS IAM console: https://console.aws.amazon.com/iam
-
Create a new role:
-
Choose Roles from the left menu.
-
Choose Create role.

-
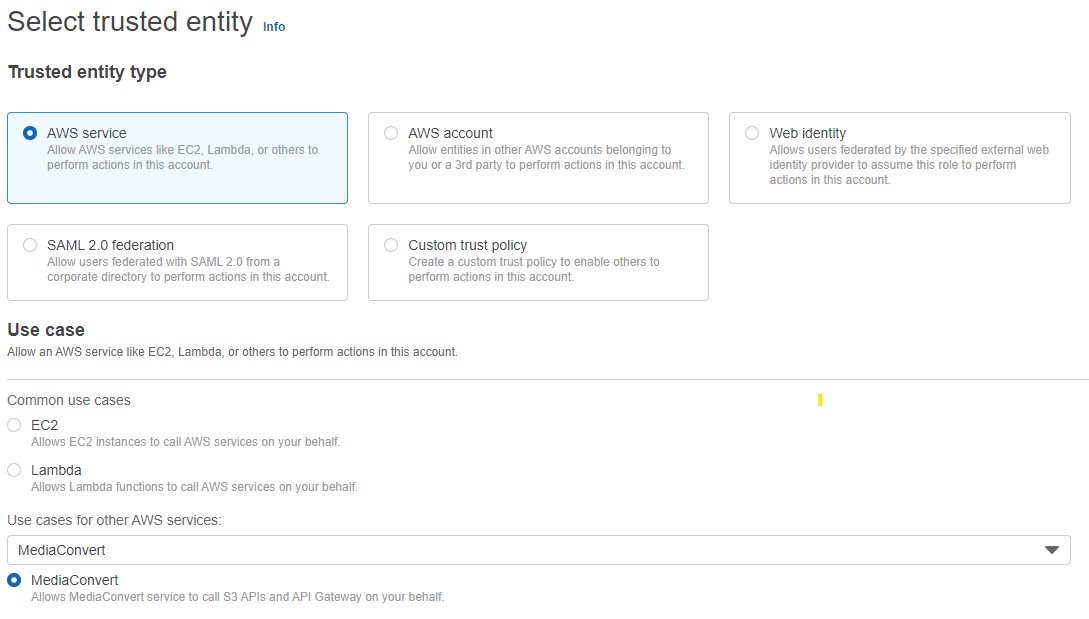
Select AWS service entity type -> MediaConvert service -> MediaConvert use case (we use a modified MediaConvert role since MediaPackage doesn’t have a suitable default role).
-
Choose Next: Permissions.
-
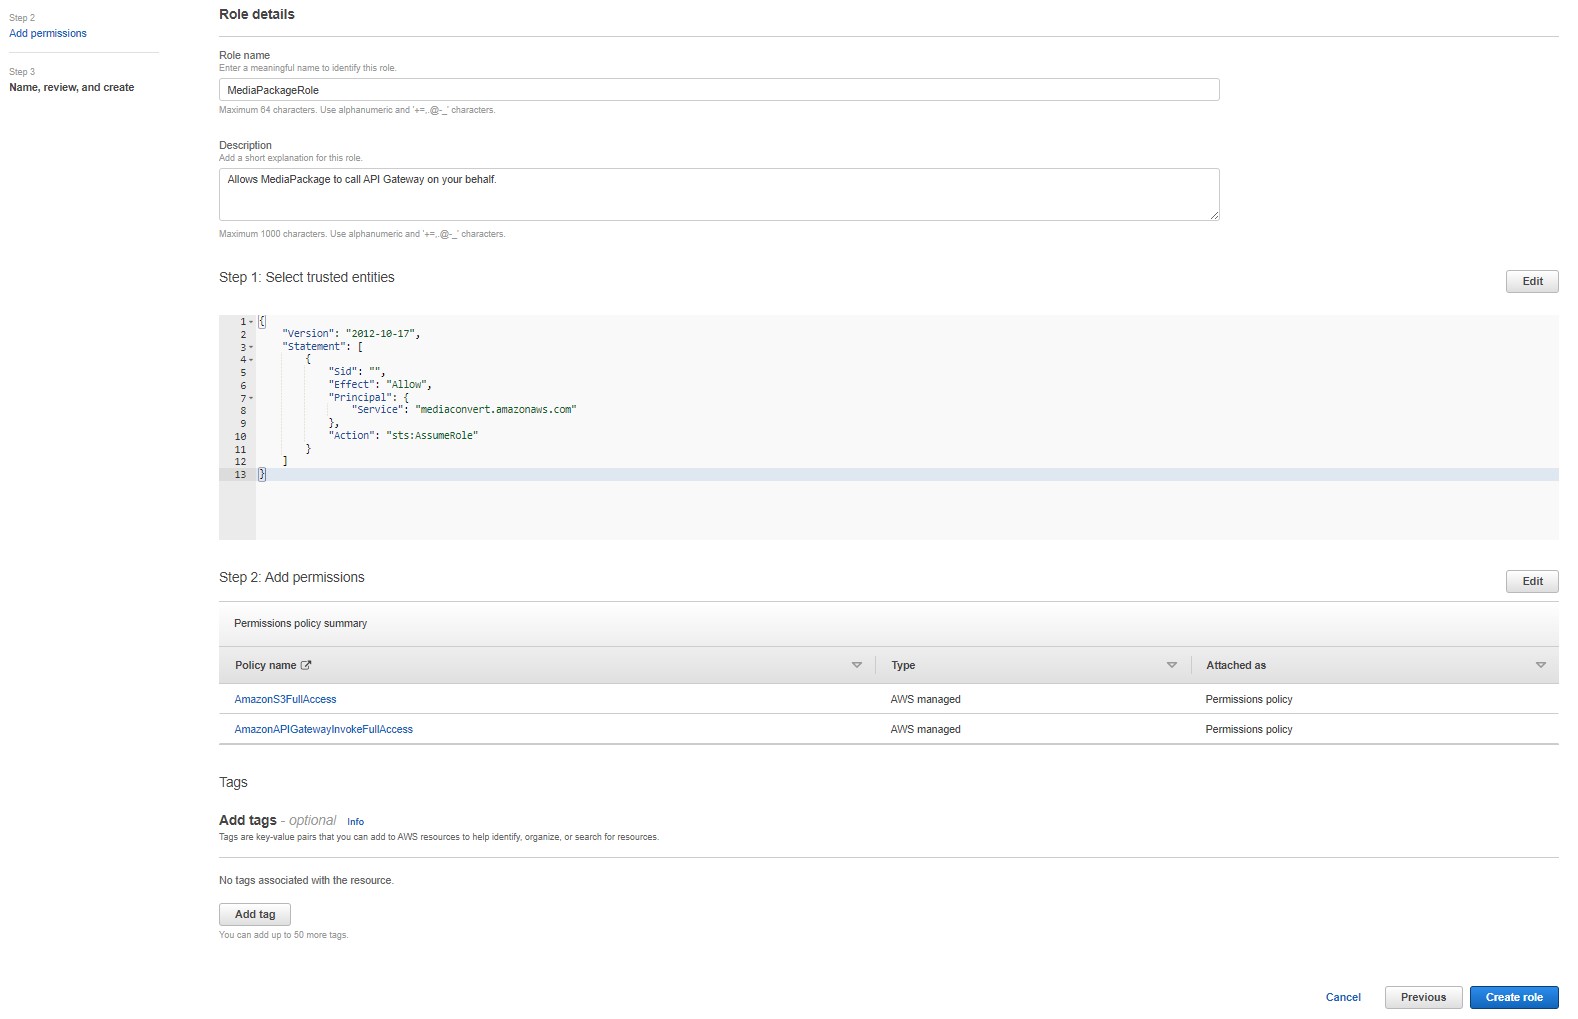
Provide role information:
-
Role name: "MediaPackageRole".
-
Role description: "Allows MediaPackage to call API Gateway on your behalf."
-
Choose Create role.
-
-
-
Configure the role:
-
Select the new MediaPackageRole from the list of existing roles.
-
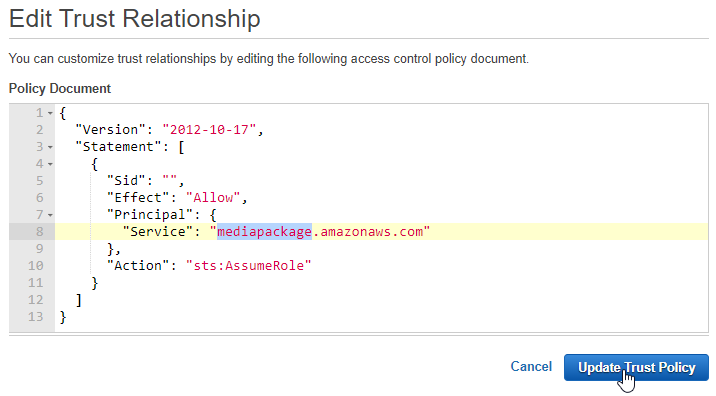
Choose the Trust relationships tab.
-
Choose Edit trust relationships.
-
Replace "mediaconvert.amazonaws.com" in the JSON with "mediapackage.amazonaws.com".
-
If you are using Media Package V2, add "mediapackagev2.amazonaws.com".
-
Choose Update Trust Policy.
-
-
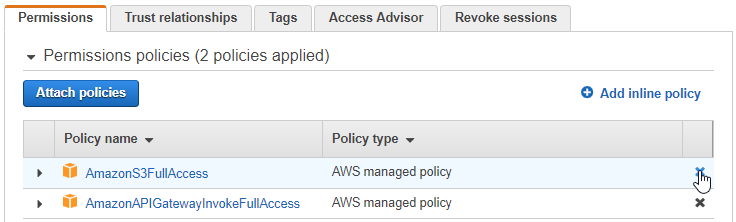
Choose the Permissions tab.
-
Detach the AmazonS3FullAccess policy. For this demo, MediaPackage doesn’t need S3 access.
-
-
-
Note down the MediaPackageRole Role ARN. It is used in the following steps.

MediaPackage Setup
MediaPackage takes a live stream sent by the MediaLive service (configured in the next section) and then packages it as DASH and CMAF content while obtaining keys from Axinom Key Service via the previously configured API Gateway proxy service.
Encrypted DASH content is created for playback with Widevine and PlayReady DRM; encrypted CMAF (HLS + fMP4) for playback with FairPlay. Clear versions of both types of content are also created.
-
Open the AWS MediaPackage console: https://console.aws.amazon.com/mediapackage
-
Create a new channel:
-
Choose Next step in the Create a new channel pane.
-
Configure the channel:
-
When using MediaPackage V1,
- ID: "MediaPackage-Channel01"
- Choose Create. A channel with two inputs is created.
 note
noteNote down the URL, username and password of both inputs. They are used later when configuring MediaLive.
-
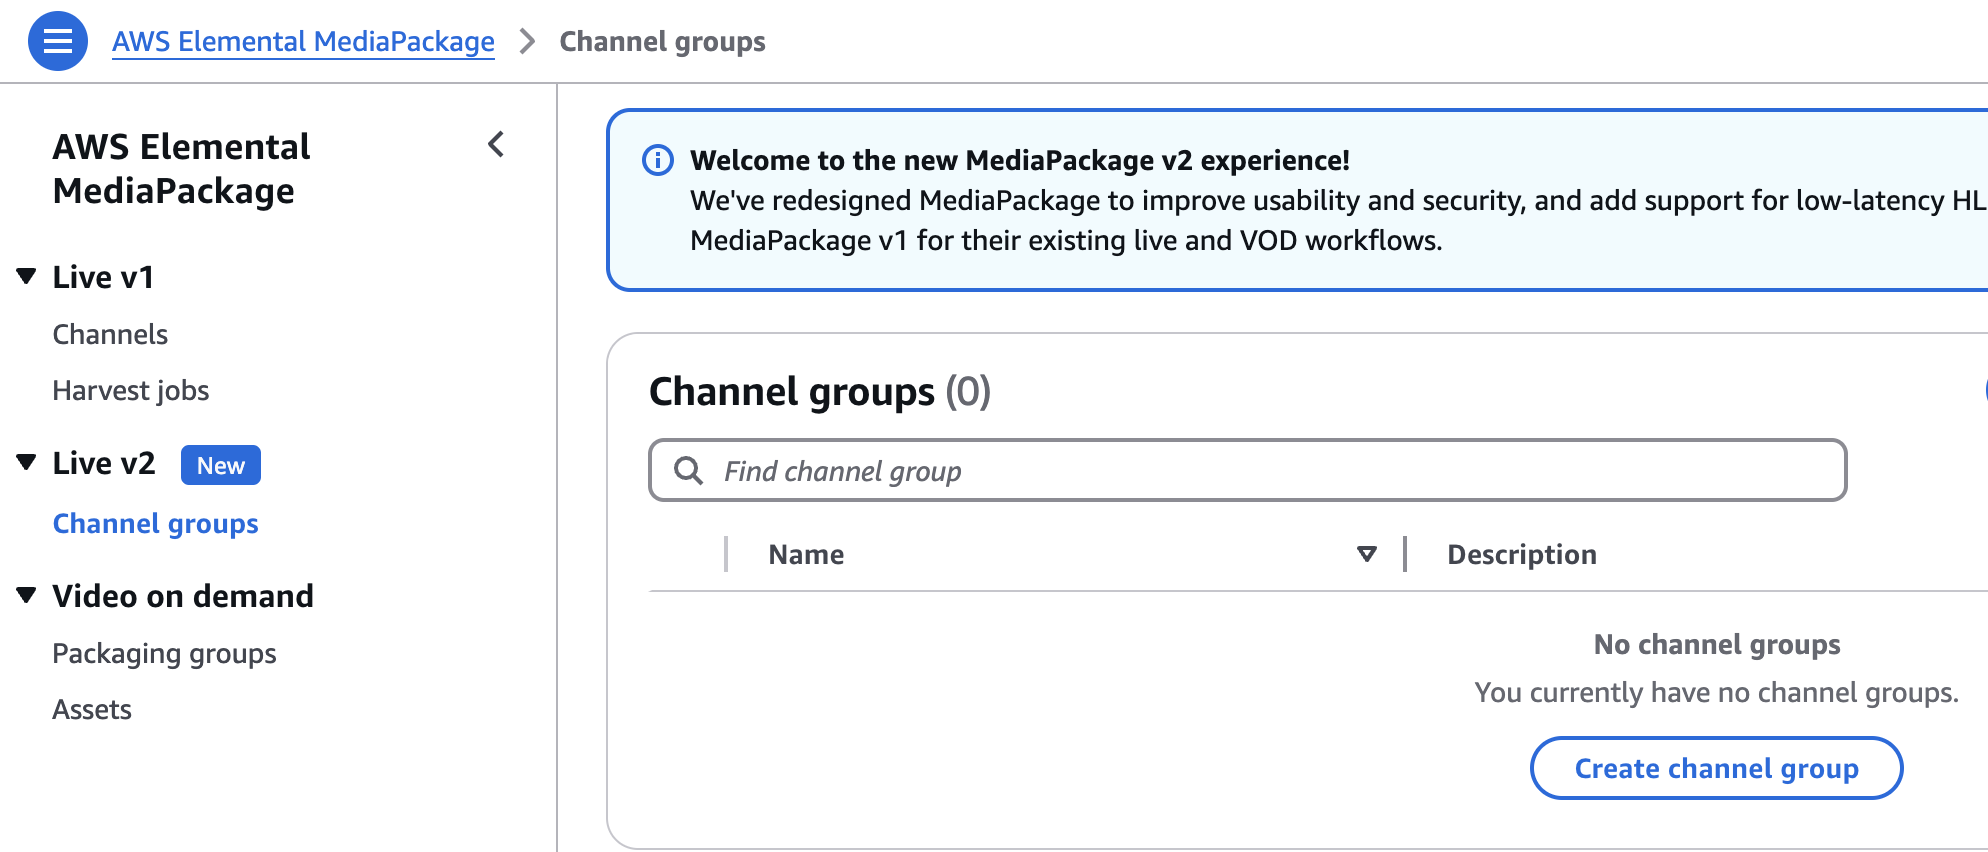
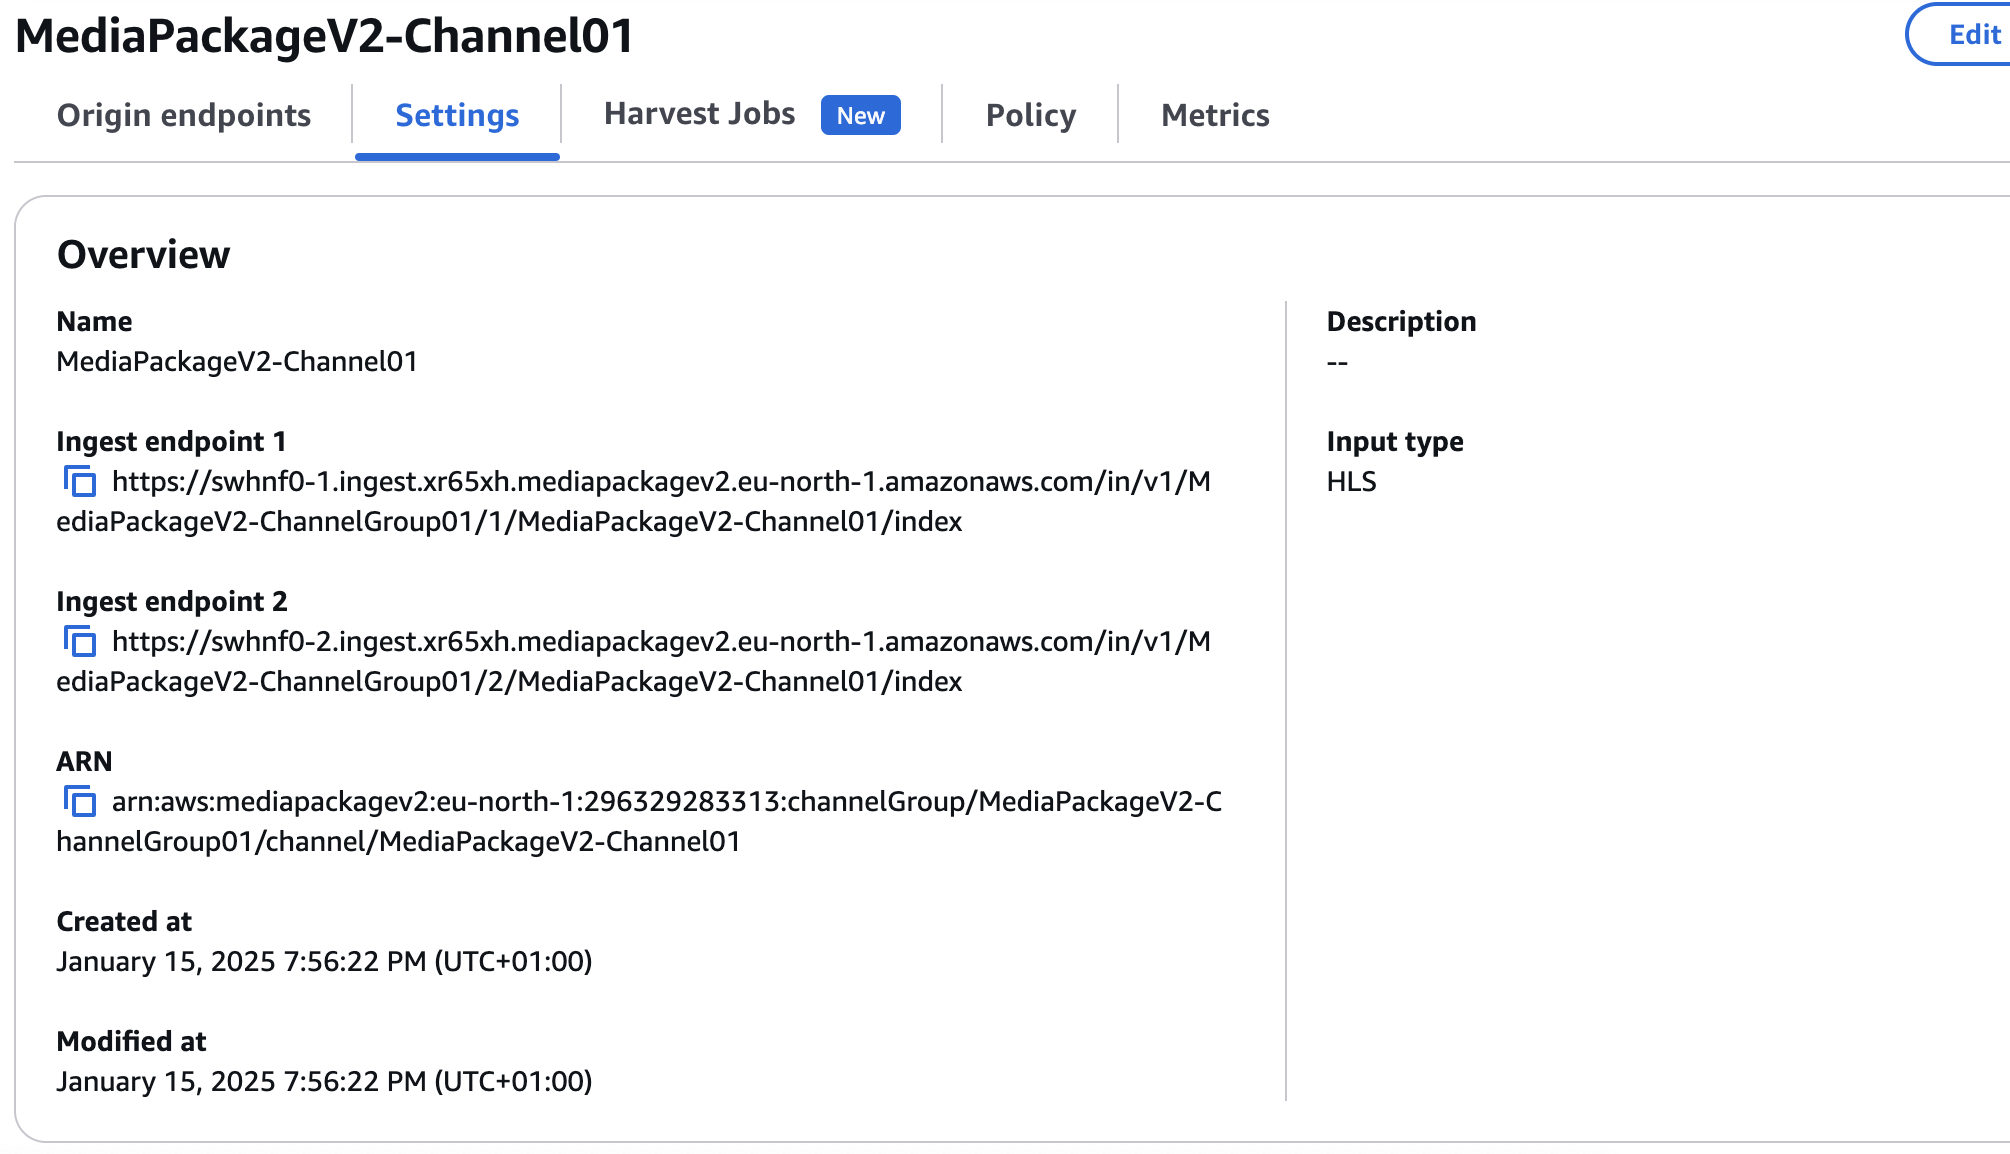
When using MediaPackage V2,
- Go to MediaPackage channel List -> Live v2, select Channel groups
-
Create a Channel Group
- Channel group name: "MediaPackageV2-ChannelGroup01"
- Click Create.
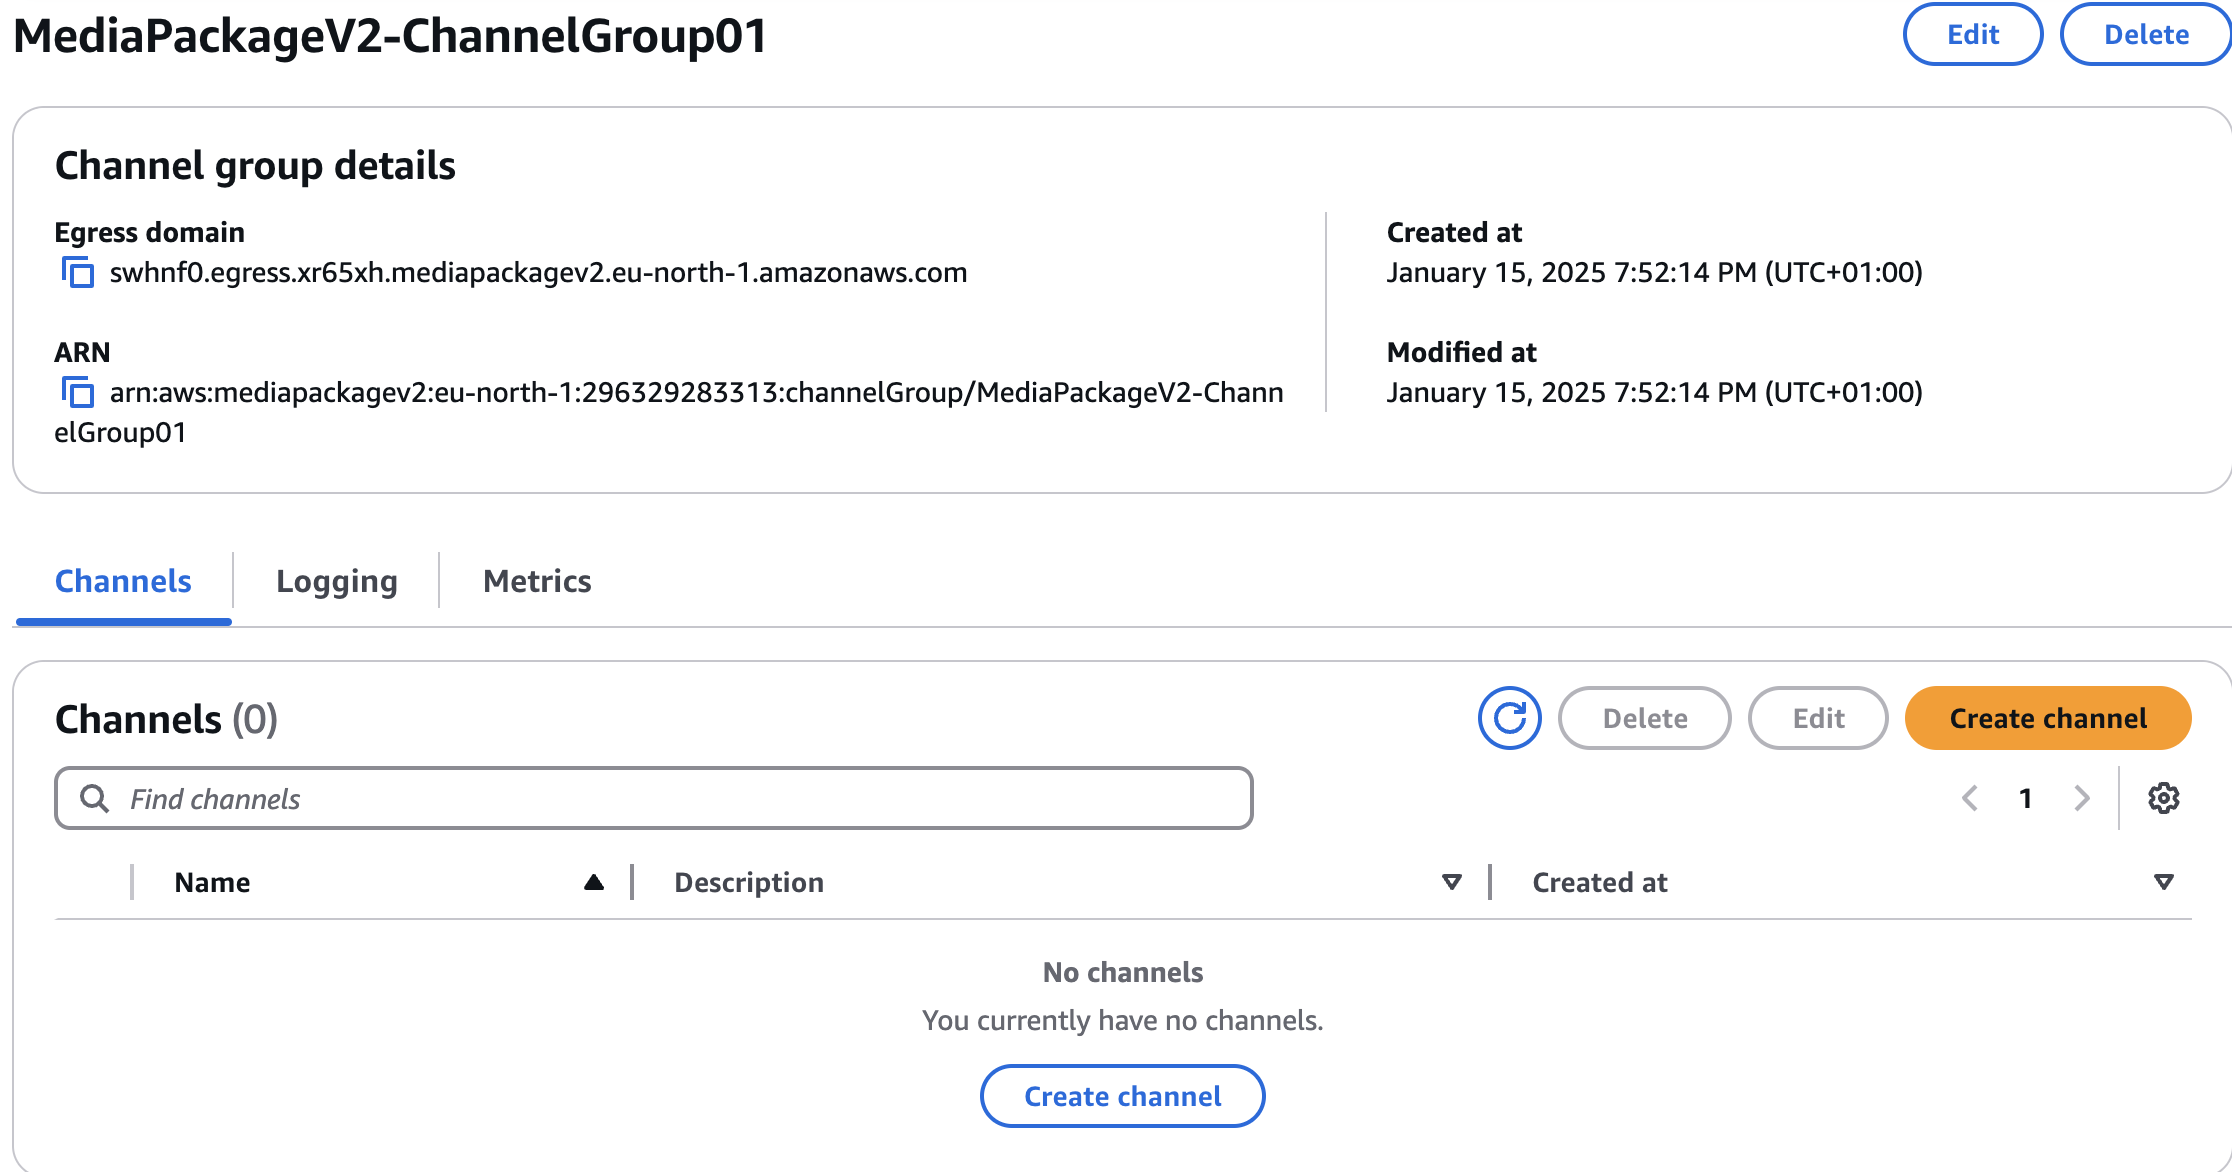
-
Now under the above created channel group, you can create a channel.
- Click on Create Channel
- Channel Name: "MediaPackageV2-Channel01"
- Input Type : HLS
- Click on Create
-
-
-
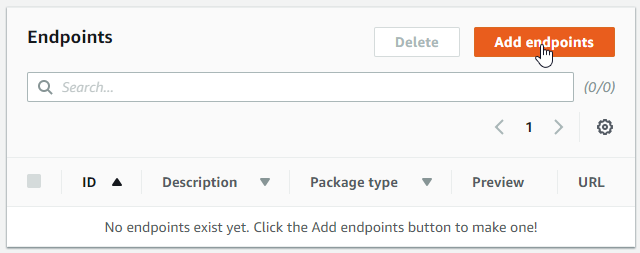
Add an endpoint for clear DASH content:
-
Choose Add endpoints.
-
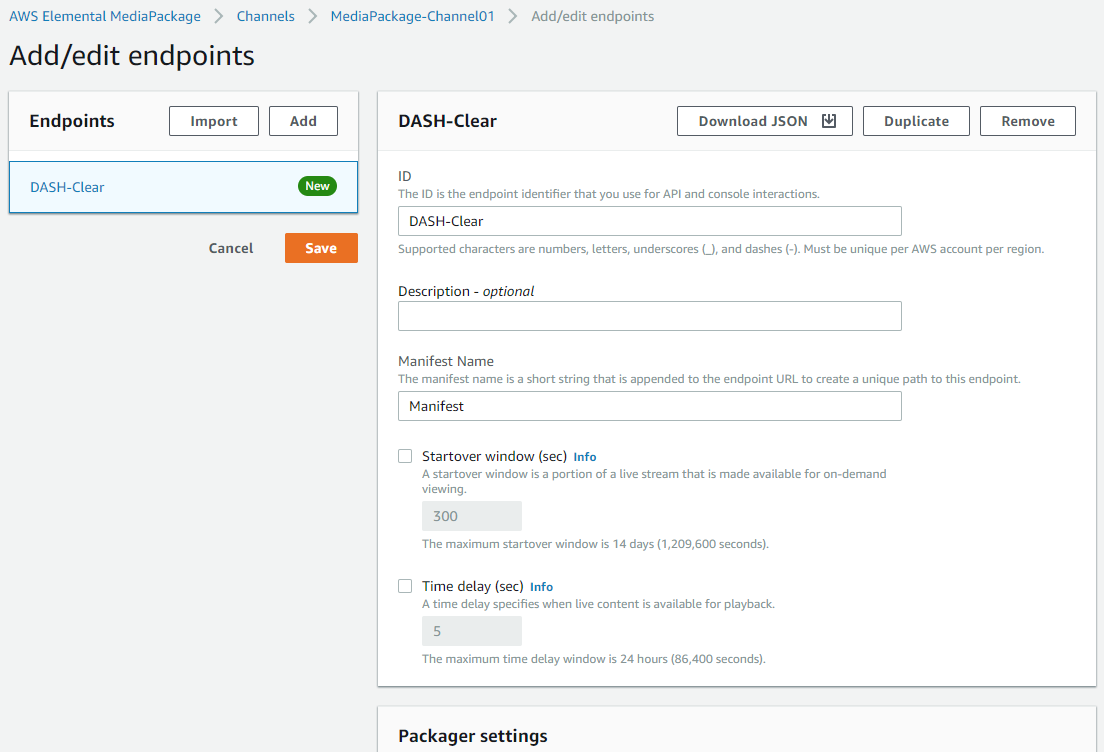
Configure the endpoint:
-
ID: "DASH-Clear".
-
Manifest Name: "Manifest".
-
Packager settings -> Type: select DASH-ISO.
-
Package encryption -> select No encryption.
-
-
Choose Save.
-
-
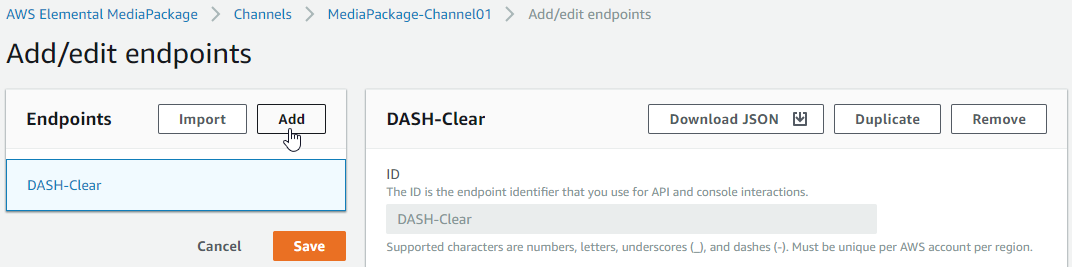
Add an endpoint for the encrypted DASH content:
-
Choose Add/edit endpoints.
-
Choose Add.
-
Configure the endpoint:
-
ID: "DASH-Encrypted".
-
Manifest Name: "Manifest".
-
Packager settings -> Type: select DASH-ISO.
-
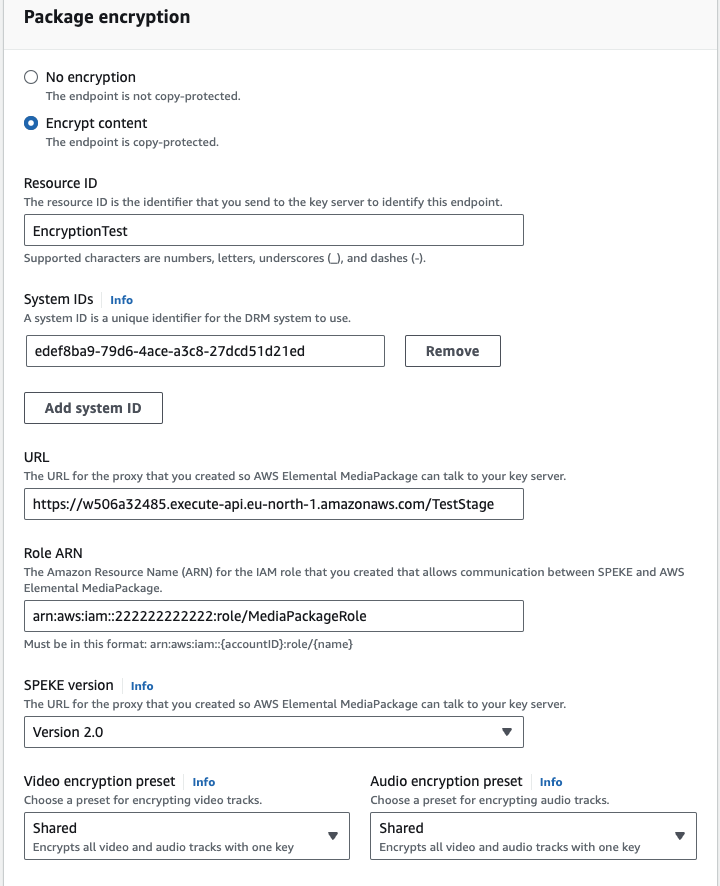
Package encryption -> select Encrypt content and provide the following:
-
Resource ID: "EncryptionTest" (an arbitrary value that MediaPackage uses for generating content key IDs).
-
System ID is a DRM system-specific identifier, see DRM systems.
-
URL: <API Gateway Invoke URL for Axinom Key Service> (the value from the API Gateway setup).
-
Role ARN: <IAM MediaPackage role ARN> (the value from the IAM setup).
-
-
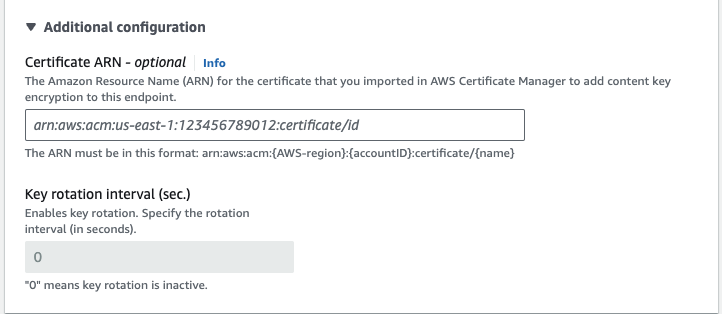
Disable key rotation to simplify license token generation for testing purposes:
-
Expand Additional configuration and unselect Key rotation interval (sec).
-
-
-
Choose Save.
-
-
Add an endpoint for clear CMAF content:
- Choose Add/edit endpoints.
- Choose Add.
- Configure the endpoint:
- ID: "CMAF-Clear".
- Manifest Name: "Manifest".
- Packager settings -> Type: select Common Media Application Format (CMAF).
- HLS manifest -> ID: "CMAF-Clear".
- Package encryption -> select No encryption.
- Choose Save.
-
Add an endpoint for the encrypted CMAF content:
-
Choose Add/edit endpoints.
-
Choose Add.
-
Configure the endpoint:
-
ID: "CMAF-Encrypted".
-
Manifest Name: "Manifest".
-
Packager settings -> Type: select Common Media Application Format (CMAF).
-
HLS manifest -> ID: "CMAF-Encrypted".
-
Package encryption -> select Encrypt content and provide the following:
-
Resource ID: "EncryptionTest" (an arbitrary value that MediaPackage uses for generating content key IDs).
-
System IDs: "94CE86FB-07FF-4F43-ADB8-93D2FA968CA2" (FairPlay System ID).
-
URL: <API Gateway Invoke URL for Axinom Key Service> (the value from the API Gateway setup).
-
Role ARN: <IAM MediaPackage role ARN> (the value from the IAM setup).
-
-
Disable key rotation to simplify license token generation for testing purposes:
- Expand Additional configuration and unselect Key rotation interval (sec).
-
-
Choose Save.
-
-
Add an endpoint when using Media Package V2:
- Select TS as the container type.
- Package encryption -> select Encrypt content and provide the following:
- Encryption method : "Sample AES"
- DRM systems : "Fairplay"
- Resource ID: "EncryptionTest" (an arbitrary value that MediaPackage uses for generating content key IDs).
- Key server URL: <API Gateway Invoke URL for Axinom Key Service> (the value from the API Gateway setup).
- Role ARN: <IAM MediaPackage role ARN> (the value from the IAM setup).
- Video encryption preset : Select Shared if you need a single key for Video and Audion tracks.
- Add a HLS manifest :
- Manifest name: "Manifest"
- Choose Save.
-
Note down the endpoints URLs. These are used when testing playback.

MediaLive Setup
Now the MediaLive service can be configured to ingest a live stream and send it to the MediaPackage service for packaging. In this demo, we take a clear live HLS stream from an external source and package it into two live DASH streams: one clear and one encrypted.
-
Open the AWS MediaLive console: https://console.aws.amazon.com/medialive
-
Create a new channel:
-
Choose Create channel in the Get started pane.
-
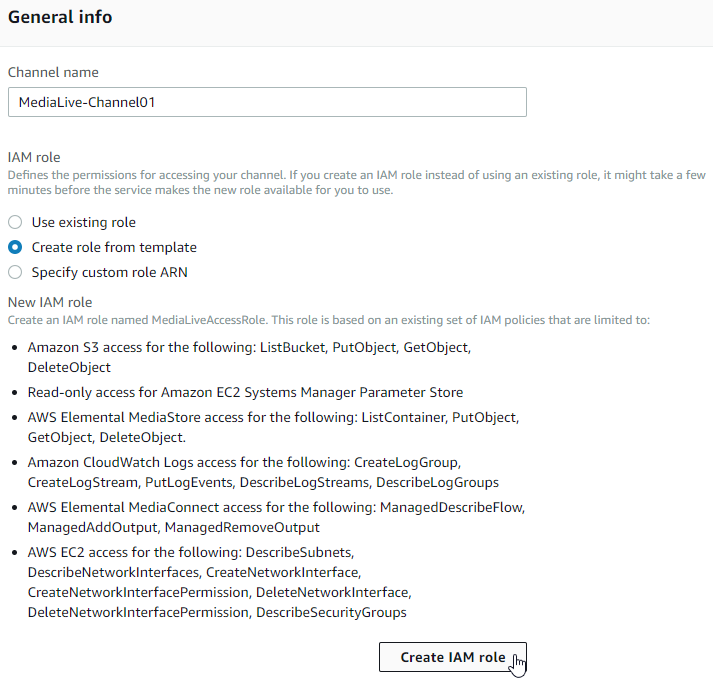
Channel name: "MediaLive-Channel01".
-
Create MediaLive IAM role for the channel:
-
Select Create role from template (alternatively, select a suitable existing role).
-
Choose Create IAM role.
-
-
Add channel inputs:
-
In the Input attachments section of the Channel pane, choose Add.

-
Choose Create input in the Attach input pane.

-
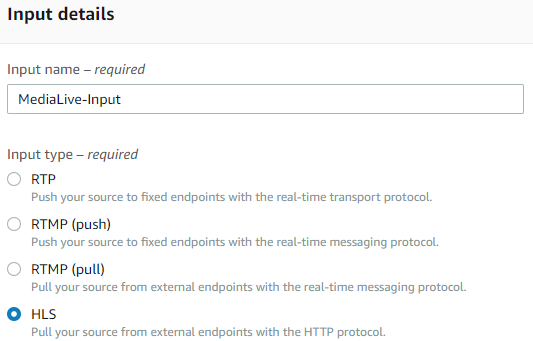
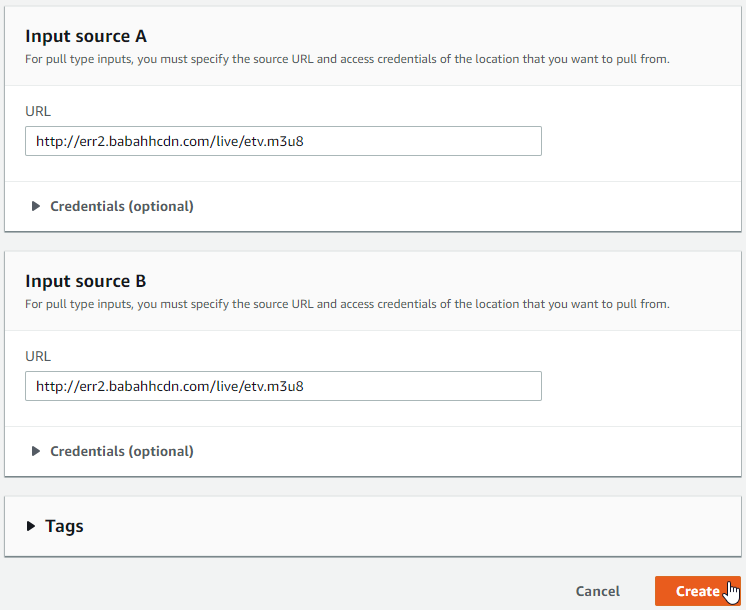
Configure the input:
-
Input name: "MediaLive-Input".
-
Input type: select HLS.
-
Input source A URL: "https://cph-p2p-msl.akamaized.net/hls/live/2000341/test/master.m3u8".
-
Input source B URL: "https://cph-p2p-msl.akamaized.net/hls/live/2000341/test/master.m3u8".
noteIt is recommended to provide your own input sources. The example sources may or may not be available.
noteAs tested during the creation of this guide, the HLS input type expects MPEG2-TS content and does not work with fMP4 HLS input.
-
-
Choose Create.
-
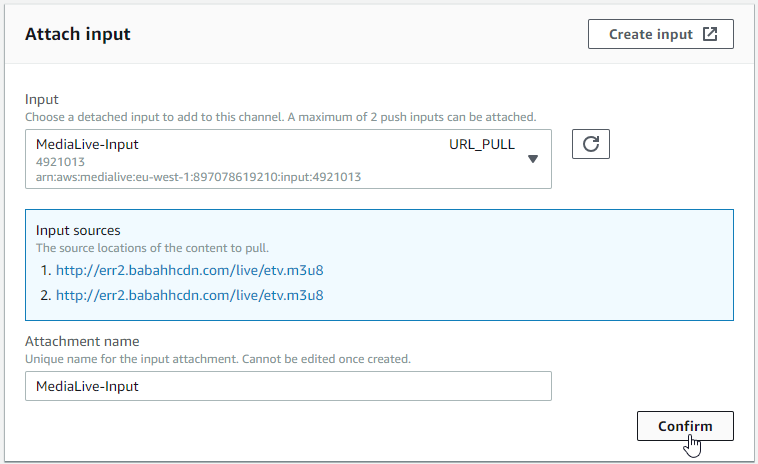
Select MediaLive-Input as the Input in the Attach input pane.
-
Choose Confirm.
-
-
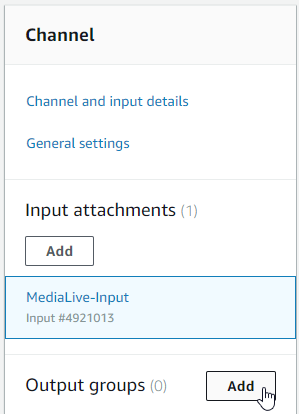
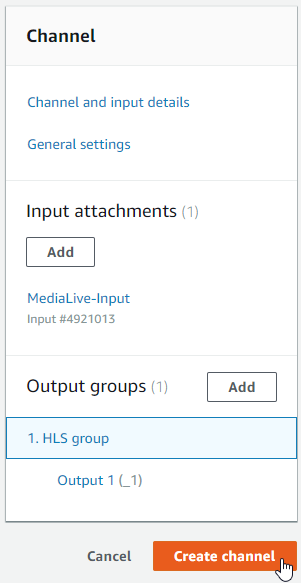
Add channel outputs:
-
In the Output groups section of the Channel pane, choose Add.
-
Output group type: choose HLS.
-
Choose Confirm.
-
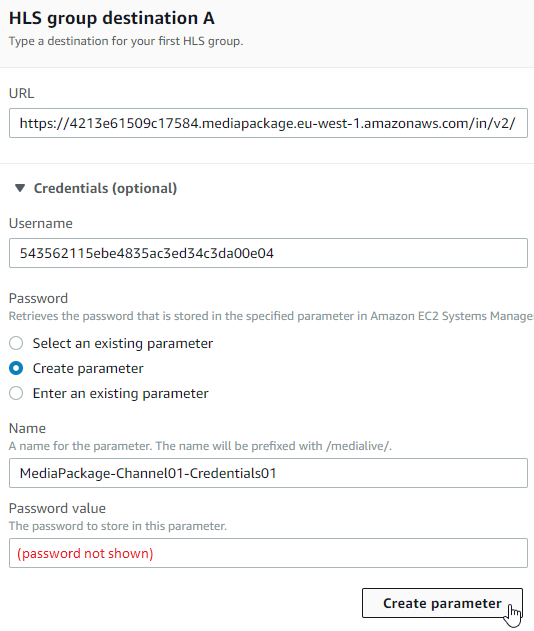
Configure HLS group destination A (refer to the values of the first MediaPackage input noted down previously):
-
When using MediaPackage V1,
-
URL: <MediaPackage-Channel01 Input #1 URL>.
-
Expand Credentials.
-
Username: <MediaPackage-Channel01 Input #1 Username>.
-
Select Create parameter in the Password section.
-
Name: "MediaPackage-Channel01-Credentials01".
-
Password value: <MediaPackage-Channel01 Input #1 Password>.
-
Choose Create parameter.
-
-
When using MediaPackage V2,
-
URL: You can find the Ingest URL from the MediaPackage Channel Settings. Add the Ingest endpoint 1 URL here.
-
Since the Credentials are optional, you can ignore it.
-
-
-
Configure HLS group destination B (refer to the values of the second MediaPackage input noted down previously):
-
When using MediaPackage V1,
- URL: <MediaPackage-Channel01 Input #2 URL>.
- Expand Credentials.
- Username: <MediaPackage-Channel01 Input #2 Username>.
- Select Create parameter in the Password section.
- Name: "MediaPackage-Channel01-Credentials02".
- Password value: <MediaPackage-Channel01 Input #2 Password>.
- Choose Create parameter.
-
When using MediaPackage V2,
-
URL: You can find the Ingest URL from the MediaPackage Channel Settings. Add the Ingest endpoint 2 URL here.
-
Since the Credentials are optional, you can ignore it.
-
-
-
Configure HLS settings:
-
Choose HLS webdav in the CDN Settings section (this is required for sending content to MediaPackage).

-
-
-
Choose Create channel.
-
-
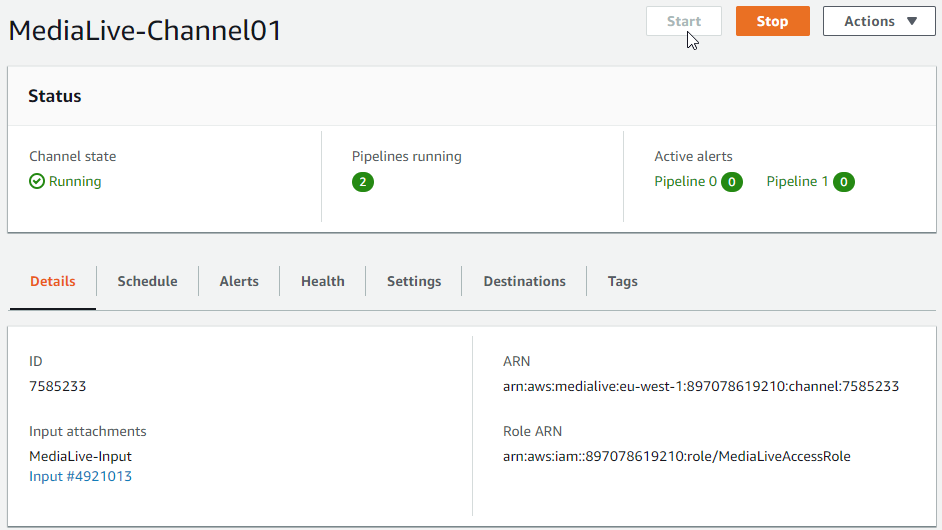
Choose Start to start the channel and wait until it’s in the Running state.
noteWhen the Running state is reached it may take an additional minute before the stream is available.
Playback Test
Playback can be tested on the Axinom Video Test Bench website.
-
Open the VTB site: https://vtb.axinom.com. Use a suitable browser for the content being tested:
- Playback of clear content doesn’t have browser restrictions.
- To play the encrypted DASH content with Widevine, use Chrome or Firefox.
- To play the encrypted DASH content with PlayReady, use Edge or IE.
- To play the encrypted CMAF content (FairPlay-protected), use Safari.
-
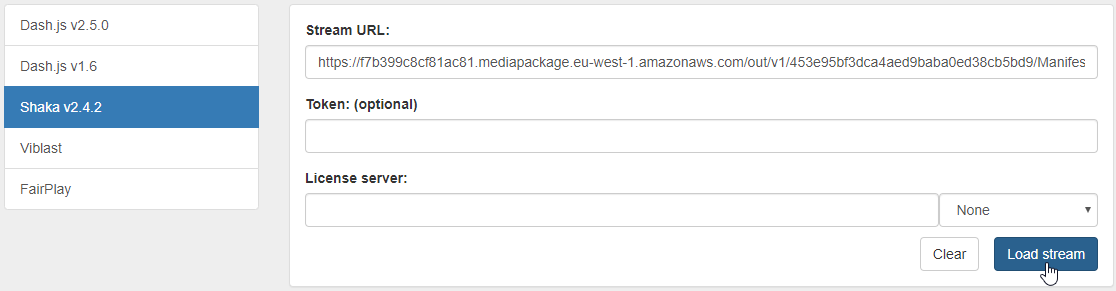
Test DASH-Clear playback:
-
Select Shaka player.
noteFor DASH content, we recommend Shaka player because the latest Dash.js players were unable to play some of the content produced in this demo.
-
Stream URL: <MediaPackage DASH-Clear endpoint URL>.
-
Leave rest of the fields blank.
-
Choose Load stream. The video should play.
-
-
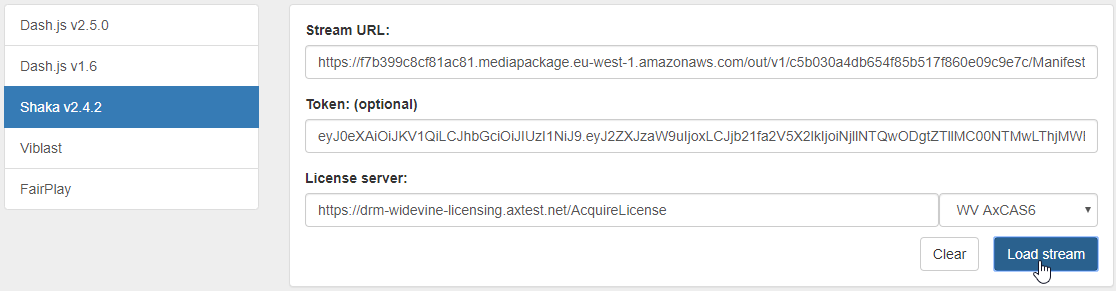
Test DASH-Encrypted playback:
-
Select Shaka player.
-
Stream URL: <MediaPackage DASH-Encrypted endpoint URL>.
-
Token: <Your license token>.
noteMake sure that the token specifies the Key ID(s) generated by AWS MediaPackage.
-
Set the license service:
- For Widevine playback: "https://drm-widevine-licensing.axprod.net/AcquireLicense".
- For PlayReady playback: "https://drm-playready-licensing.axprod.net/AcquireLicense".
-
Choose Load stream. Video should play.
-
-
Test the CMAF-Clear playback:
- Select the FairPlay player (Safari only). Alternatively, clear CMAF also plays in Shaka.
- Stream URL: <MediaPackage CMAF-Clear endpoint URL>.
- Leave rest of the fields blank.
- Choose Load stream. The video should play.
-
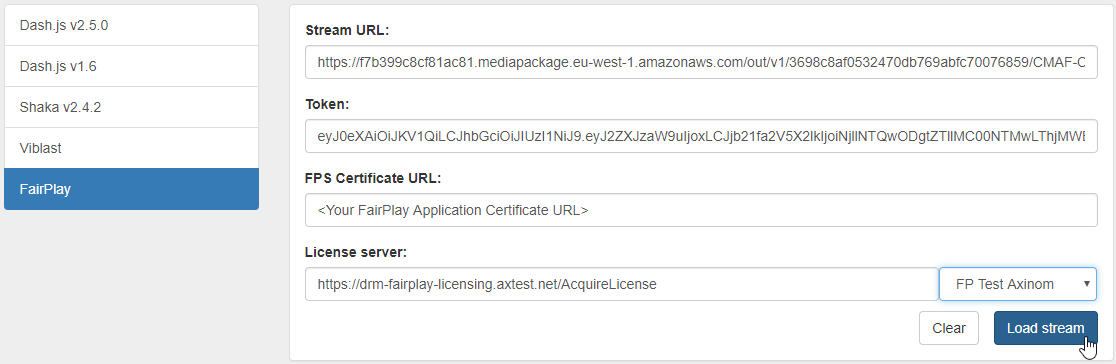
Test the CMAF-Encrypted playback:
-
Select the FairPlay player (Safari only).
-
Stream URL: <MediaPackage CMAF-Encrypted endpoint URL>.
-
Token: <Your license token>.
-
FPS Certificate URL: <the URL to your FairPlay application certificate>.
-
License service: "https://drm-fairplay-licensing.axprod.net/AcquireLicense".
-
Choose Load stream. The video should play.
-