Storage with AWS S3
This guide describes how to create a bucket in Amazon S3. You can use the bucket with Axinom Encoding as an input and/or output storage.
Create an AWS Bucket
Start creating a bucket
To create an AWS bucket:
-
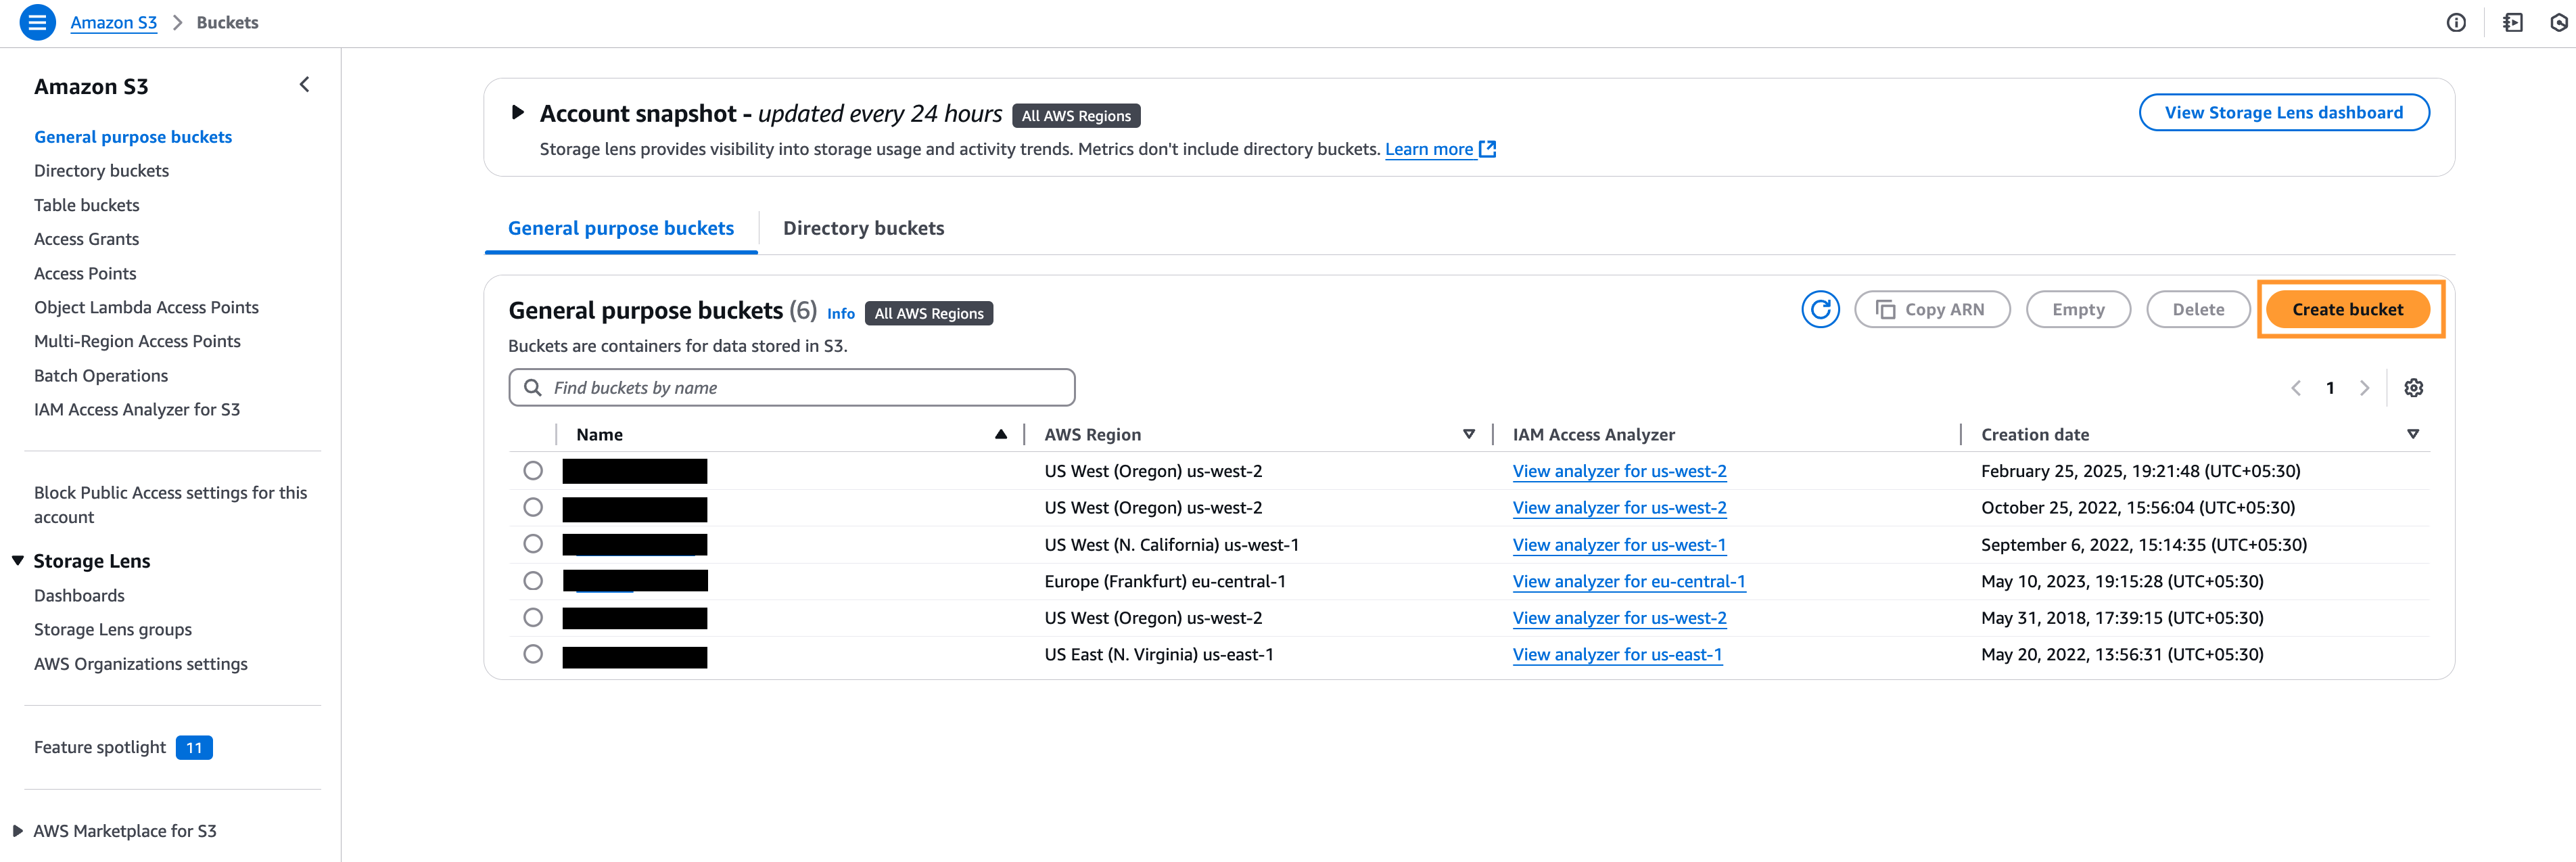
On the s3 AWS Console, click create bucket.
Start bucket creation
-
During the bucket creation you should use unique name, proper AWS region and deselect all
Block all public access, agree the acknowledge of the public access and create the bucket.Bucket initial settings

Bucket permissions
-
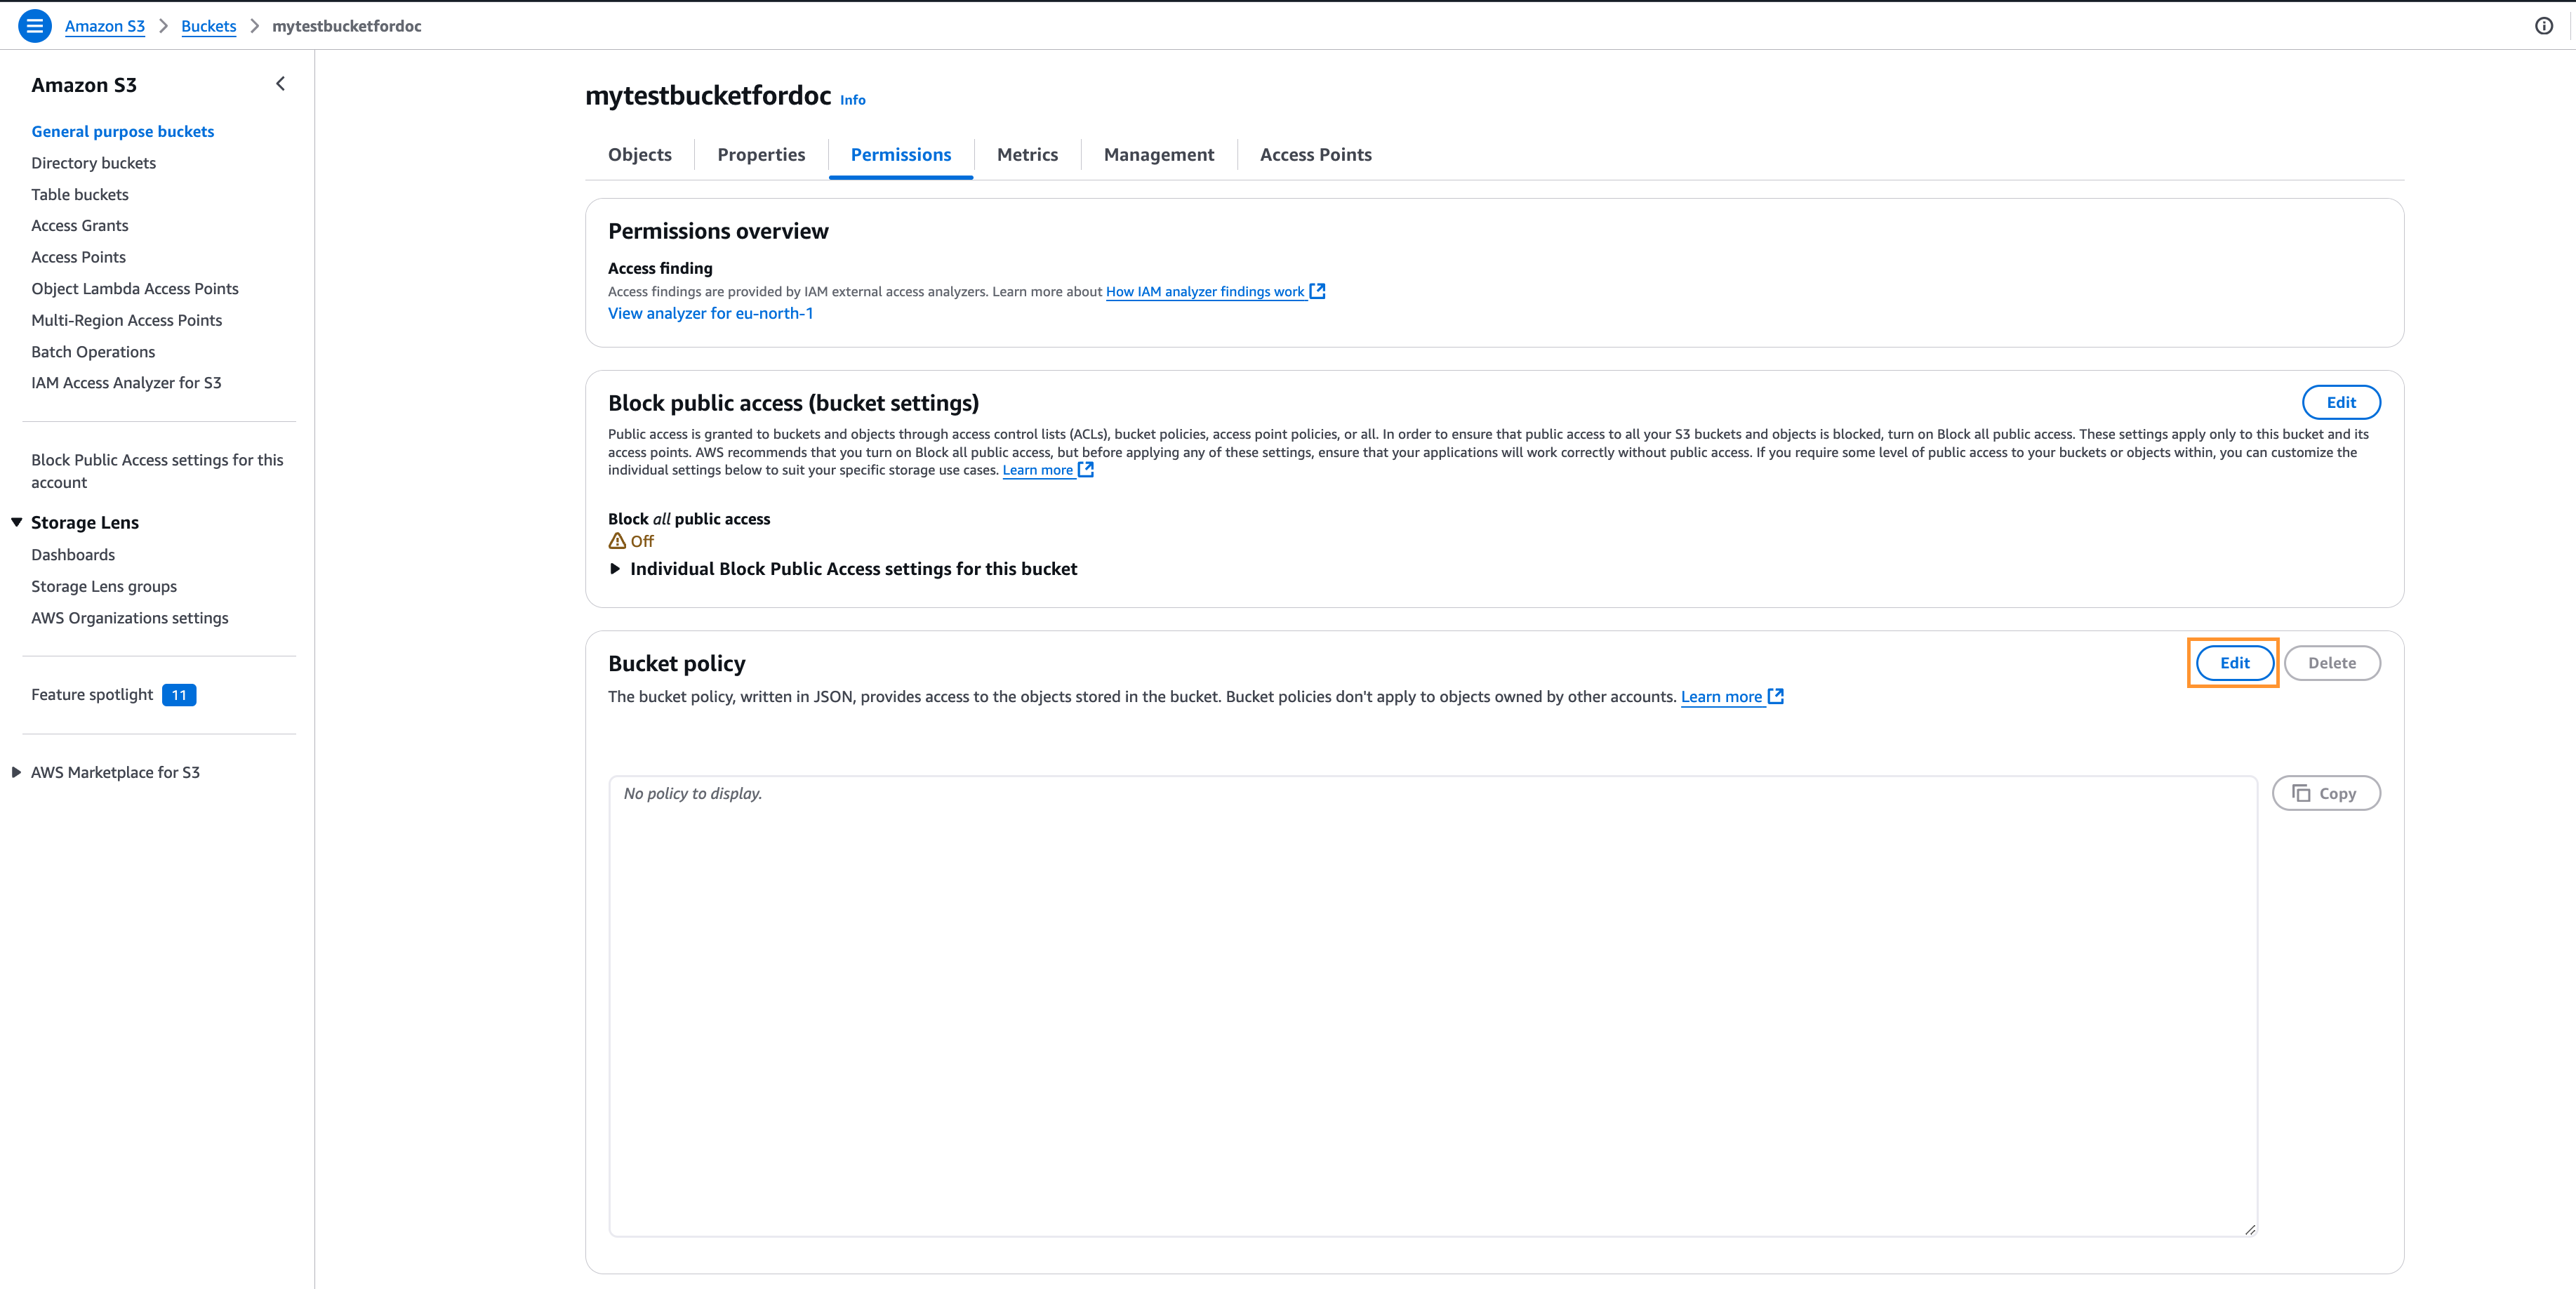
Created bucket is not public yet. To make it properly accessed: open the bucket, go to permissions and click
Editin Bucket policy sectionAdd permissions to the bucket
-
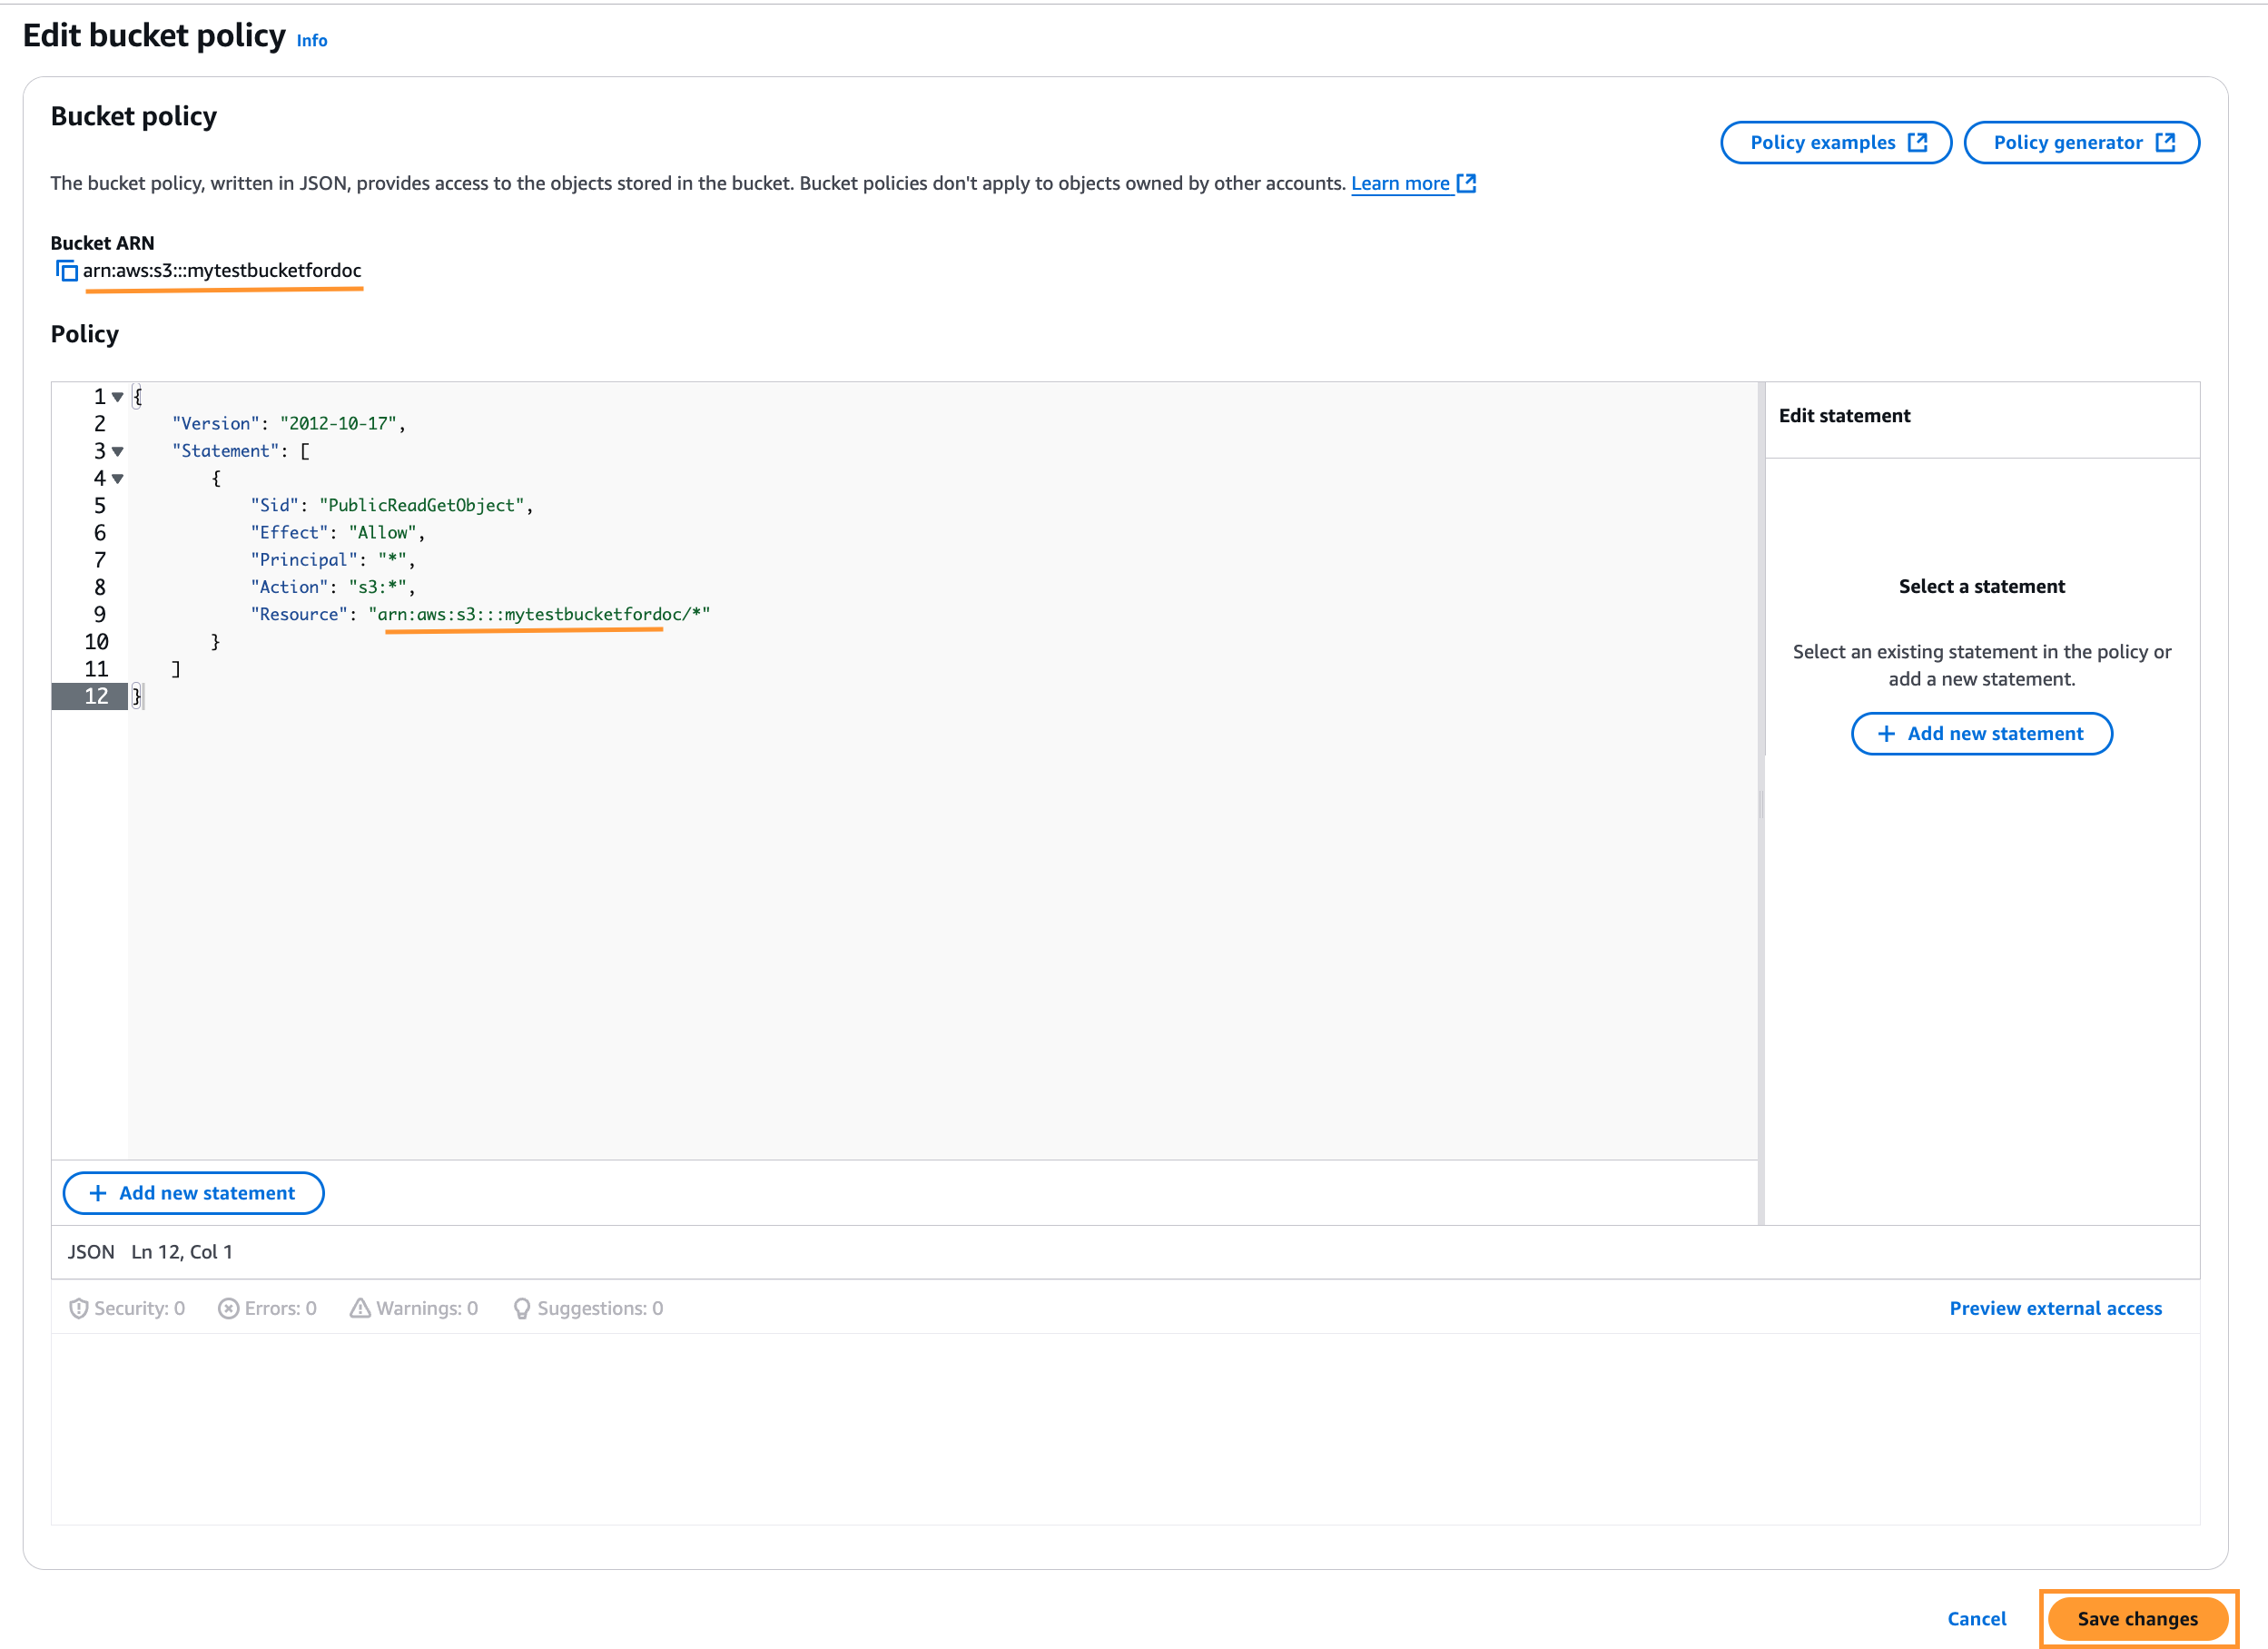
Add a new policy. The json to be added:
{"Version": "2012-10-17","Statement": [{"Sid": "PublicReadGetObject","Effect": "Allow","Principal": "*","Action": "s3:*","Resource": "{bucket_arn}/*"}]}Use
Bucket ARNin the Resource. And if there is no any Errors, pushSave changes.Bucket policy
-
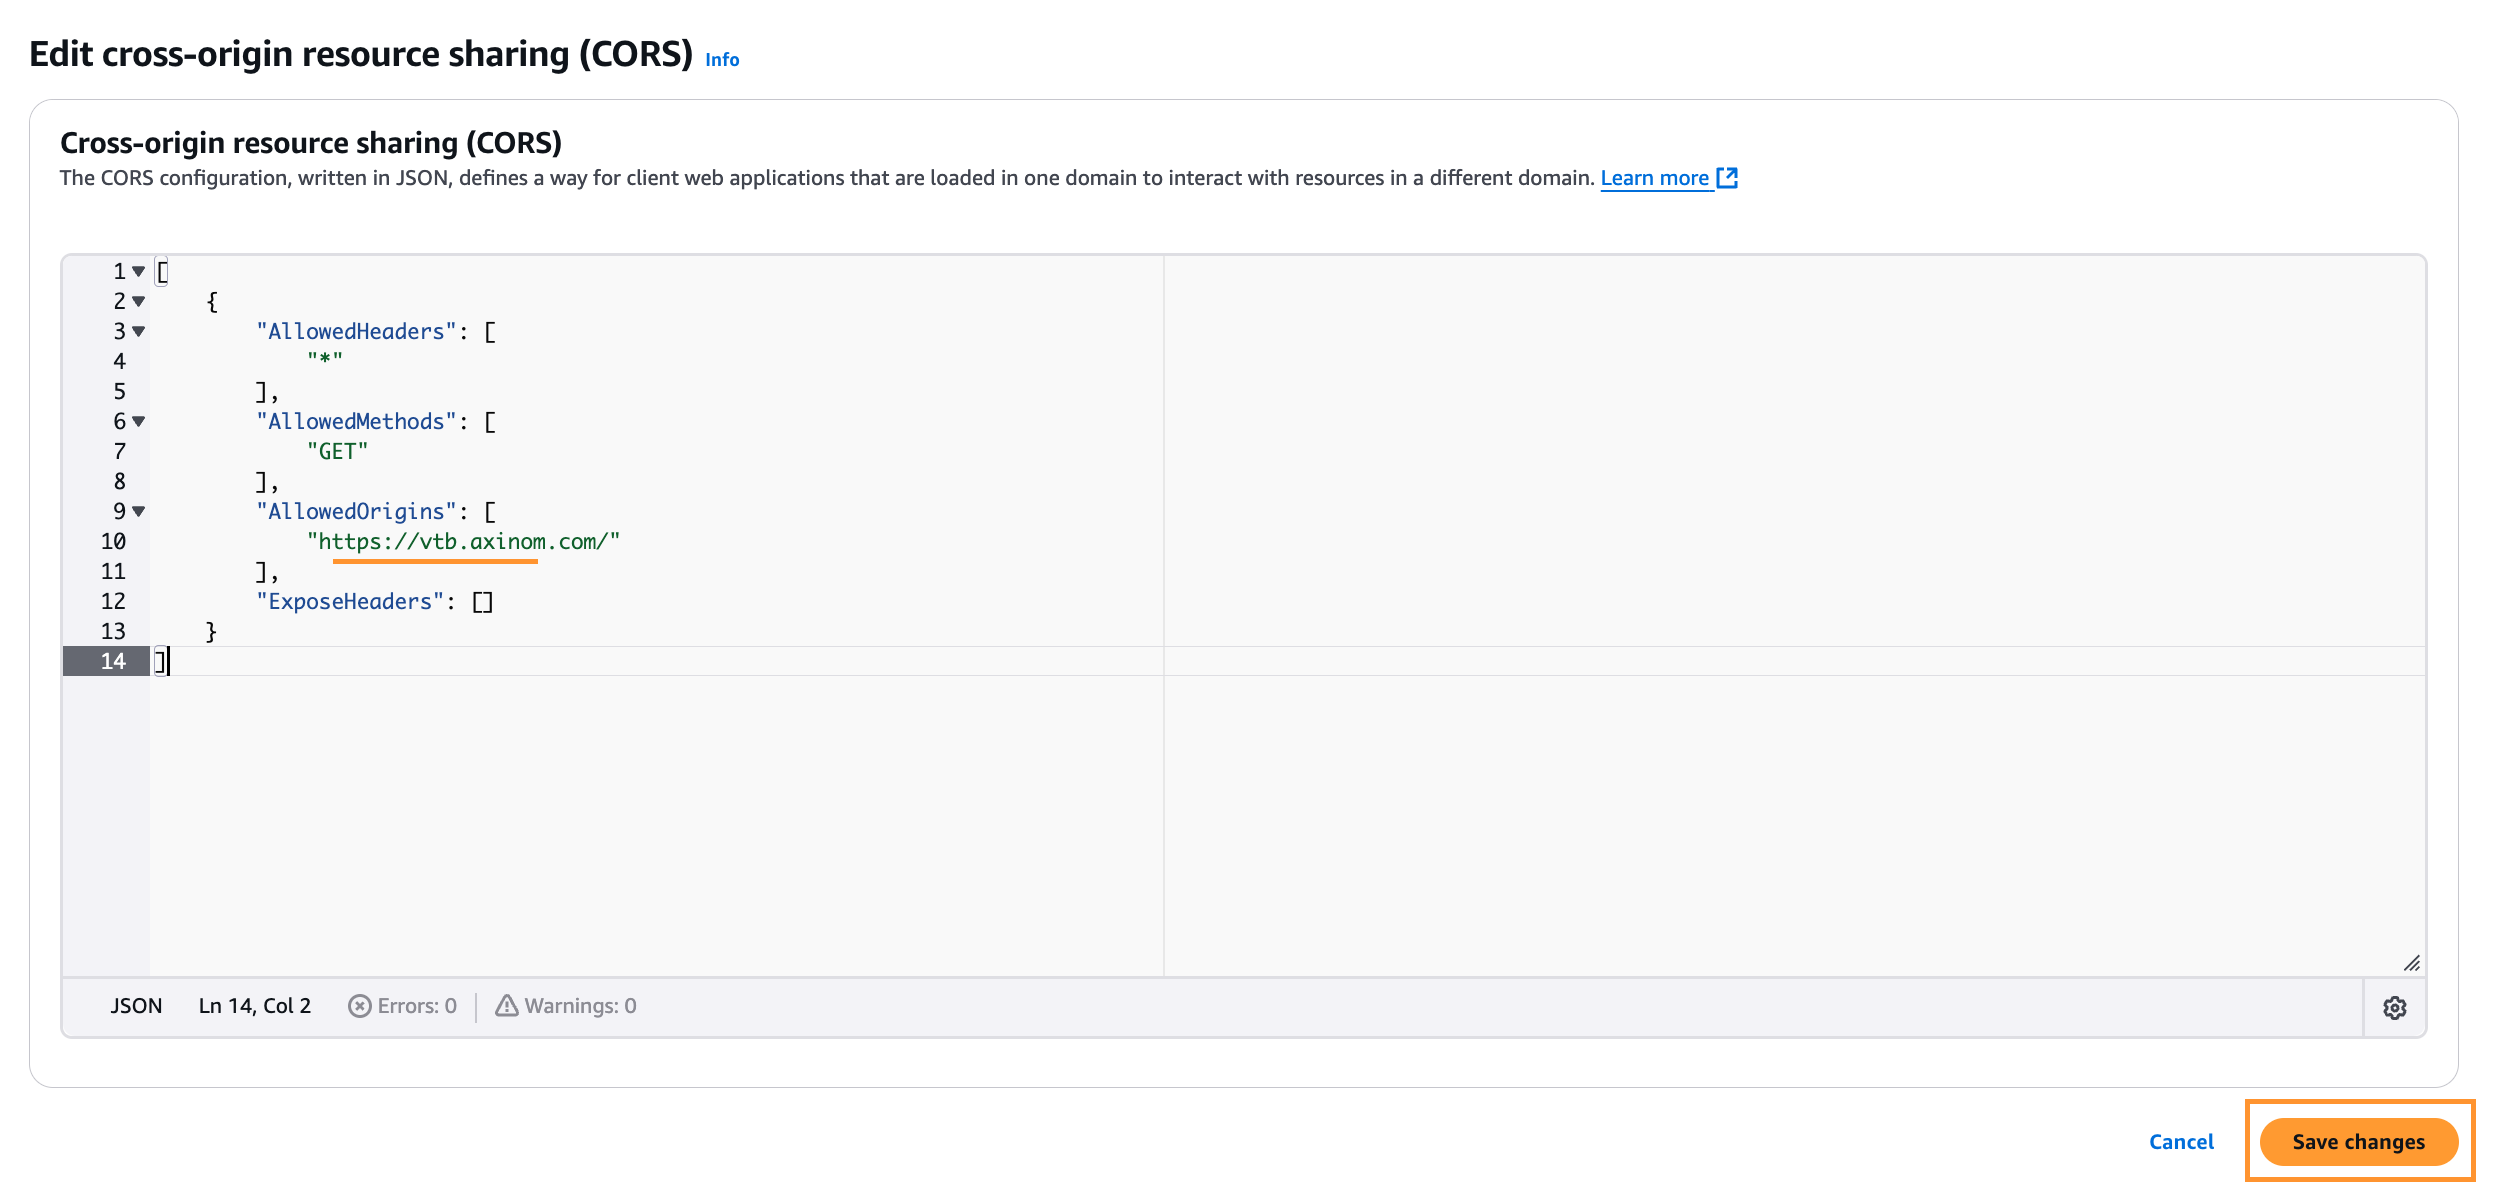
To make it available for a player usage
Cross-origin resource sharing (CORS)has to be updated in the corresponded section under bucket permissions. Allowed Origins should contain list of the players URL which are going to use the bucket. Next save the changes.Bucket CORS
Create an IAM User
-
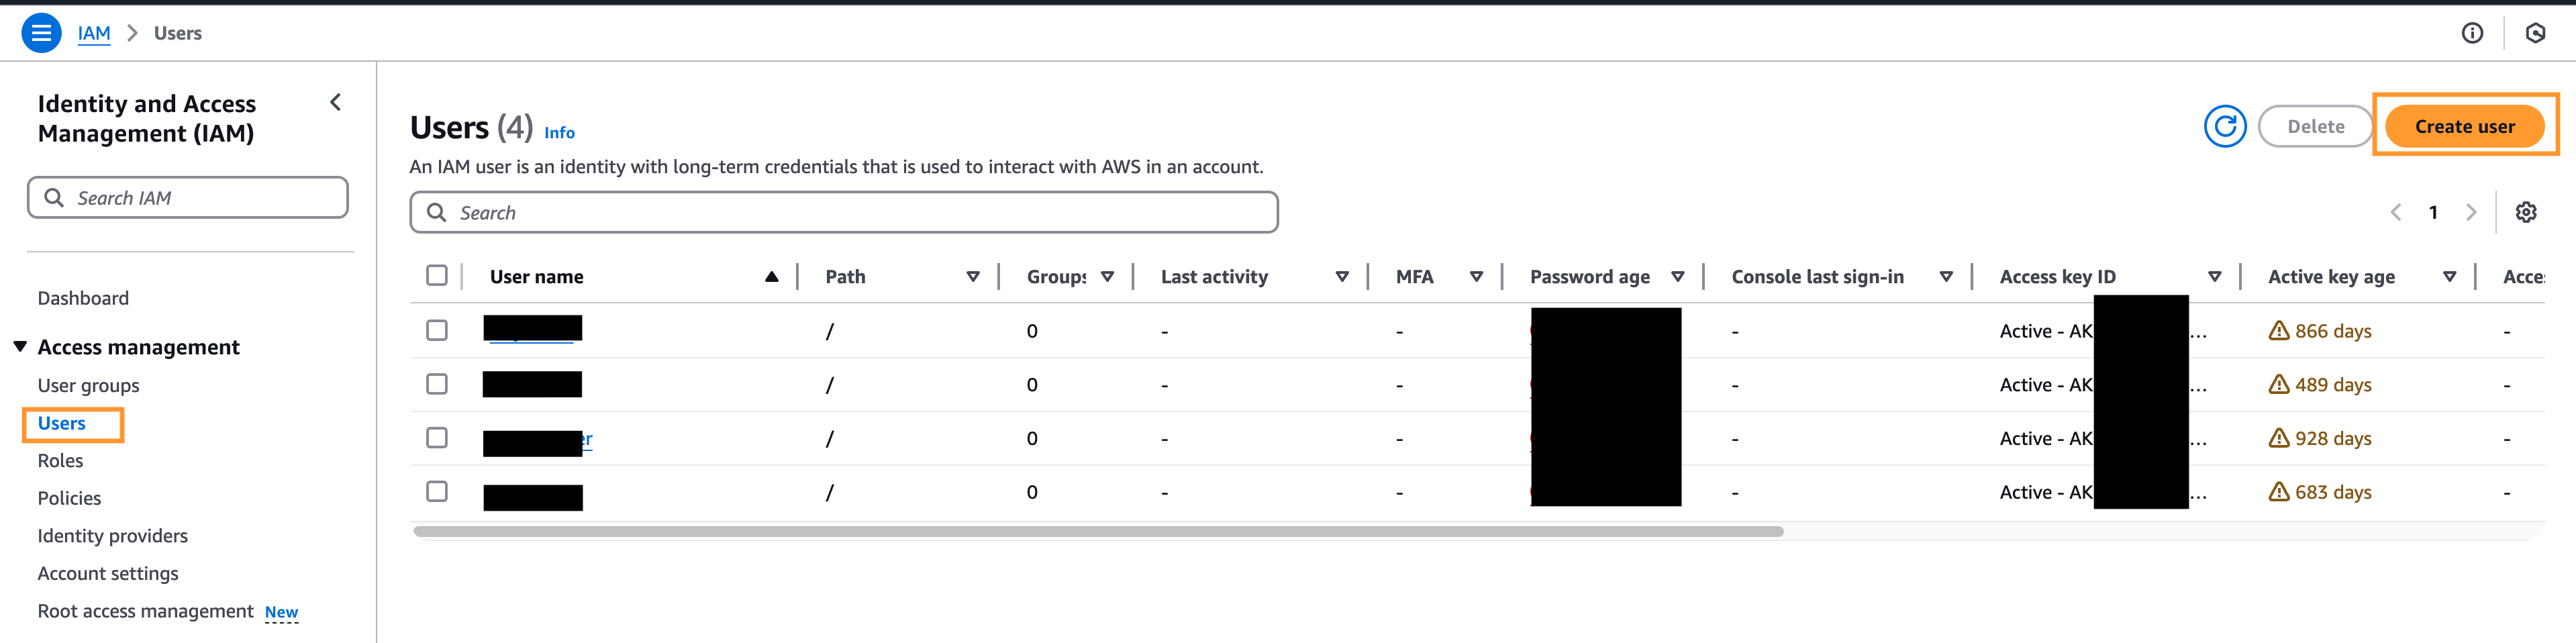
Once the bucket is ready, additional user with correct access should be added in Amazon, which credential are needed to set up the
Acquisition Profile. Go toIdentity and Access Management (IAM)-> Users -> Create userIAM Add User
-
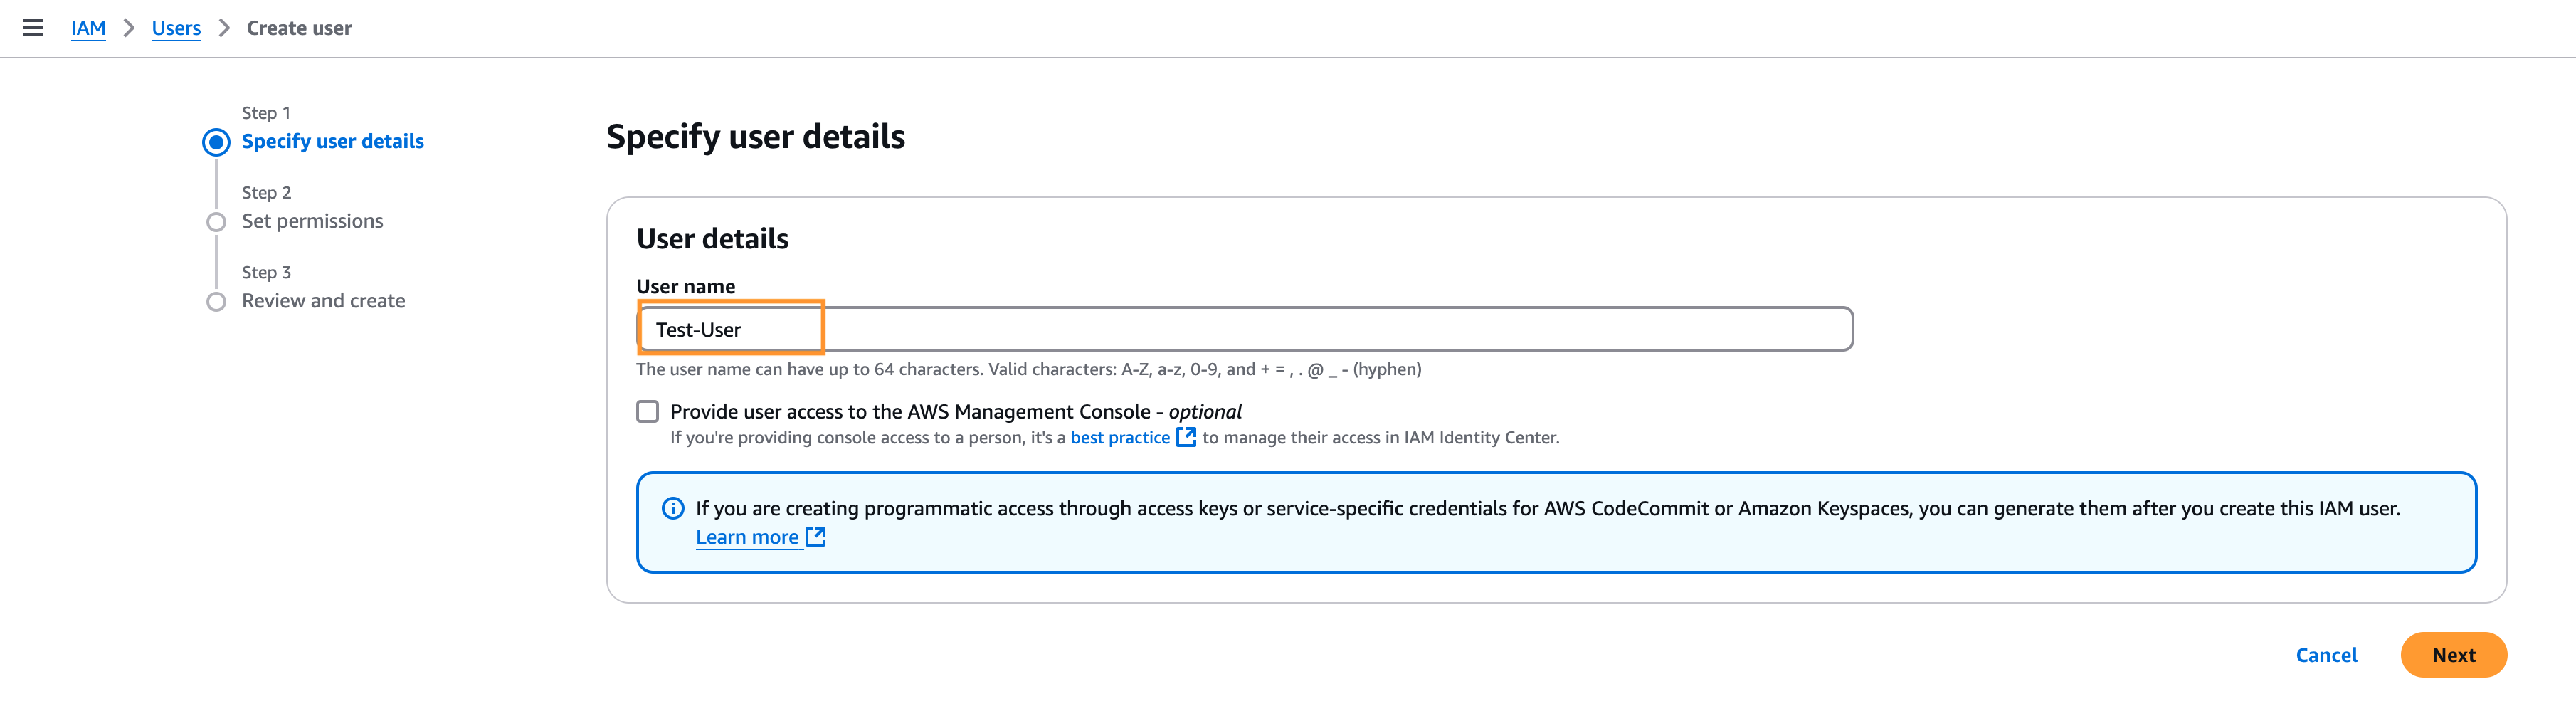
Create User with proper permissions. Type User name and click "Next".
IAM Set user details
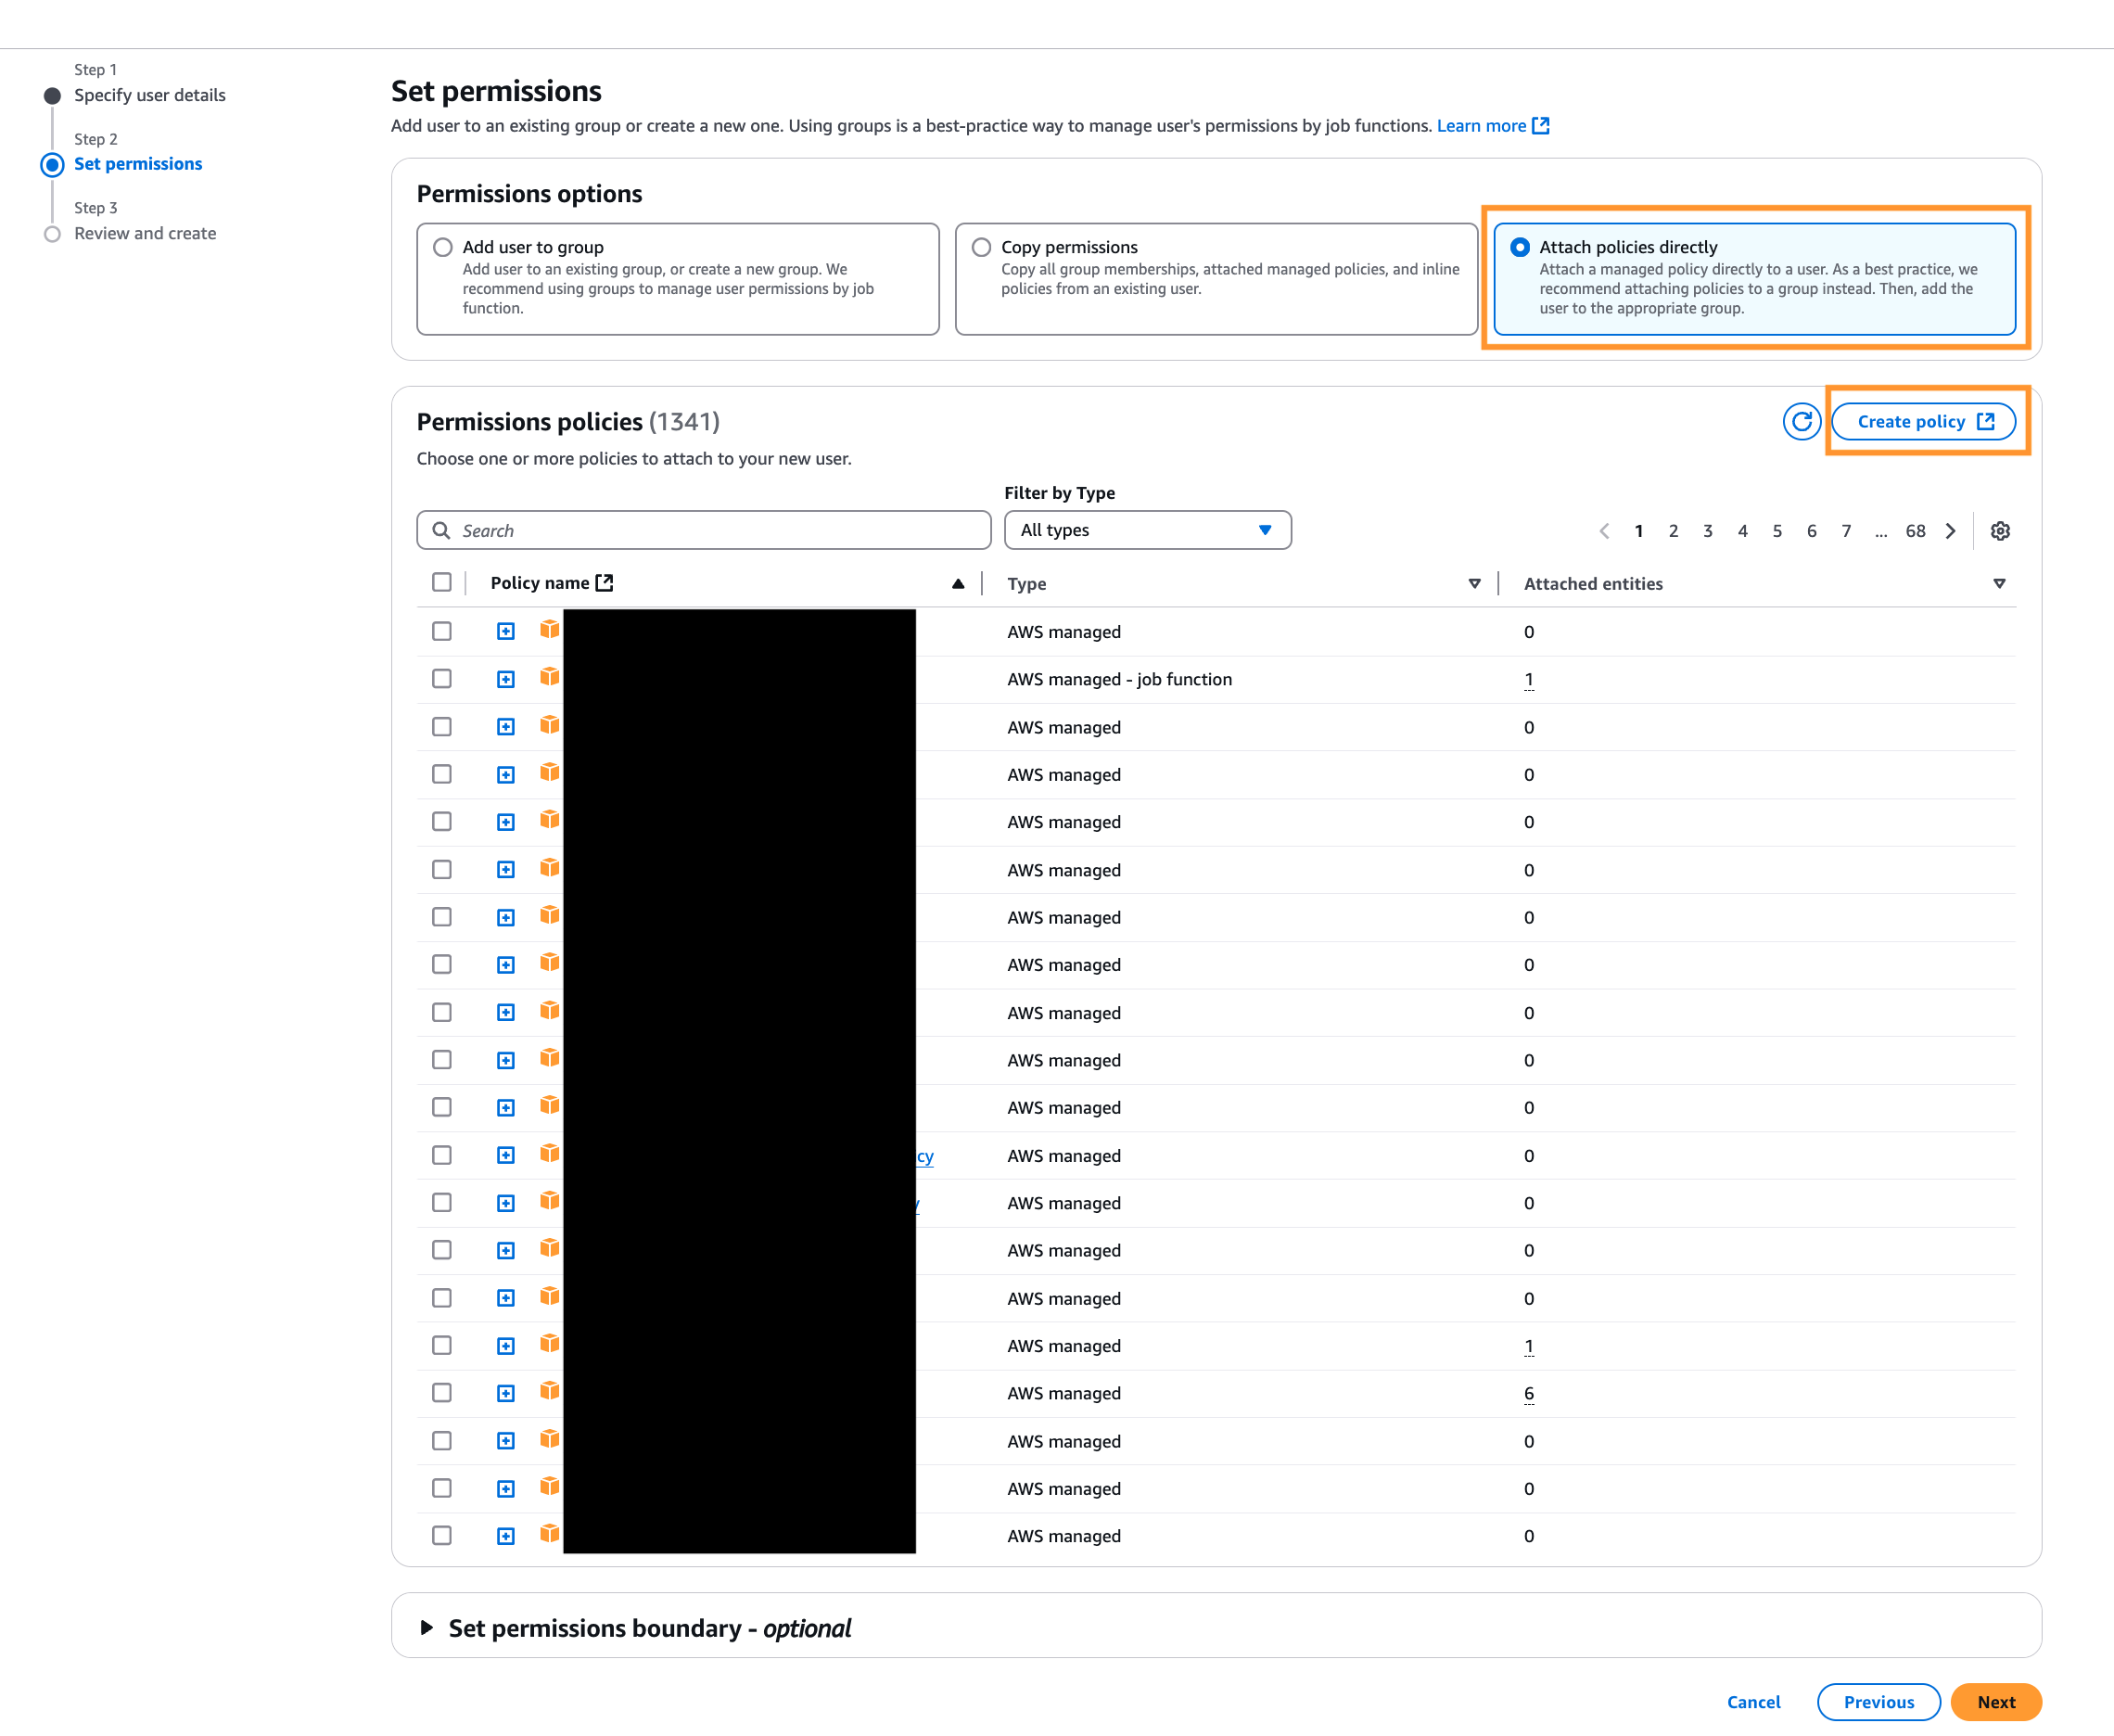
Set permissions to the user by
Attach policies directlyand then Create policy.IAM Create Policy
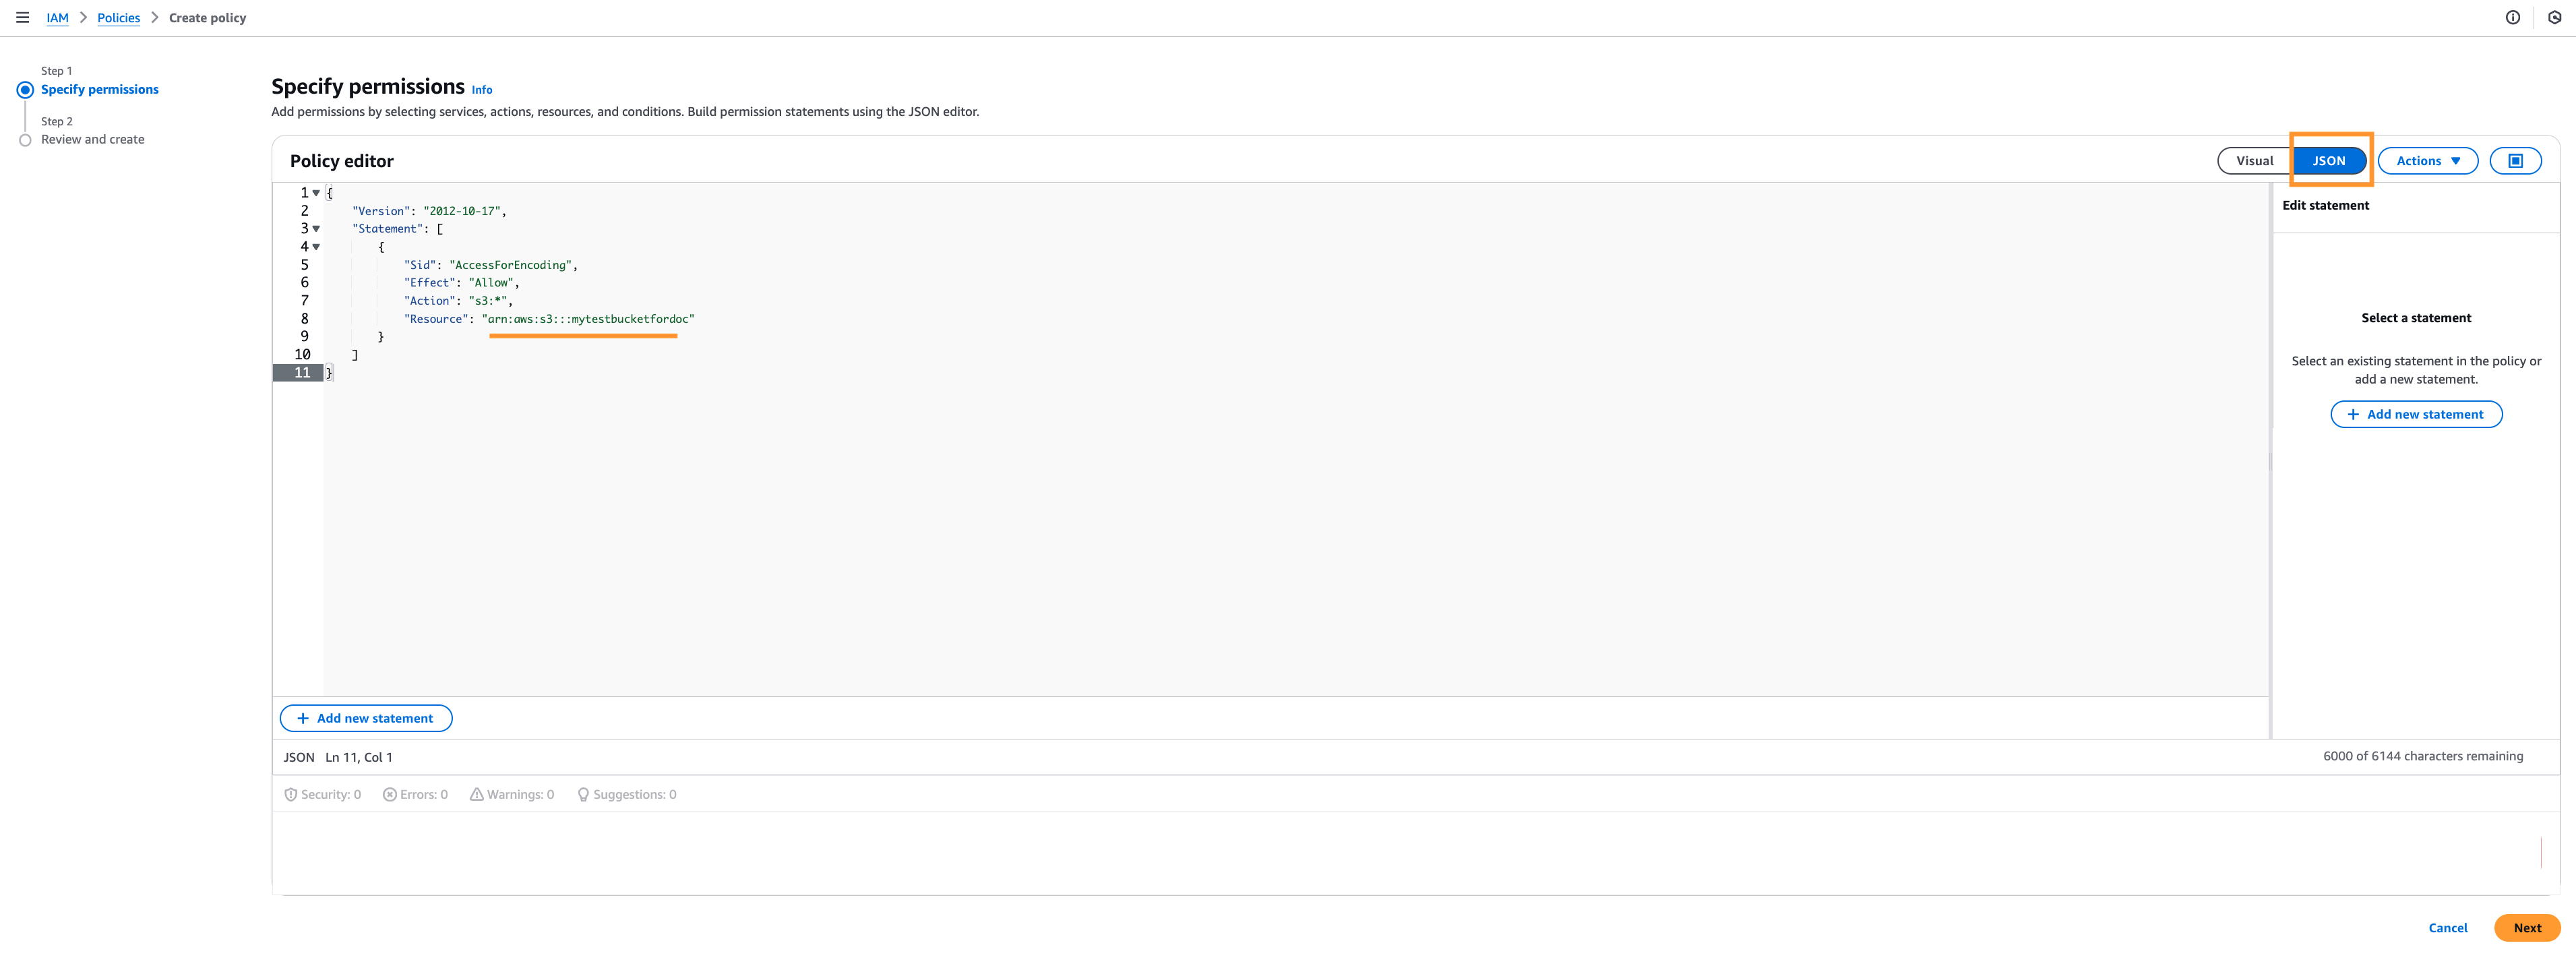
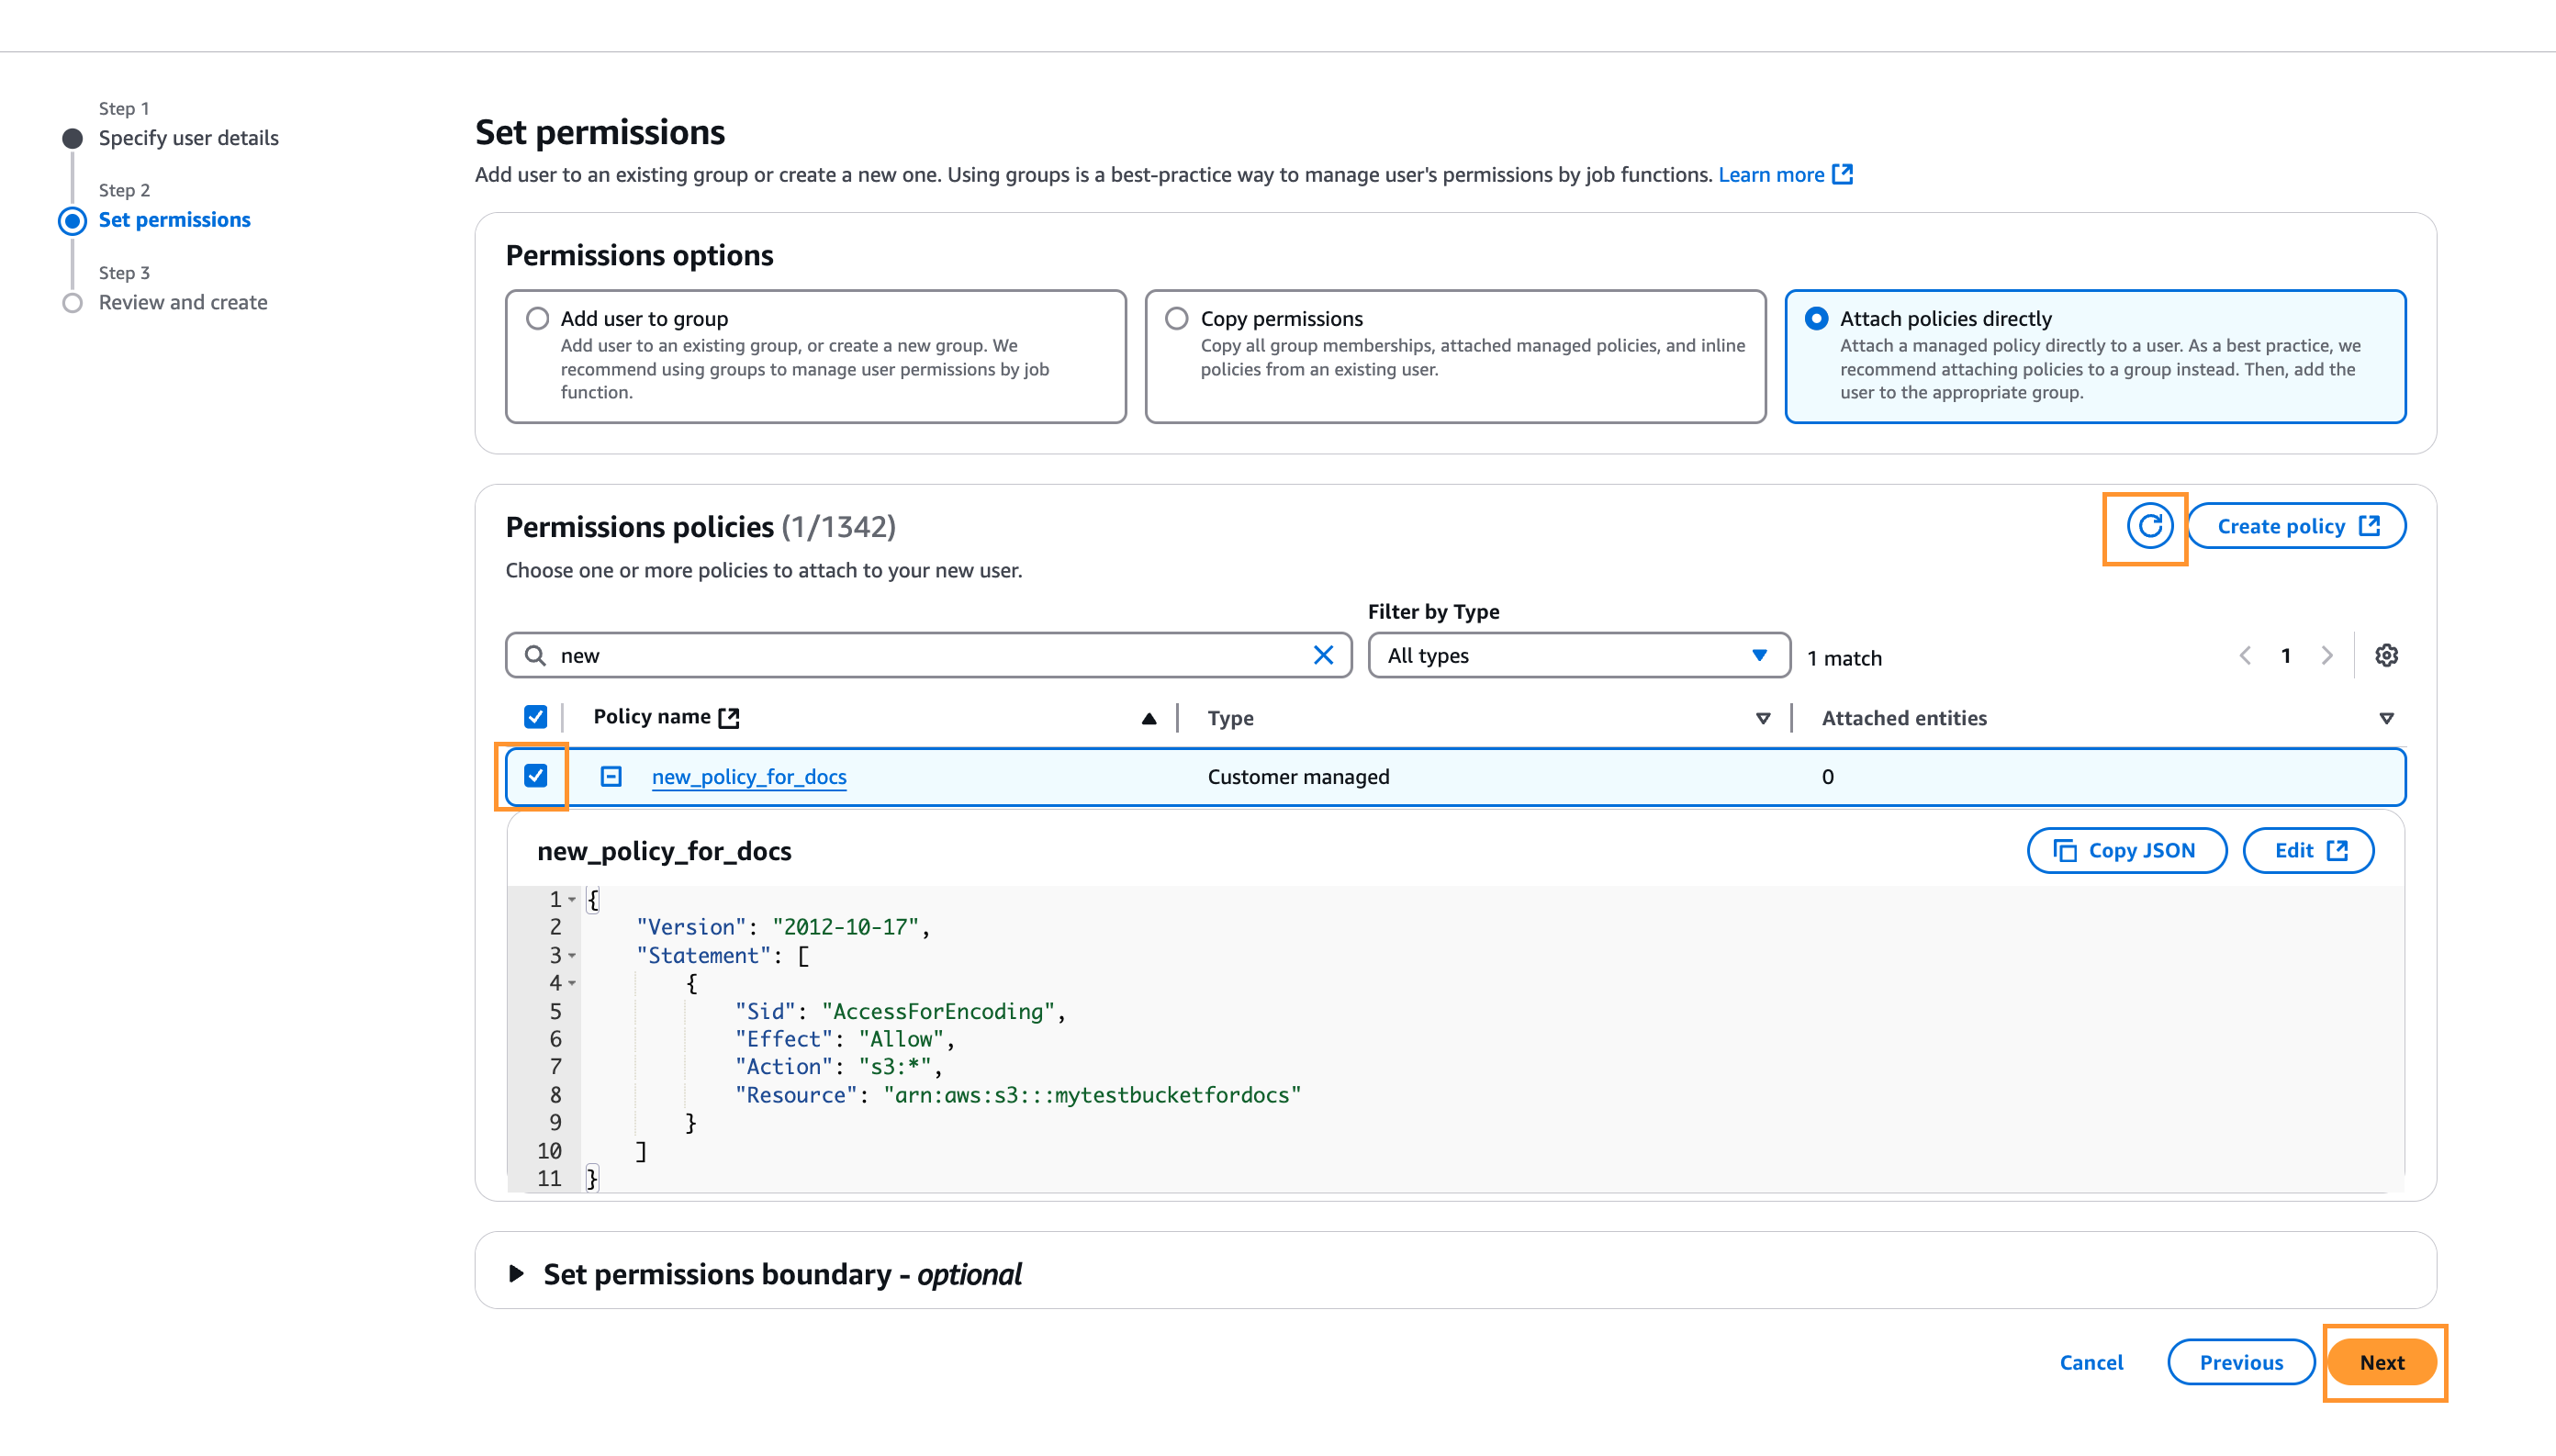
Use Json editor and copy paste the object with Previously created pubic bucket name:
{"Version": "2012-10-17","Statement": [{"Sid": "AccessForEncoding","Effect": "Allow","Action": "s3:*","Resource": "arn:aws:s3:::{previously_created_public_bucket_name}"}]}IAM create policy
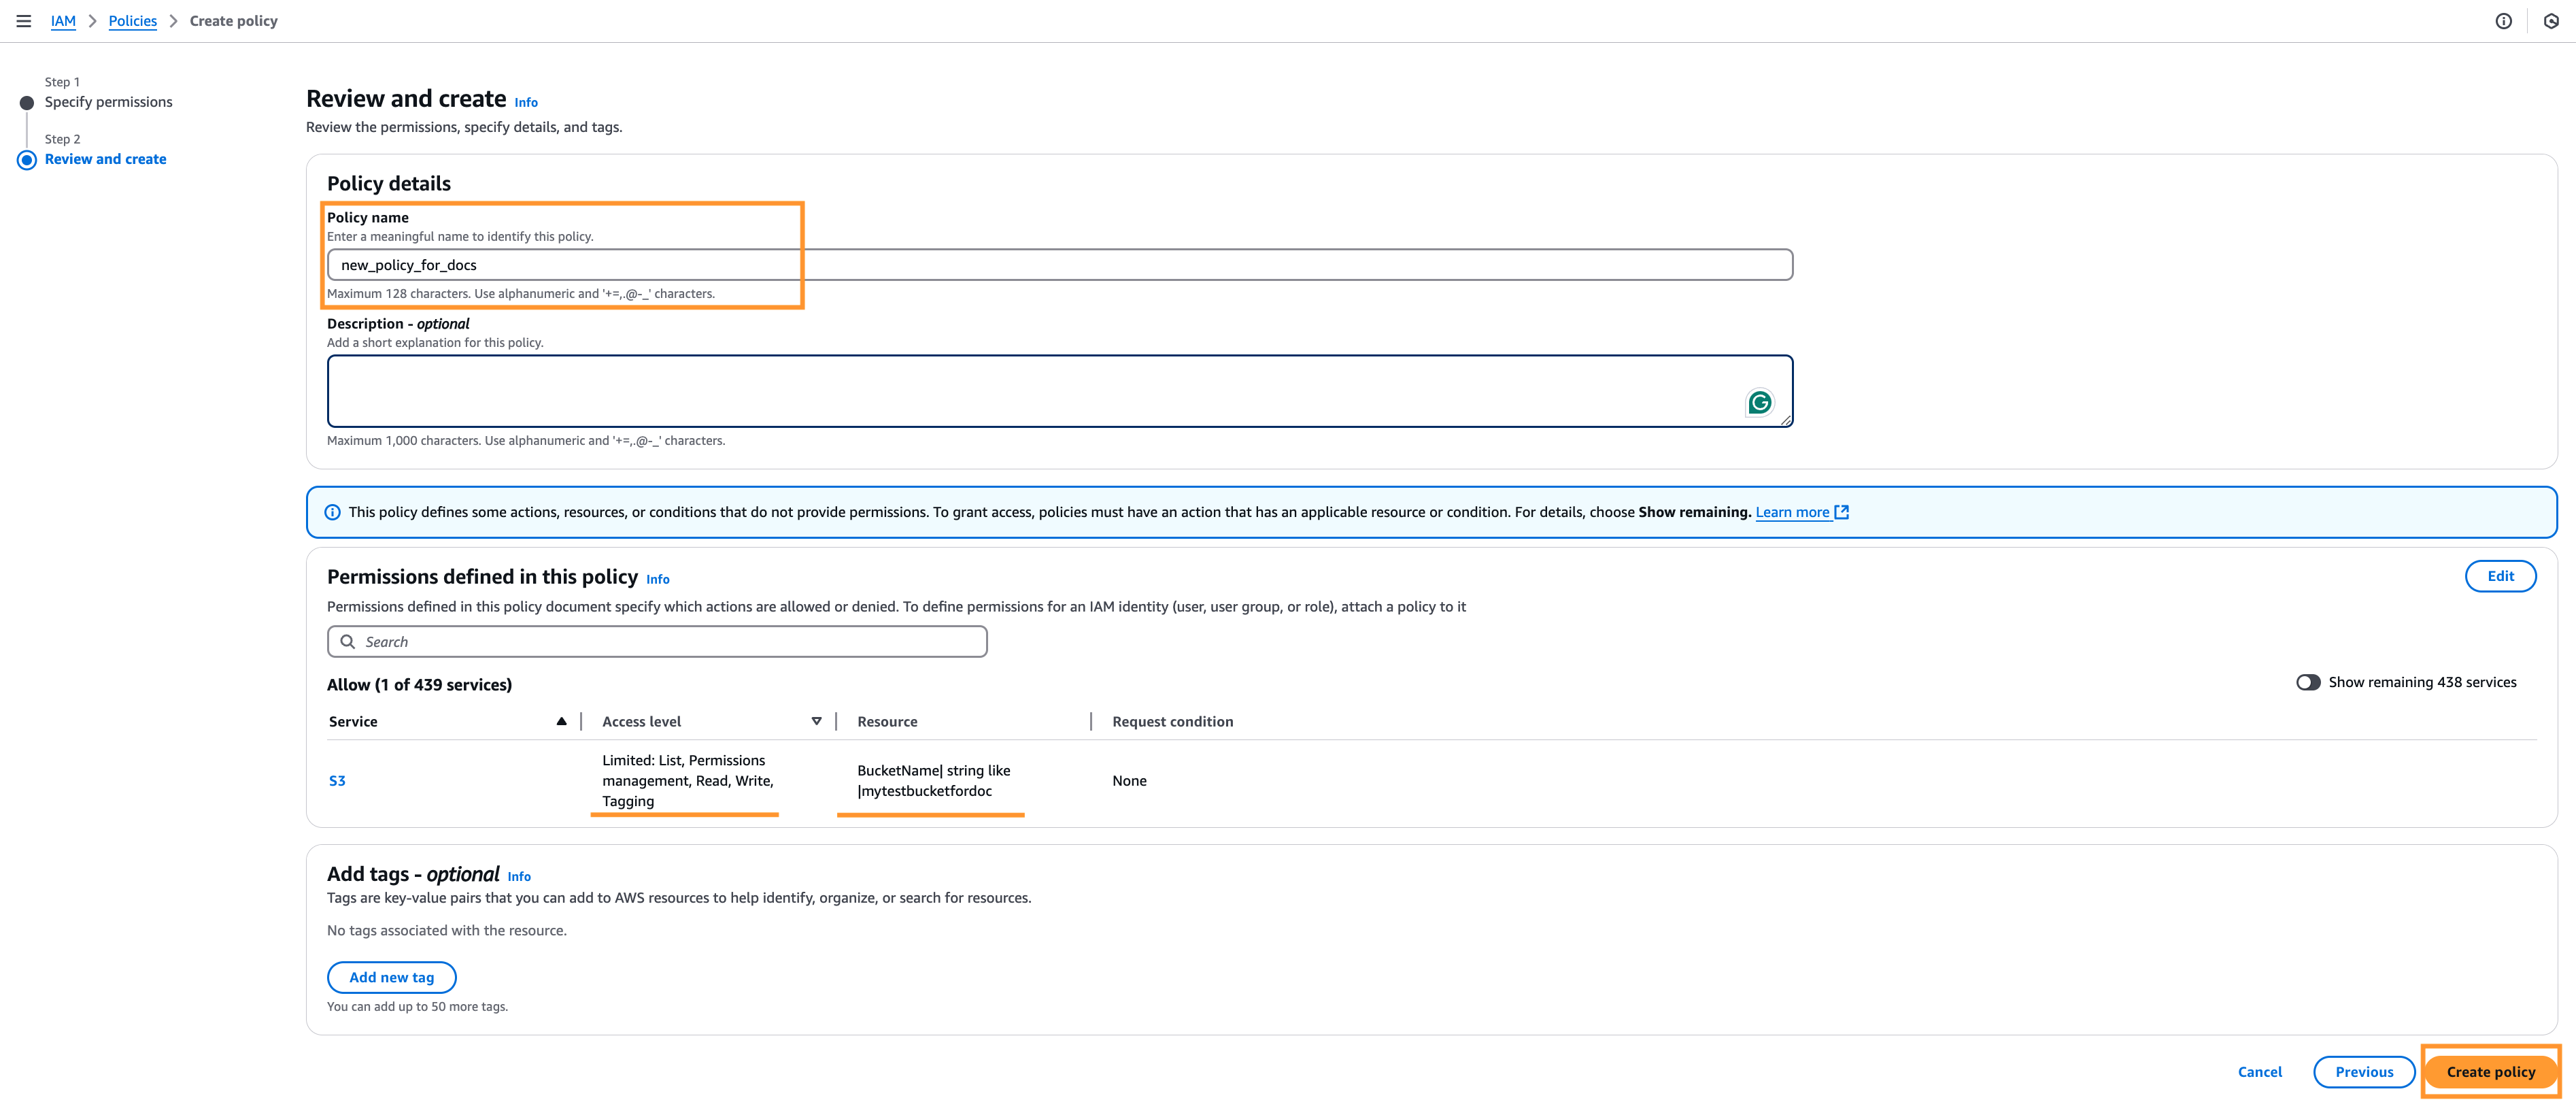
Finish policy creation
To review and create policy, add a policy name and check that access of the policy is correct.
Further, add any tag if needed. We suggest adding some tags for more convenient management in future. Finally, click Create policy.
IAM double check the created policy

-
Continue with a new user creation and select the newly created policy after refreshing the list of policies.
IAM new user select policy
-
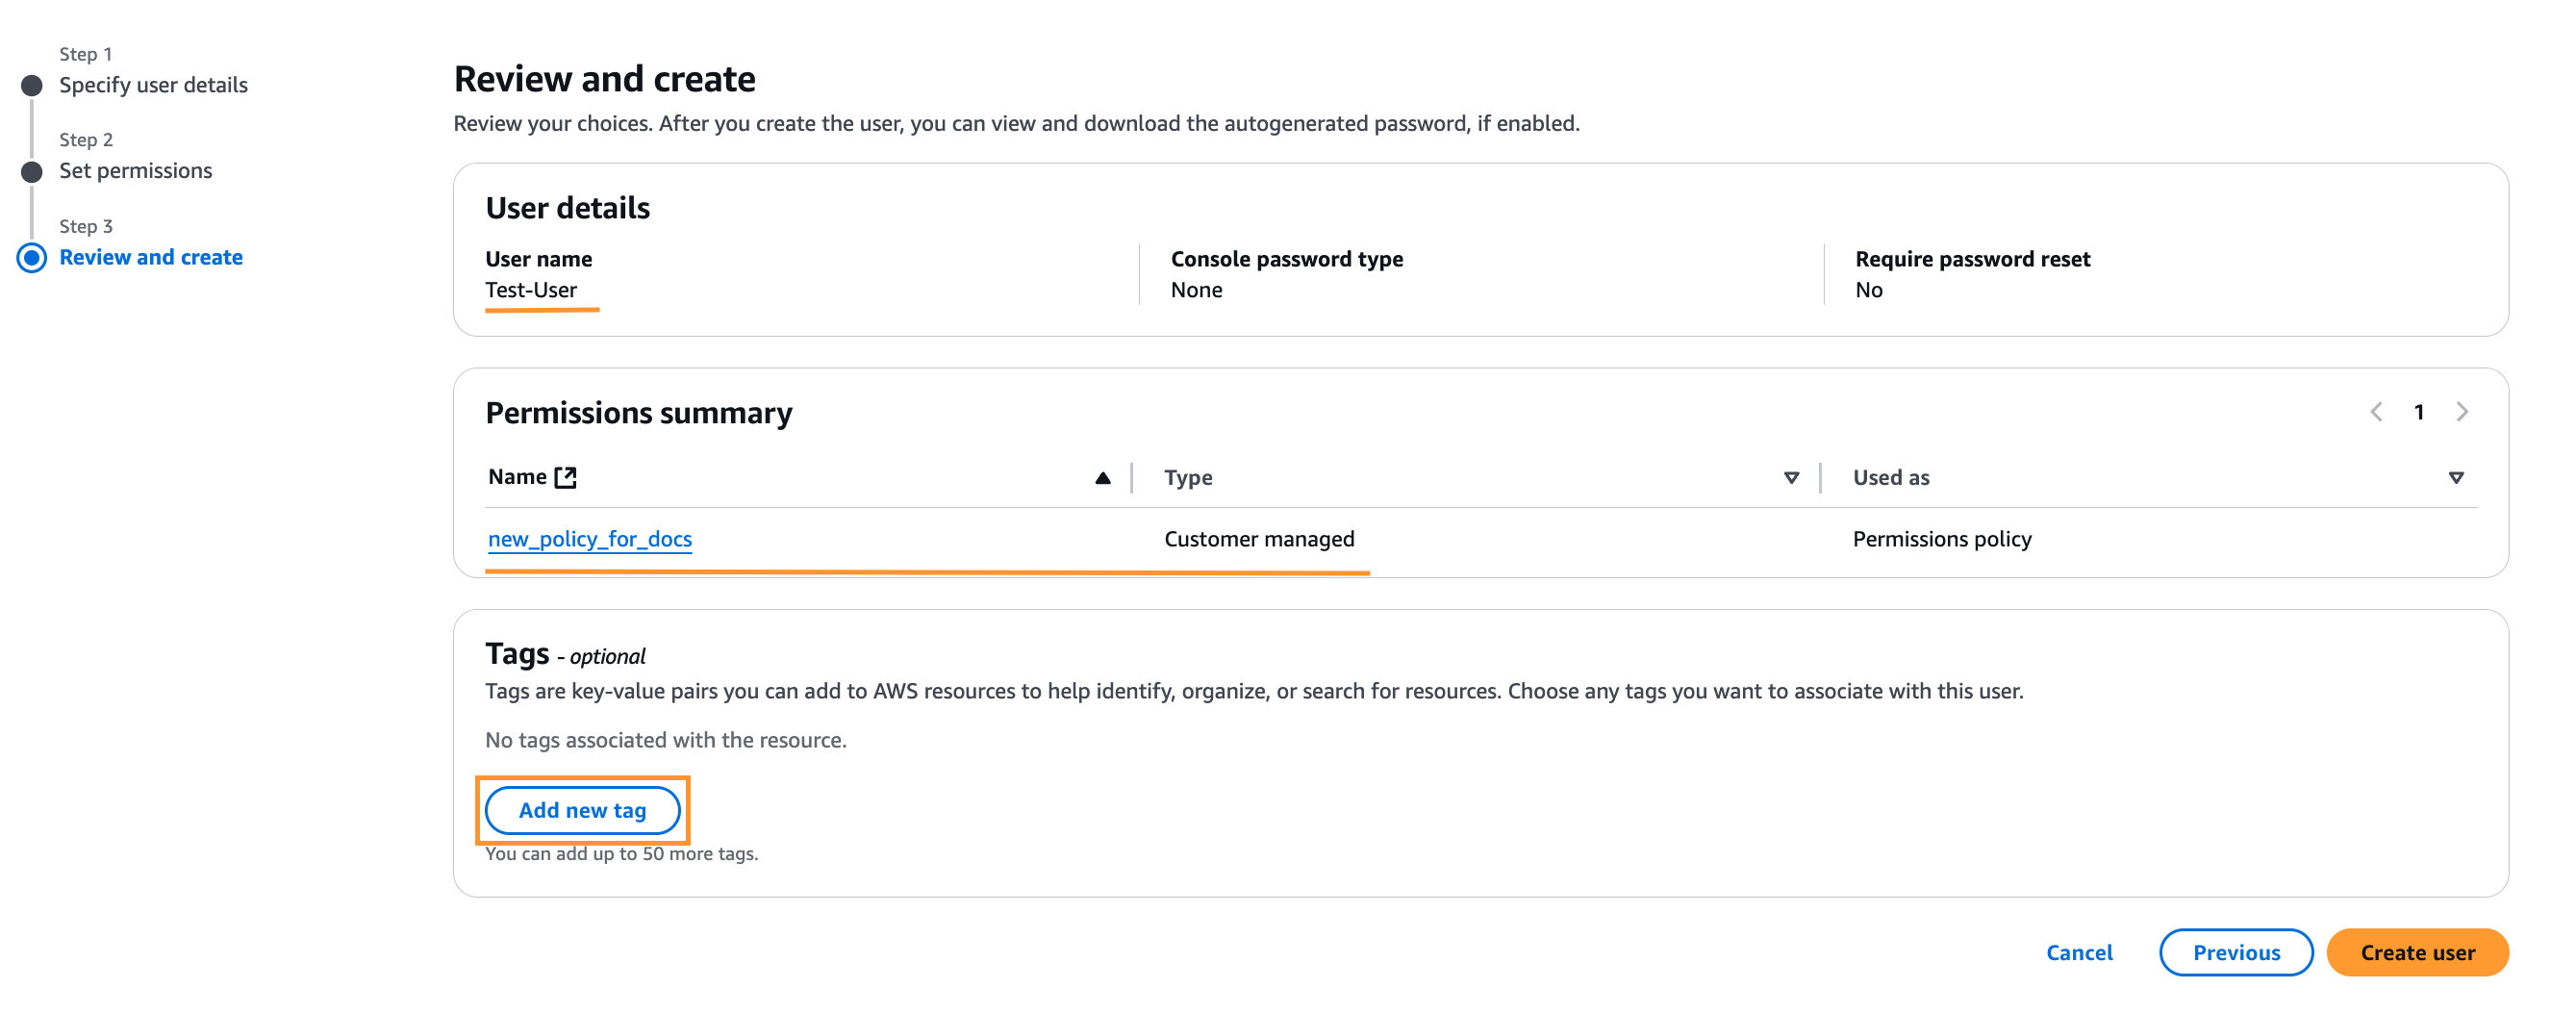
You can review the user details and permissions and add any tag if needed. We suggest adding some for the more convenient management in future. Finally click Create user.
IAM user review and tags
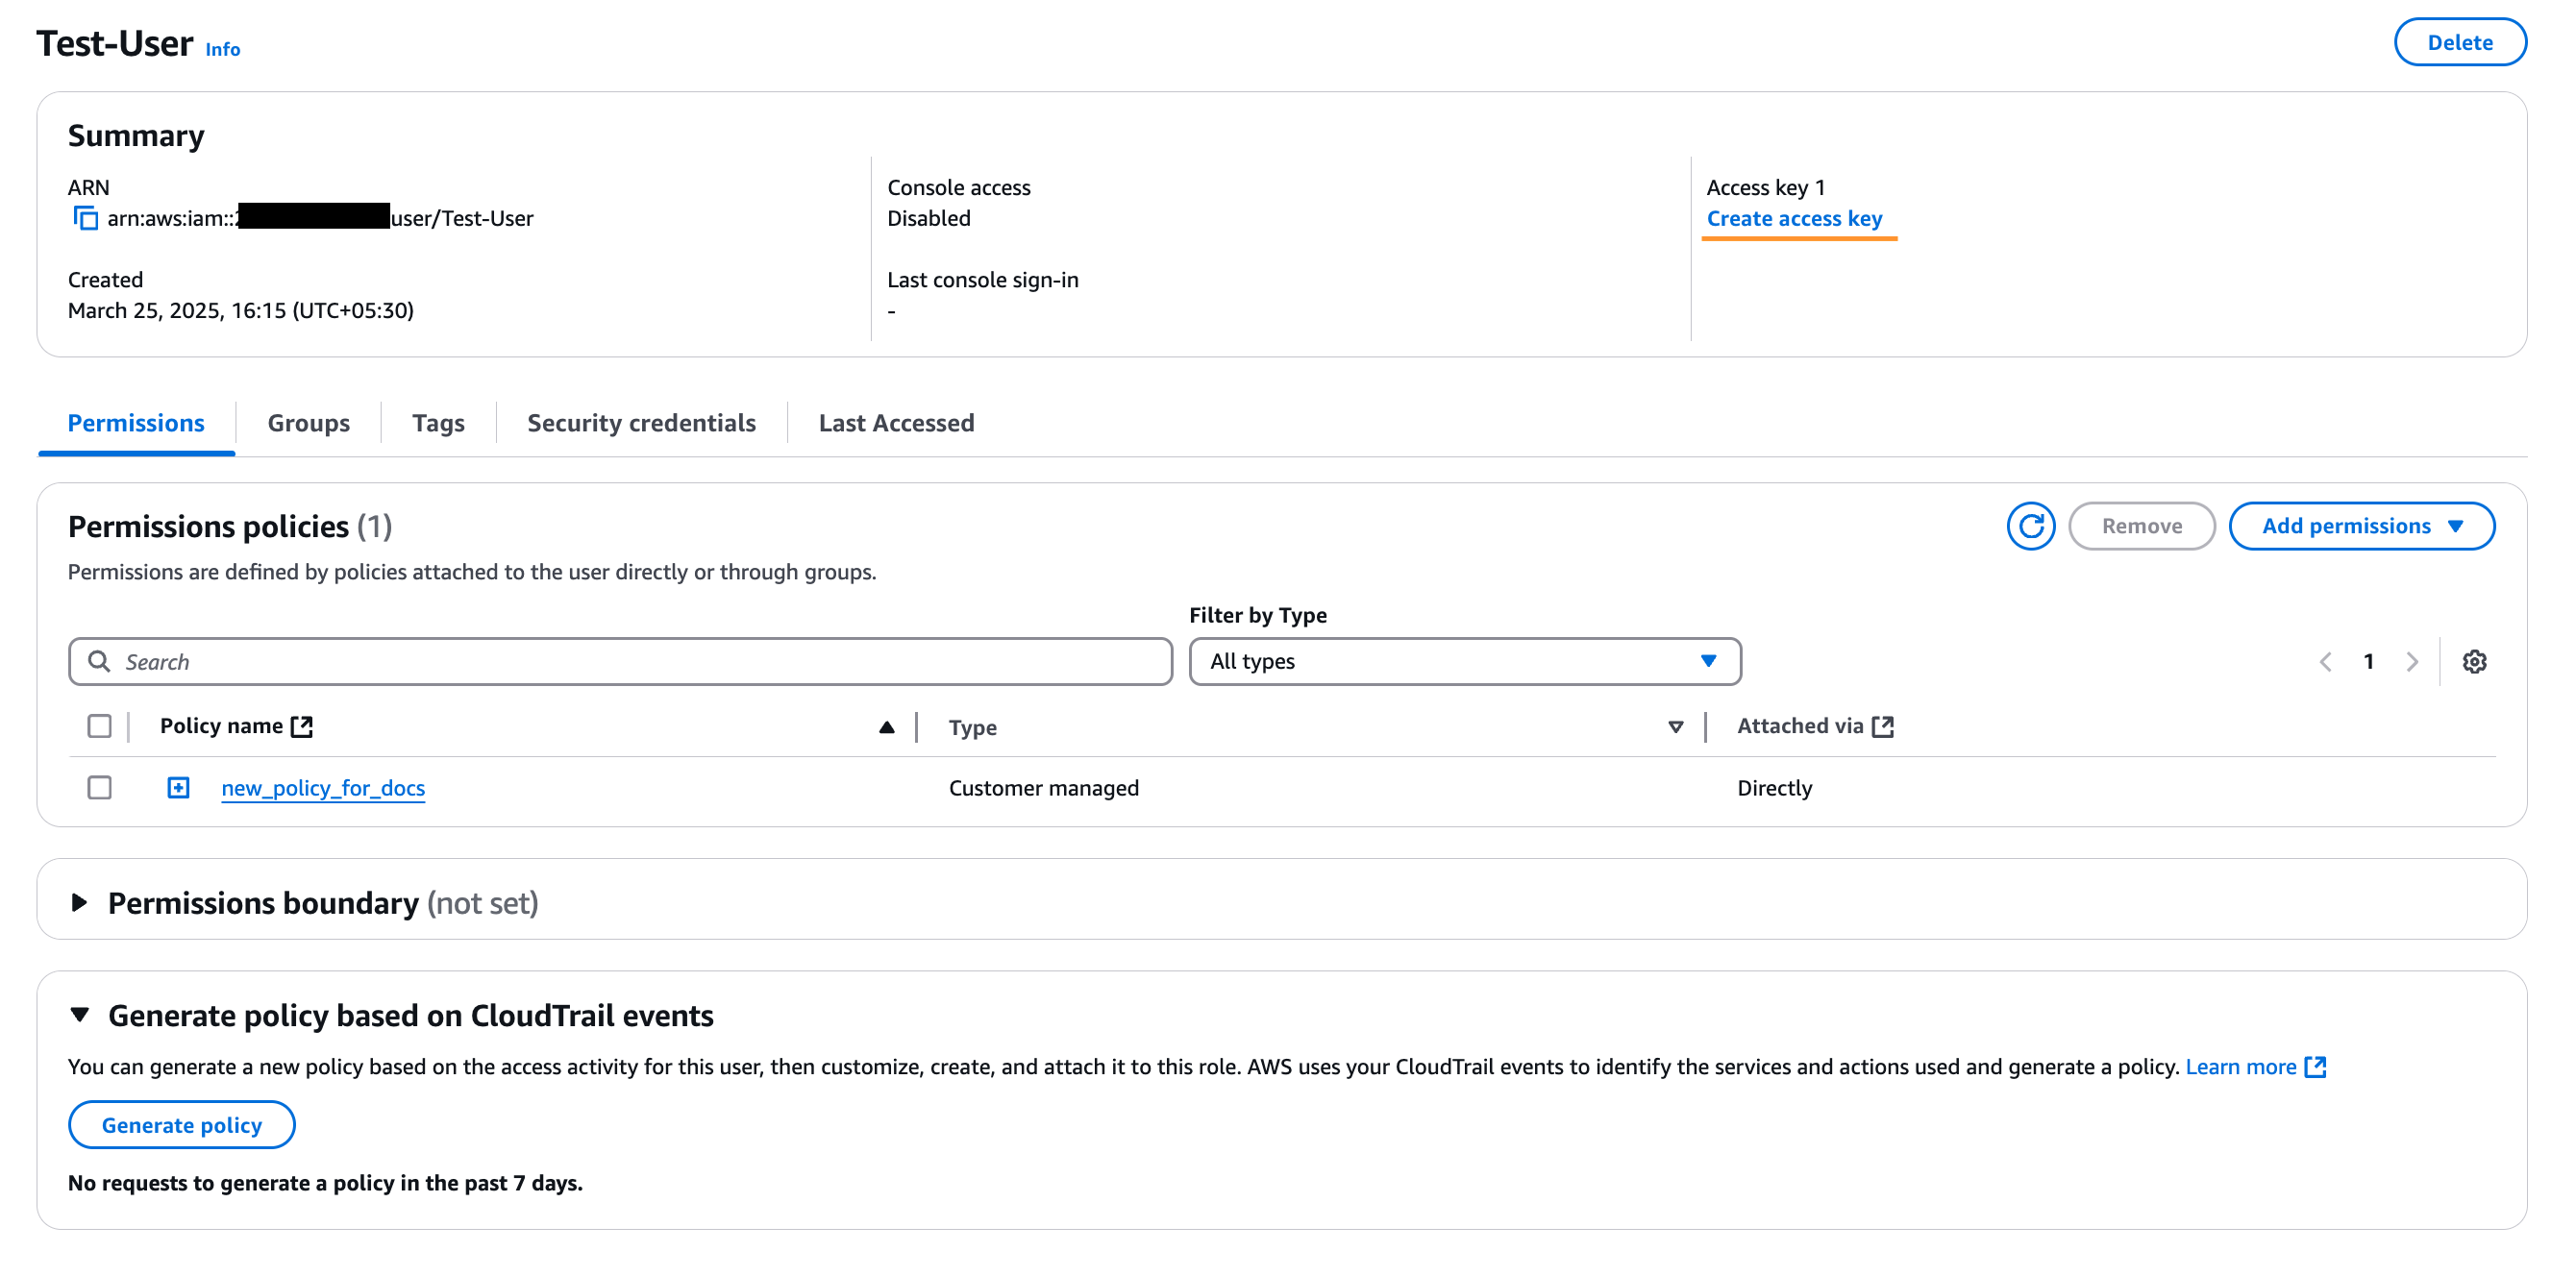
Create Access Key
-
Next, you need to create an access key for the user. Go to the new user and click Create access key
-
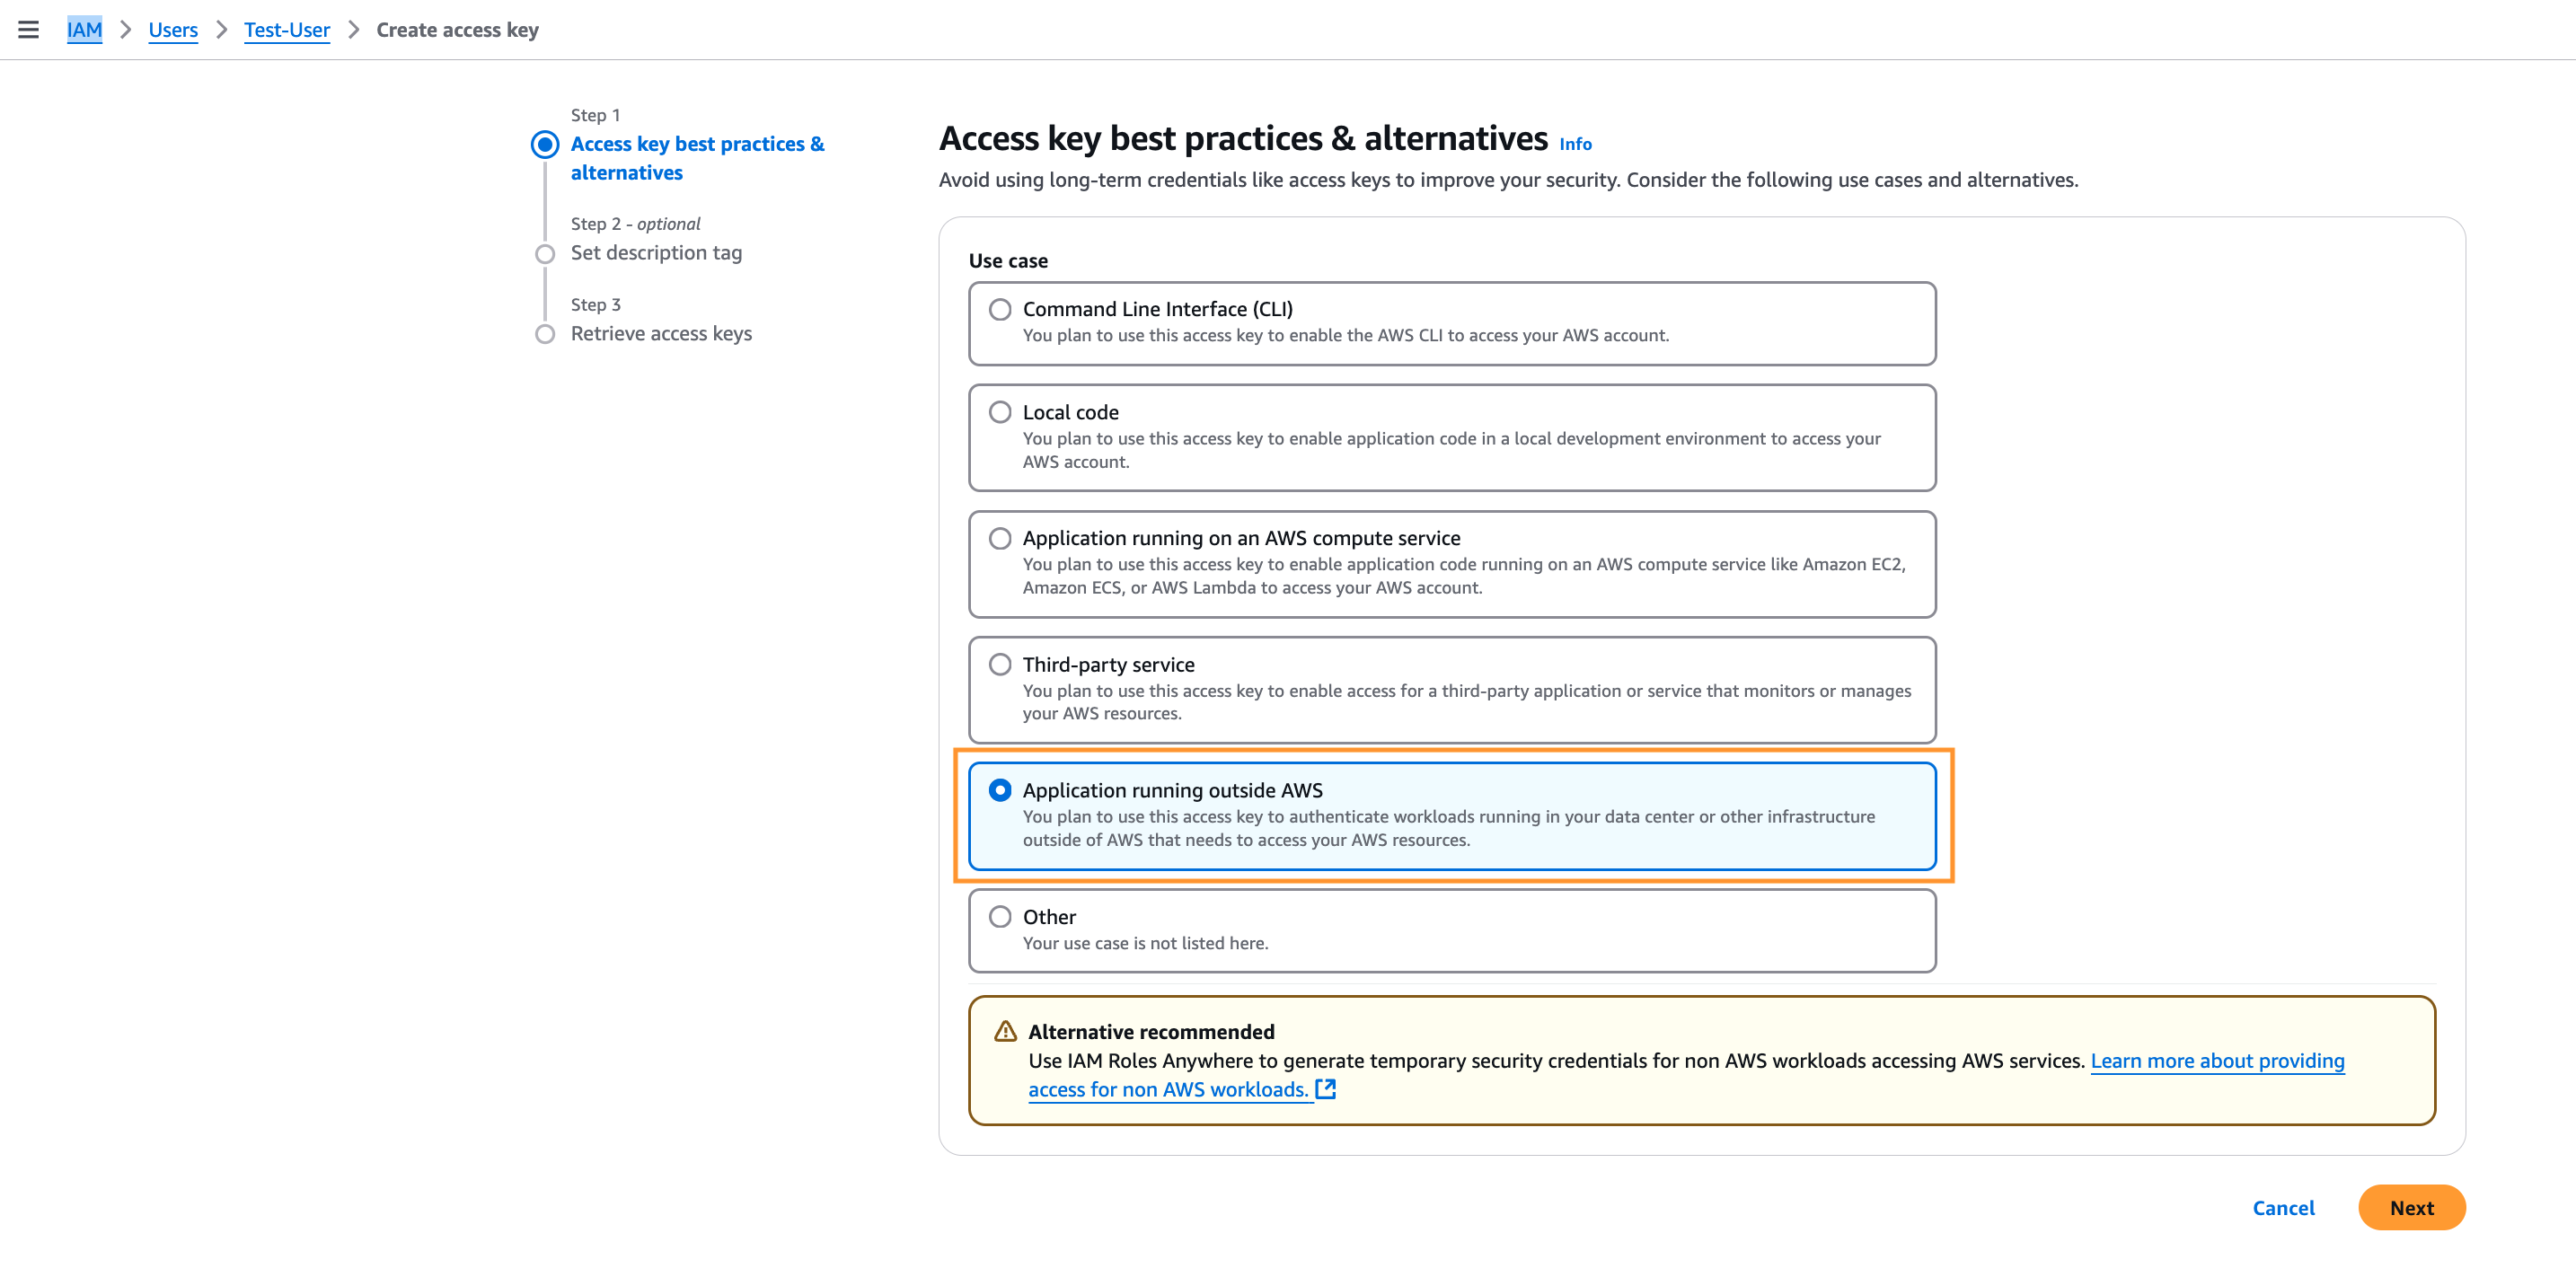
Next, select Application running outside AWS and click Next. In the next step you can add tags if you want.
Create access key
-
Finally you will get the Access key and the Secret access key. You will need these credentials to set up the
Acquisition Profile.Retrieve access key
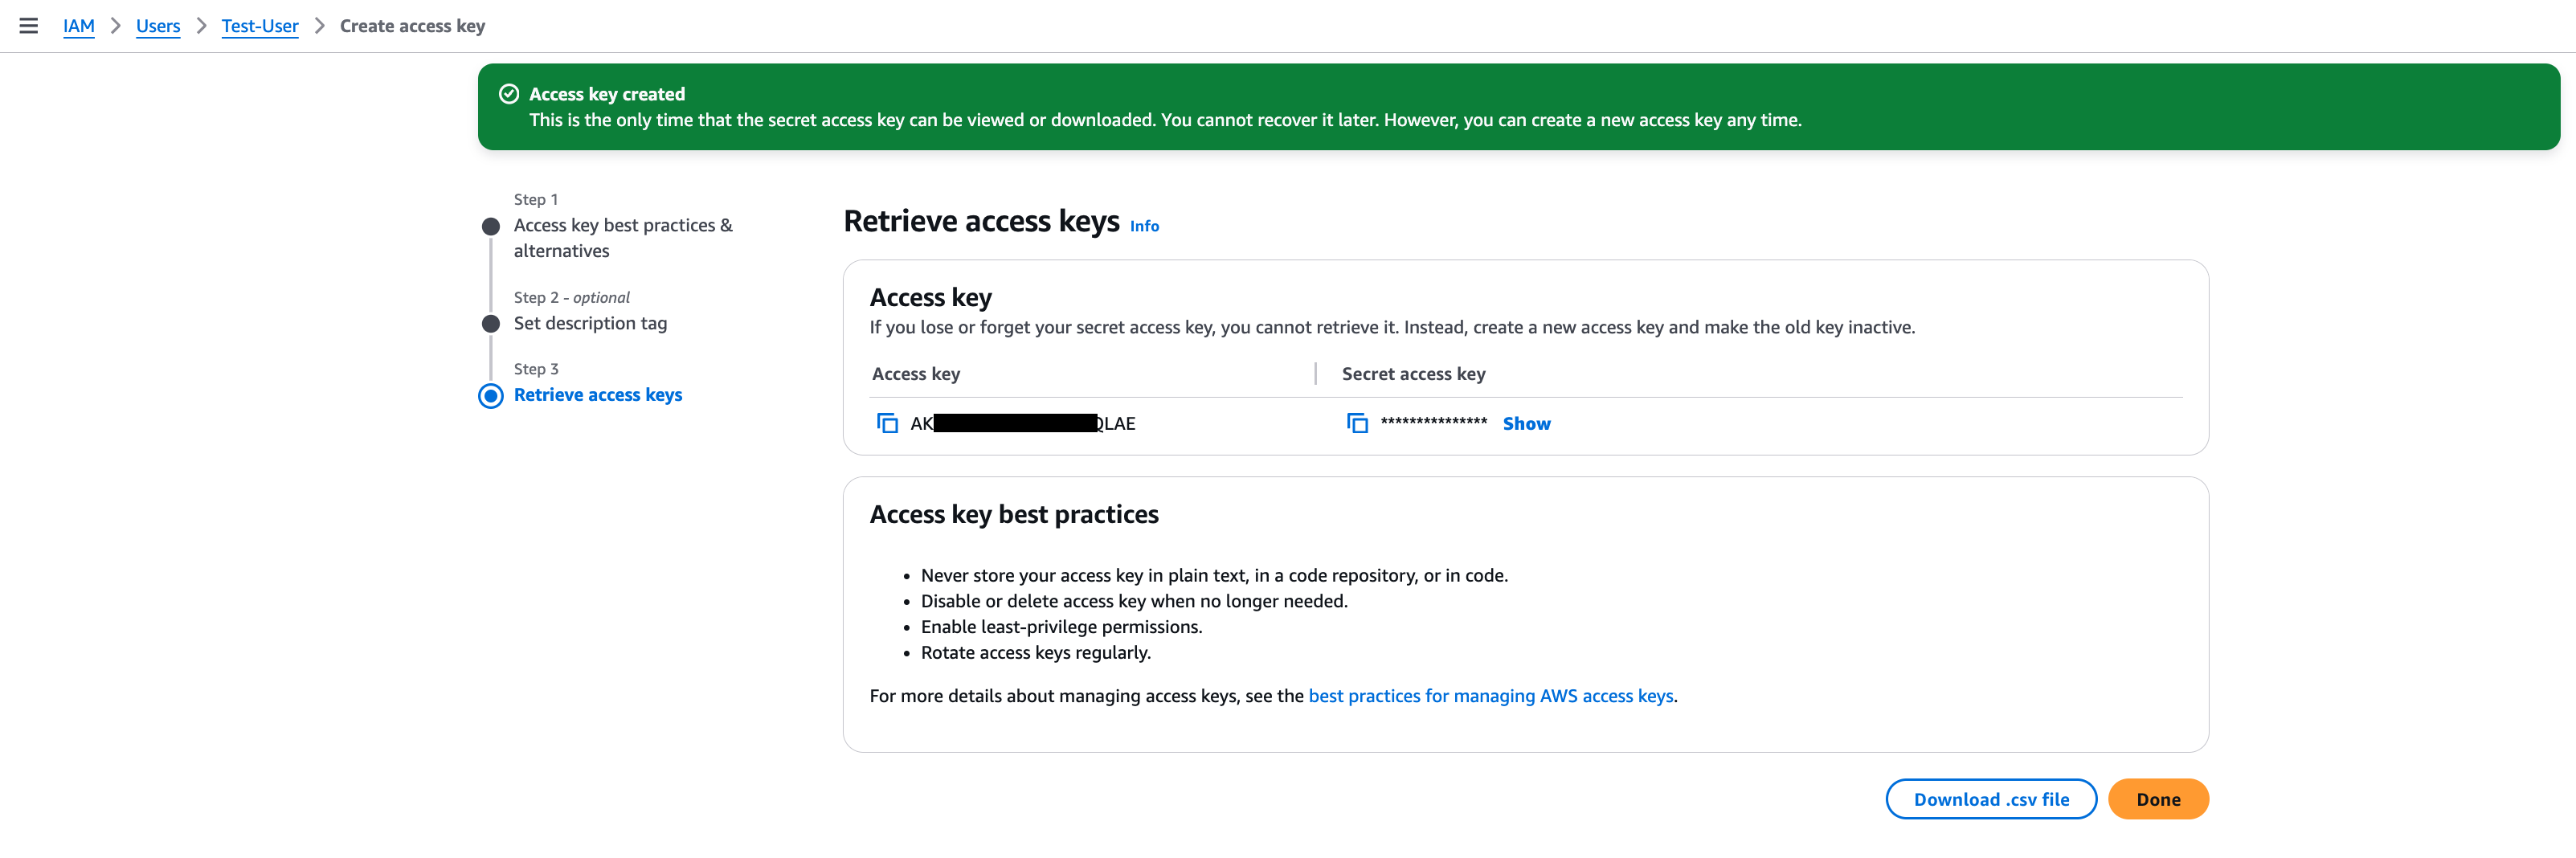
Secret Access Key is not be visible once the page will be closed. Store it securely for the further usage.