Migrate Users from an Existing User Store
Introduction
If you already run your own user store and want to move to the Mosaic User Service, you rarely want a flag-day cutover where every user is forced to reset their password or sign in again. The User Service supports a seamless migration built from two independent, complementary stages that you can run at the same time:
- Session transfer moves a user who is currently signed in on your legacy system into the User Service silently, without a password and without a new sign-in.
- Lazy credential migration moves every remaining user the first time they sign in with their email and password through your application.
Both stages converge on the same result: a User Service user identified by the user's email address,
and an ordinary User Service session (the AX_REFRESH_TOKEN cookie the application uses to obtain
access tokens). Because both are identified by email, a user migrated by one stage is recognized by the
other, so no duplicate accounts are created and users are migrated exactly once.
Migration builds on the AxAuth standalone user store. Set that up first, as described in Configure AxAuth IDP for End-User Applications.
Before you start
- AxAuth IDP configured for the application. The application must have an AxAuth IDP Connection, so it has a standalone user store to migrate into. See Configure AxAuth IDP for End-User Applications.
- An authentication proxy in place. Migration writes the same
AX_REFRESH_TOKENsession cookie a normal sign-in would, and the browser only sends that cookie to the token endpoint when the authentication endpoints share your application's top-level domain. See Set Up an Authentication Proxy. - A trusted backend you operate. Both stages call into a server-side component you build, referred to here as the migration proxy. It is trusted because it can mint User Service sessions and because it validates credentials against your legacy store, so it must never be reachable by untrusted callers. You can host the session-transfer endpoint and the credential-migration webhook in the same backend service.
- A service account with the
MIGRATE_END_USER_SESSIONSpermission for session transfer (used in the first stage below).
Stage 1 - Transfer a live session
This stage targets users who are still signed in on your legacy system. When the application
loads and finds no User Service session yet, it hands the migration proxy the user's live legacy
credential. The proxy validates it, asks the User Service to provision the user and open a session,
and returns that session to the browser as the AX_REFRESH_TOKEN cookie. The user is never prompted
and no password is involved.
What the migration proxy must do
- Expose an endpoint your application calls, authenticated by the user's live legacy session (for example, the legacy access token sent in a header or cookie).
- Validate that legacy credential yourself using your existing authentication system, and derive the user's email (required). Optionally read the display name, phone number, and the user's subject identifier on the legacy provider.
- Call the
migrateEndUserSessionmutation on the User Service Management API, presenting a service account token that holds theMIGRATE_END_USER_SESSIONSpermission. - Return the resulting
refreshTokento the browser as theAX_REFRESH_TOKENcookie. Set itHttpOnlyandSecure, and scope it to your application's registrable domain so the browser sends it to the token endpoint. See Set Up an Authentication Proxy for why the cookie domain matters.
The call is idempotent: if the user has already been migrated, migrateEndUserSession simply returns
a fresh session, so it is safe to call on every application start and safe to retry.
The migrateEndUserSession operation
This is a secured operation on the User Service Management API
(https://user.service.eu.axinom.net/graphql-management). It requires a valid service account token
with the MIGRATE_END_USER_SESSIONS permission. The tenant and environment the session is created
for are derived from that token.
Inputs
| Property | Type | Required | Description |
|---|---|---|---|
| applicationId | UUID | Yes | Application the migrated session is created against. |
| String | Yes | Email address of the migrated user. Used as the identity key in both the User Service and AxAuth. | |
| name* | String | No | Display name of the migrated user. |
| phone | String | No | Phone number of the migrated user. |
| legacySubjectId | String | No | The user's subject identifier on your legacy provider. Stored for audit purposes only. |
*Even though name is not a required field, it is recommended it is passed for a better user experience.
Response
| Property | Type | Required | Description |
|---|---|---|---|
| refreshToken | String | Yes | Opaque refresh token. Return it to the browser as the AX_REFRESH_TOKEN cookie and use it against the token endpoint. |
Inside your migration endpoint, after you have validated the legacy session:
const MIGRATE_END_USER_SESSION = /* GraphQL */ `
  mutation MigrateEndUserSession($input: MigrateEndUserSessionInput!) {
    migrateEndUserSession(input: $input) {
      refreshToken
    }
  }
`;

const response = await fetch(
  "https://user.service.eu.axinom.net/graphql-management",
  {
    method: "POST",
    headers: {
      "content-type": "application/json",
      // Service account token with the MIGRATE_END_USER_SESSIONS permission.
      authorization: `Bearer ${serviceAccountToken}`,
    },
    body: JSON.stringify({
      query: MIGRATE_END_USER_SESSION,
      variables: {
        input: {
          applicationId,
          email, // derived from the validated legacy credential
          name, // optional
          phone, // optional
          legacySubjectId, // optional, audit only
        },
      },
    }),
  },
);

const { data } = await response.json();
const refreshToken = data.migrateEndUserSession.refreshToken;

// Hand the session to the browser as the AX_REFRESH_TOKEN cookie.
setCookie("AX_REFRESH_TOKEN", refreshToken, {
  httpOnly: true,
  secure: true,
  sameSite: "strict",
  domain: ".example.com", // your application's registrable domain
});
On the application side, trigger the transfer only when there is no User Service session yet and the user still has a live legacy session:
// On application start, migrate a live legacy session exactly once.
if (!hasCookie("AX_REFRESH_TOKEN") && hasLiveLegacySession()) {
  await fetch("https://id.example.com/migrate-legacy-session", {
    method: "POST",
    credentials: "include", // send the legacy credential to your migration proxy
  });
}
Once the cookie is set, token retrieval and renewal are identical to any other User Service session:
call getToken from @axinom/mosaic-user-auth, or
request the token endpoint directly, exactly as described in
How Authentication Works. Nothing about migration changes
how the application uses the session afterwards.
Stage 2 - Lazy credential migration
Users who are not signed in on your legacy system (they signed out, cleared cookies, or are on a new device) are migrated the first time they sign in with their email and password through the application's normal AxAuth sign-in (see Sign in with AxAuth IDP). Until a user has been migrated, the AxAuth user store has no password on file for that email, so it calls your Migration Webhook to verify the submitted credentials against your legacy store. If the webhook confirms them, the user is migrated and signed in in the same step. Every later sign-in is a normal AxAuth sign-in with no webhook call.
The user's password never reaches Mosaic in a stored form: it is only forwarded to your own webhook, over a signed request, so that your legacy store can verify it. After a successful first sign-in, the password lives in the AxAuth user store and the webhook is no longer involved.
Configure the Migration Webhook
The Migration Webhook is configured on the AxAuth User Store, alongside the User Sign Up Webhook and Forgot Password Webhook. Open the User Store details station (Environment -> AxAuth
Service Configuration -> User Stores -> your end-user store) and set the URL under Migration Webhook.
User Store Details station
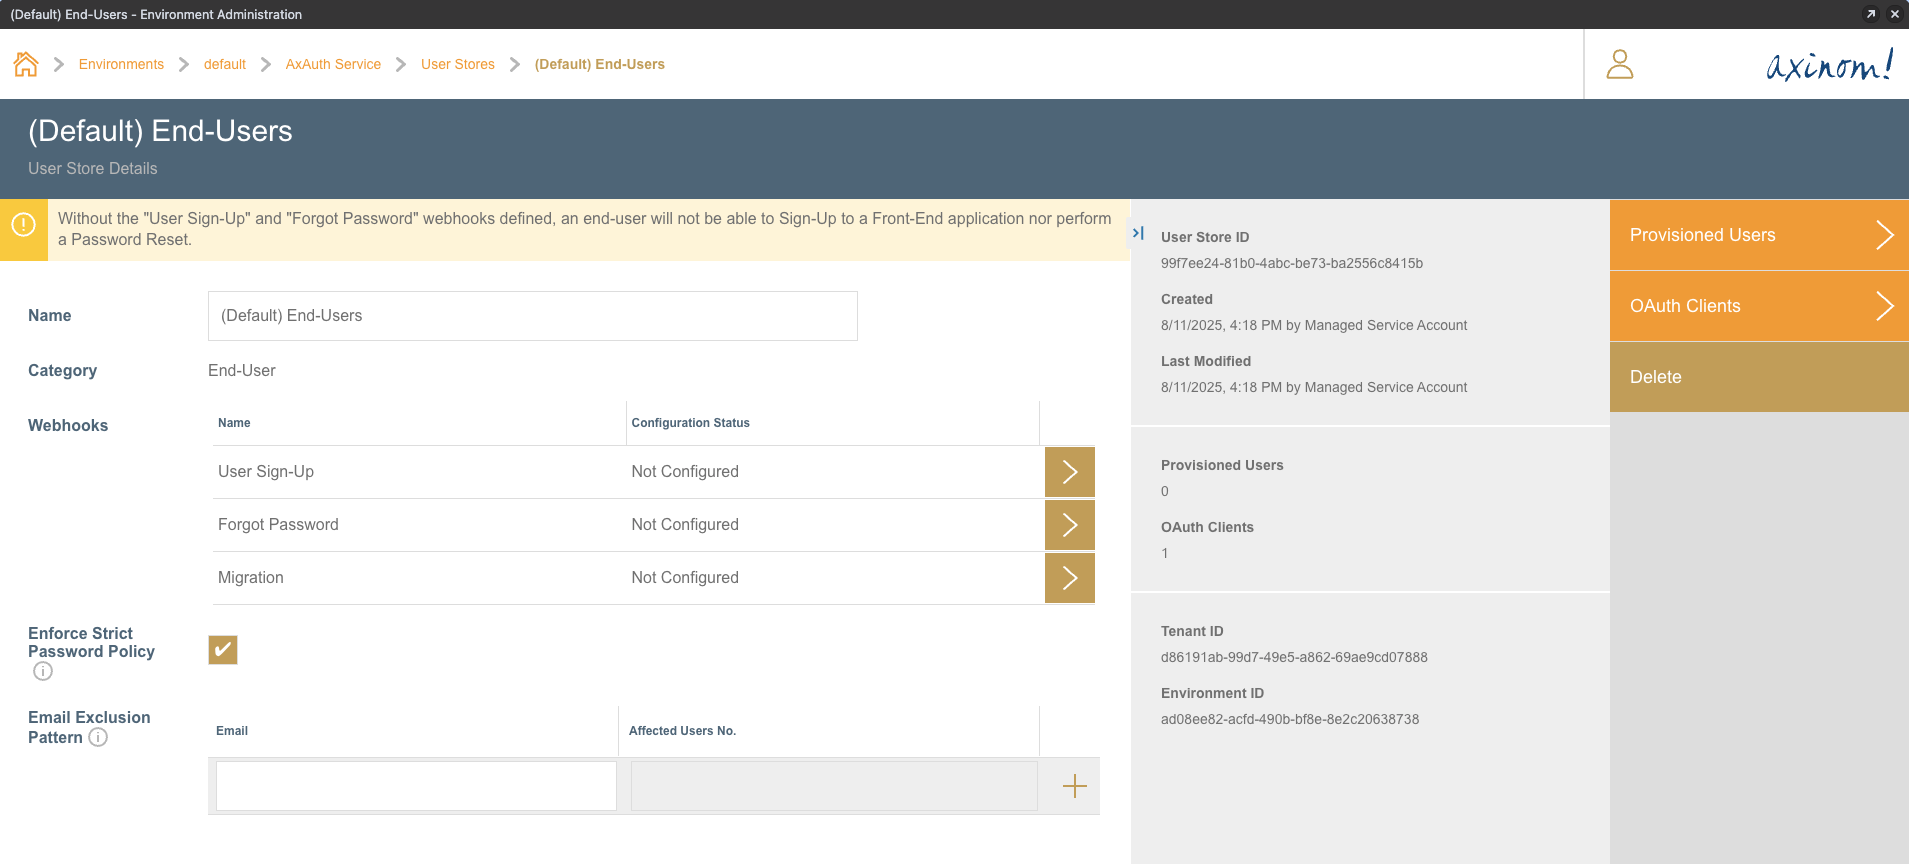
Configuring the webhook produces a webhook secret. Copy it and store it securely; it is used to validate that incoming requests genuinely originate from the AxAuth Service, as described in Webhooks.
What the Migration Webhook must do
- Verify the request signature using the webhook secret, and reject requests whose
timestampis older than 120 seconds. TheverifyWebhookRequestMiddlewarehelper in @axinom/mosaic-service-common does both. - Check the
emailandpasswordagainst your legacy user store. - Respond with HTTP 2xx within 30 seconds. Set
payload.validtotrueonly when the credentials are correct; the user is migrated and signed in only in that case. Optionally return aprofileto populate the new account. Returningvalid: false(or reportingerrors) leaves the user unmigrated and fails the sign-in.
Request - the AxAuth Service sends a signed POST with this body:
{
  "payload": {
    "email": "user@example.com", // string
    "password": "<plaintext>" // string
  },
  "message_type": "Migration Webhook",
  "message_id": "<uuid>", // unique per call
  "message_version": "1.0",
  "timestamp": "<UTC ISO-8601>" // reject if older than 120s (default)
}
Response - return a 2xx with a JSON body:
{
  "payload": {
    "valid": true, // boolean, REQUIRED; only `true` migrates the user
    "profile": {
      // optional; used to populate the new account
      "firstName": "Jane", // optional string
      "lastName": "Doe", // optional string
      "phoneNumber": "+1..." // optional string
    }
  },
  "errors": null, // optional
  "warnings": null, // optional
  "message_version": "1.0" // optional
}
A minimal implementation, following the standard Mosaic webhook pattern:
import {
  Dict,
  generateWebhookResponse,
  handleWebhookErrorMiddleware,
  verifyWebhookRequestMiddleware,
  WebhookRequestMessage,
} from "@axinom/mosaic-service-common";
import { Express, NextFunction, Request, Response } from "express";

export const setupMigrationWebhook = (app: Express, config: Config): void => {
  app.post(
    "/migration-webhook",

    // Validate the request signature and reject stale requests.
    verifyWebhookRequestMiddleware({
      webhookSecret: config.migrationWebhookSecret,
      payloadJsonSchema: MigrationWebhookRequestPayloadSchema,
    }),
    handleWebhookErrorMiddleware,

    async (
      req: Request<
        Dict<string>,
        Dict<string>,
        WebhookRequestMessage<{ email: string; password: string }>
      >,
      res: Response,
      next: NextFunction,
    ) => {
      try {
        const { email, password } = req.body.payload;

        // Verify the credentials against your existing user store.
        const legacyUser = await verifyLegacyCredentials(email, password);

        const response = generateWebhookResponse({
          payload: legacyUser
            ? {
                valid: true,
                profile: {
                  firstName: legacyUser.firstName,
                  lastName: legacyUser.lastName,
                  phoneNumber: legacyUser.phoneNumber,
                },
              }
            : { valid: false },
        });
        res.status(200).send(response);
      } catch (error) {
        handleWebhookErrorMiddleware(error, req, res, next);
      }
    },
  );
};
See Webhooks for the full request and response envelope, signature validation details, and how to expose your webhook during development.