Sign in to End-User Application with an External IDP
Introduction
@axinom/mosaic-user-auth is a React library provided to be used
by the frontend application to make end-user related authentication
and other end-user related operations easier.
This article describes the use case where the methods exposed by this library can be used to develop sign in functionality for external IDPs configured in the User Service.
Sign In
The user sign in functionality of an end-user can be easily developed
using the following @axinom/mosaic-user-auth library methods.
The first step would be to retrieve the available IDPs that are configured for the end-user application. This can be done via the getIdpConfiguration method.
Then we must render each of the configured IDPs with a link/button to sign
in, and for the onClick event, the authUrl returned by getIdpConfigurations()
for each IDP must be called.
Let’s think of a scenario where 3 IDPs are configured using the User Service. The IDP Provider IDs are as follows.
- AX_GOOGLE
- AX_APPLE
- AX_FACEBOOK
The component which renders the sign-in page could be written as follows.
import { IdpConfiguration, useUserService } from '@axinom/mosaic-user-auth';

export const Login: React.FC = () => {
    const { getIdpConfigurations } = useUserService();
    const [idpConfigurations, setIDPConfigurations] = useState<
        IdpConfiguration[]
    >([]);

    useEffect(() => {
        // Get the configured IDPs
        (async () => {
            const idpConfigs = await getIdpConfigurations(
            `${END_USER_APP_BASE_URL}/profiles`,
            );
            setIDPConfigurations(idpConfigs);
        })();
    }, [getIdpConfigurations]);

    return (
        <Grid textAlign="center" style={{ height: '100vh' }} verticalAlign="middle">
        <Grid.Column style={{ maxWidth: 450 }}>
            <Header as="h2" textAlign="center">
            Sign in to your account
            </Header>
            <Segment>
            <Header as="h5" textAlign="center">
                Social Connectors
            </Header>
            // Iterate through the IDP Configurations
            {idpConfigurations
                .sort(
                (a, b) =>
                    (a.sortOrder ?? Number.MAX_VALUE) -
                    (b.sortOrder ?? Number.MAX_VALUE),
                )
                .map((idpConfig) => {
                return (
                    <Button
                    key={idpConfig.idpConnectionId}
                    color={
                        idpConfig.providerId === 'AX_GOOGLE'
                        ? 'google plus'
                        : idpConfig.providerId === 'AX_APPLE'
                        ? 'grey'
                        : idpConfig.providerId === 'AX_FACEBOOK'
                        ? 'facebook'
                        : 'teal'
                    }
                    fluid
                    style={{ marginTop: '5px' }}
                    size="large"
                    // Call the IDP's authorization URL when clicked on the IDP
                    // Sign In button
                    onClick={() => {
                        if (idpConfig.authUrl !== undefined) {
                        window.location.replace(idpConfig.authUrl);
                        }
                    }}
                    >
                    Sign in with {idpConfig.title}
                    </Button>
                );
                })}
            </Segment>
        </Grid.Column>
        </Grid>
    );
}
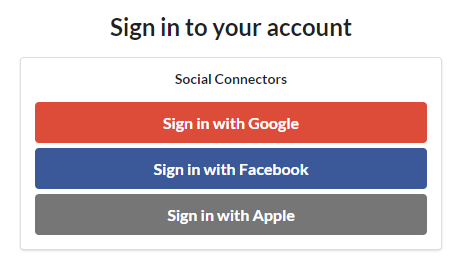
The above code will render a Sign In component as below, and when
a user clicks on either of the Social Connector buttons, the user
will be redirected to the IDP’s authentication flow. After signed
in, the user will be redirected to the path mentioned as the
origin_url.
Sign In Page
Handling the Access Token
After the sign in process is completed, the access token for the
user can be retrieved by calling the getToken method. This can
be done in the Root component as below.
export const App: React.FC = () => {
  const { getToken, addTokenChangedHandler, removeTokenChangedHandler } =
    useUserService();
  const [tokenResponse, setTokenResponse] = useState<TokenResponse | null>(
    null,
  );

  useEffect(() => {
    // Get the access token and store in tokenResponse.
    // If the token changes or removed, call getToken()
    // and refresh the token.
    (async () => {
      setTokenResponse(await getToken());
    })();
  }, [addTokenChangedHandler, getToken, removeTokenChangedHandler]);

  return (
    <BrowserRouter>
      <Switch>
        <Route path="/profiles">
          <ProfileSelector />
        </Route>

        <Route>
          {tokenResponse === null ? (
            <LoadingPlaceholder />
          ) : tokenResponse.userToken === undefined ? (
            <LandingPage />
          ) : (
            <ProfileSelector />
          )}
        </Route>
      </Switch>
    </BrowserRouter>
  );
}
In the above code, the router checks if there’s a valid access token
in the tokenResponse variable. If there is an access token, which
means the user has successfully signed in, it displays the
ProfileSelector component. Or else, it displays a generic
LandingPage component.